
Yes—you can ease sciatica by combining gentle nerve-gliding, targeted core/hip strengthening, flexible stretching, and low-impact aerobic movement.
This structured plan helps calm an irritated sciatic nerve, reduce flare-ups, and support long-term function. Below you’ll find clear steps, safety rules, and a simple routine you can start today—no equipment required.
What Is Sciatica?
Sciatica describes pain, tingling, or numbness that travels from your lower back into the buttock and down the leg. It often results from nerve irritation (e.g., disc herniation, spinal stenosis, or muscle tightness around the hip).
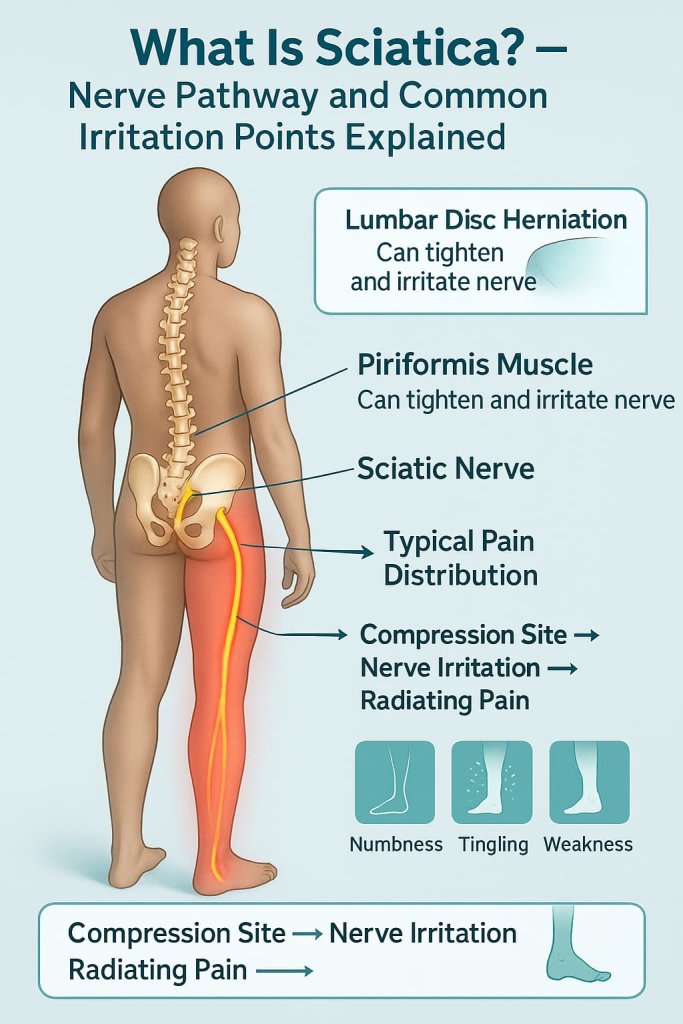
The right exercises help by improving nerve mobility, building trunk and hip support, and reducing tissue stiffness that can compress or irritate the nerve.
Why Sciatica Exercises Matter
Targeted exercise is one of the safest, most effective ways to manage sciatica — not by “stretching the nerve harder,” but by improving how the spine, hips, and surrounding tissues support and move around the sciatic nerve.
What the right exercises do
- Restore nerve mobility: Gentle nerve glides help the sciatic nerve slide through tissues without irritation.
- Reduce mechanical stress: Stronger glutes and core stabilize the pelvis and lumbar spine, easing pressure on nerve roots.
- Improve tissue flexibility: Stretching hamstrings, hip rotators, and hip flexors reduces the tug on the lower back and nerve pathway.

- Boost circulation & recovery: Low-impact aerobic work (e.g., walking) delivers oxygen and nutrients that support healing.
- Enhance posture & movement patterns: Better alignment and control lower the chance of future flare-ups.
- Support daily function: Less pain means easier standing, walking, lifting, and sitting.
What to expect
- Relief is gradual and comes from consistency (3–4 sessions/week).
- Symptoms that centralize (move from the leg toward the back) usually indicate improvement.
- On flare-up days, keep range small, slow the tempo, and prioritize calm breathing.
Quick Warm-Up (5–7 Minutes)

- Brisk walk in place or on a flat surface – 2 minutes
- Pelvic tilts (supine) – 12 slow reps
- Cat–Cow – 10 gentle cycles
- Hip circles (standing, hands on hips) – 10 each way
The 10 Best Sciatica Exercises
These ten exercises combine gentle stretching, core activation, and controlled mobility to relieve pressure on the sciatic nerve and improve daily comfort.
Practice them consistently, move within a pain-free range, and focus on smooth, steady breathing for lasting relief.
1) Supine Sciatic Nerve Glide (Nerve “Floss”)
Why it works:
This movement gently mobilizes the sciatic nerve, helping it glide through the surrounding muscles and fascia instead of being compressed or irritated.
Muscles worked:
- Hamstrings (as secondary movers)
- Hip flexors (stabilizing)
- Deep spinal stabilizers
- Peripheral nerve and connective tissue mobility
How to do it:
- Lie flat on your back with one knee bent and the other leg extended.
- Bring the extended thigh toward you until you feel light tension.
- Slowly straighten the knee while flexing the ankle (toes toward your face).
- Then bend the knee and point the foot to return to the start.
- Perform 8–10 smooth reps on each side.
Trainer Tip:
Move slowly and stay below the pain threshold — this is a nerve glide, not a stretch. Stop well before any sharpness, tingling, or zinging sensation.
2) Prone Press-Up (Extension Bias)
Why it works:
This movement encourages spinal extension, which can reduce pressure on nerve roots in some disc-related cases. It promotes centralization — shifting pain away from the leg and back toward the spine, a positive sign in mechanical sciatica management.
Muscles worked:
- Erector spinae (spinal extensors)
- Gluteus maximus (hip extension stabilizer)
- Core stabilizers (rectus abdominis eccentrically controlling return)
How to do it:
- Lie face down with forearms under shoulders.
- Gently press your upper body upward while keeping hips on the ground.
- Hold 1–2 seconds, then lower with control.
- Perform 8–10 repetitions.
Trainer Tip:
If your pain moves out of your leg and into your low back, that’s improvement. If leg pain increases, skip this exercise until symptoms calm.
3) Pelvic Tilts
Why it works:
Pelvic tilts teach the core and glutes to coordinate, stabilizing your lumbar spine. By restoring proper pelvic motion, they help decompress lumbar discs and reduce the pull on irritated nerve roots.
Muscles worked:
- Transverse abdominis
- Rectus abdominis
- Gluteus maximus
- Hip flexors (eccentric control)
How to do it:
- Lie on your back, knees bent, feet flat on the floor.
- Tighten your core and gently press your lower back into the floor, tilting the pelvis upward.
- Hold 2–3 seconds, then relax to neutral.
- Perform 12–15 controlled reps.
Trainer Tip:
Keep the movement small and precise — think “flatten the back,” not “crush the spine.” Avoid holding your breath.
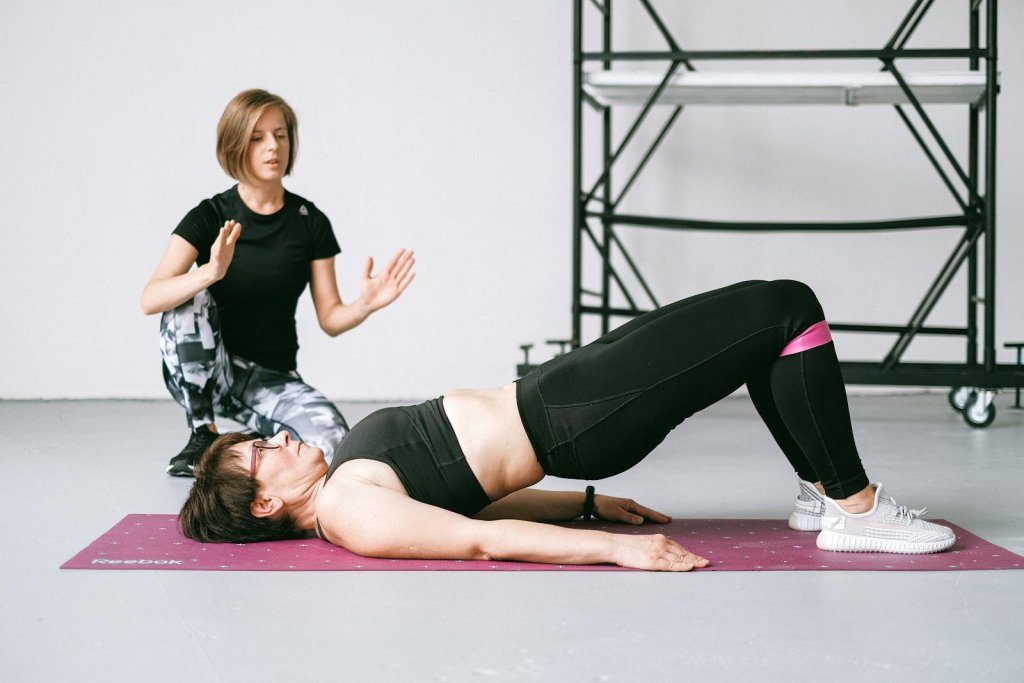
4) Bridge
Why it works:
The bridge strengthens your glutes and posterior chain, relieving excessive load on your lumbar spine. Strong glutes stabilize the pelvis and reduce nerve compression caused by poor hip control.
Muscles worked:
- Gluteus maximus (primary mover)
- Hamstrings
- Erector spinae
- Core stabilizers
How to do it:
- Lie on your back, feet hip-width apart, heels close to the glutes.
- Press through your heels to lift your hips until your body forms a straight line from shoulders to knees.
- Hold 1–2 seconds at the top, then lower slowly.
- Perform 10–12 reps.
Trainer Tip:
Keep ribs down and avoid pushing through your lower back. Focus on squeezing your glutes, not arching your spine.
5) Bird-Dog
Why it works:
This exercise enhances core stability and teaches your trunk to resist unwanted rotation — essential for protecting the lower back and preventing future sciatica flare-ups.
Muscles worked:
- Gluteus maximus and medius
- Erector spinae
- Rectus abdominis and obliques
- Shoulder stabilizers (deltoids, serratus anterior)
How to do it:
- Start on all fours (hands under shoulders, knees under hips).
- Extend one arm forward and the opposite leg backward until both are parallel to the floor.
- Hold 2–3 seconds, return, and switch sides.
- Perform 8–10 reps each side.
Trainer Tip:
Keep hips square and spine neutral — imagine balancing a glass of water on your low back. Move slowly for better control.
6) Figure-4 Piriformis Stretch
Why it works:
Tightness in the piriformis muscle can compress the sciatic nerve as it passes beneath or through it. This stretch releases that tension, improving hip mobility and easing nerve irritation.
Muscles worked:
- Piriformis (primary)
- Gluteus maximus and medius
- Deep hip rotators
How to do it:
- Lie on your back, knees bent.
- Cross one ankle over the opposite thigh (like the number 4).
- Grasp the bottom thigh and gently pull it toward your chest until you feel a stretch in your buttock.
- Hold 20–30 seconds, repeat 2–3 times per side.
Trainer Tip:
Keep your tailbone heavy and low back relaxed. Never force the stretch — tension should feel mild and controlled.
7) Hamstring Stretch (Supine Strap or Towel)
Why it works:
Tight hamstrings can pull the pelvis into posterior tilt, stressing the lumbar spine and aggravating sciatic pain. This stretch restores flexibility through the posterior chain, reducing neural tension.
Muscles worked:
- Hamstrings (biceps femoris, semitendinosus, semimembranosus)
- Gastrocnemius (secondary stretch)
- Gluteus maximus (stabilizing)
How to do it:
- Lie on your back, loop a towel or strap around one mid-foot.
- With knee slightly bent, lift the leg until you feel a gentle stretch along the back of the thigh.
- Hold 20–30 seconds, repeat 2–3 times per side.
Trainer Tip:
Keep the opposite leg bent to reduce lumbar tension. Focus on smooth breathing and avoid bouncing.
8) Cat–Cow
Why it works:
Dynamic spinal flexion and extension improve lumbar mobility, reduce stiffness, and promote gentle fluid exchange around the nerve roots — helpful for nerve nutrition and pain relief.
Muscles worked:
- Erector spinae
- Multifidus
- Abdominals
- Shoulder and hip stabilizers
How to do it:
- On hands and knees, inhale as you arch your back (Cow pose).
- Exhale as you round your spine upward (Cat pose).
- Perform 10–12 slow, breathing-coordinated cycles.
Trainer Tip:
Stay within a comfortable range and move fluidly with your breath. Avoid collapsing shoulders or locking elbows.
9) Child’s Pose (Modified as Needed)
Why it works:
This gentle yoga posture decompresses the lumbar spine and stretches hips, back, and shoulders. It promotes relaxation and reduces tension that can exacerbate nerve irritation.
Muscles worked:
- Erector spinae
- Latissimus dorsi
- Gluteus maximus
- Hip flexors (lengthened)
How to do it:
- Kneel on the floor with knees slightly apart.
- Sit back toward your heels and reach arms forward, resting your forehead on the mat (or pillow).
- Hold 20–30 seconds, repeat 2–3 rounds.
Trainer Tip:
If knee or hip discomfort occurs, place a cushion under your hips or rest your hands on a chair for support. Focus on slow, deep breathing into your back.
10) Low-Impact Walking
Why it works:
Walking maintains joint mobility, increases circulation, and keeps spinal structures moving naturally — all essential for healing and preventing recurrence. Low-impact aerobic activity also stimulates endorphins that reduce pain perception.
Muscles worked:
- Gluteus maximus and medius
- Quadriceps and hamstrings
- Calves
- Core and spinal stabilizers
How to do it:
- Start with 10–15 minutes on flat terrain at a relaxed pace.
- Gradually increase duration to 25–30 minutes most days of the week.
Trainer Tip:
Wear supportive shoes and walk on even ground. Maintain a gentle upright posture and avoid long strides if pain radiates down the leg.
Sample 2-Week Starter Plan
| Day | Session (20–25 min) |
|---|---|
| Mon | Warm-Up → Nerve Glide → Pelvic Tilts → Bridge → Figure-4 |
| Tue | 15–20 min Walk + Cat–Cow (easy) |
| Wed | Warm-Up → Prone Press-Ups → Bird-Dog → Hamstring Stretch |
| Thu | 15–25 min Walk (easy-moderate) |
| Fri | Warm-Up → Nerve Glide → Bridge → Child’s Pose |
| Sat | Optional: Gentle Walk or Mobility (Cat–Cow, Figure-4) |
| Sun | Rest or Easy Walk |
Progression: When moves are pain-free for 2–3 sessions, add 2–3 reps, extend holds by 5–10 seconds, or slow the tempo.
Modifications & Tips (Beginners, Seniors, Flare-Ups)
- Use a chair, wall, or cushions for support.
- Prefer short, frequent sessions (10–12 minutes) over long, fatiguing ones.
- On bad days, keep only nerve glides, pelvic tilts, and walking.
- Pair every session with calm, nasal breathing—never hold your breath.
Common Mistakes to Avoid
1. Pushing Through Pain
Stop if pain shoots down your leg — that’s nerve irritation, not progress. Move only within a comfortable range.
2. Skipping the Warm-Up
Cold muscles tighten quickly. Always spend 5 minutes on light walking or mobility first.
3. Moving Too Fast
Jerky motions strain the sciatic nerve. Slow, steady reps are safer and more effective.
4. Holding Your Breath
Breath-holding raises spinal pressure. Exhale during effort, inhale as you return.
5. Poor Posture
Slouching or arching the back can worsen pain. Keep your spine neutral and core gently engaged.
6. Doing Too Much Too Soon
Overtraining inflames tissues. Start small, increase gradually, and rest between sessions.
7. Sitting Too Long
Long sitting compresses the spine. Stand, walk, or stretch every 30–45 minutes.
Trainer Tip:
Move mindfully — progress comes from control and consistency, not intensity.
Safety first (YMYL)
- Stop any move that increases leg pain, numbness, or weakness.
- Seek urgent care for red flags: bowel/bladder changes, saddle numbness, or rapidly worsening weakness.
- If you have complex medical history (e.g., osteoporosis, recent surgery), consult a qualified clinician before starting.
FAQs
1) Can sciatica improve with exercise alone?
Often, yes—especially with consistent, symptom-guided work. Some causes may need medical care; monitor your response.
2) How quickly will I feel relief?
Some notice changes in 2–4 weeks. Consistency and not provoking symptoms matter most.
3) What should I avoid at first?
High-impact activities, heavy lifting, deep twisting, and aggressive toe-touching/forward bends.
4) Should I stretch or strengthen more?
Both. Use glides/mobility to calm symptoms, then strengthen glutes/core to keep them away.
5) How do I know if an exercise is right for me?
Pain should centralize (move out of the leg) or reduce over time. If leg pain increases, stop that move and choose a gentler option.
6) Do I need special equipment?
No. A yoga mat and a towel/strap are enough.
7) When should I see a clinician?
Immediately for red flags; otherwise if symptoms persist or worsen despite 2–4 weeks of careful exercise.
Conclusion
Relief comes from the combination: gentle nerve gliding, core/hip strength, flexibility, and daily low-impact walking. Start with 3–4 moves that feel best, do them today for 10 minutes, and repeat 3×/week. Track pain and function weekly and progress gradually.
This content is for informational purposes only and not medical advice.