
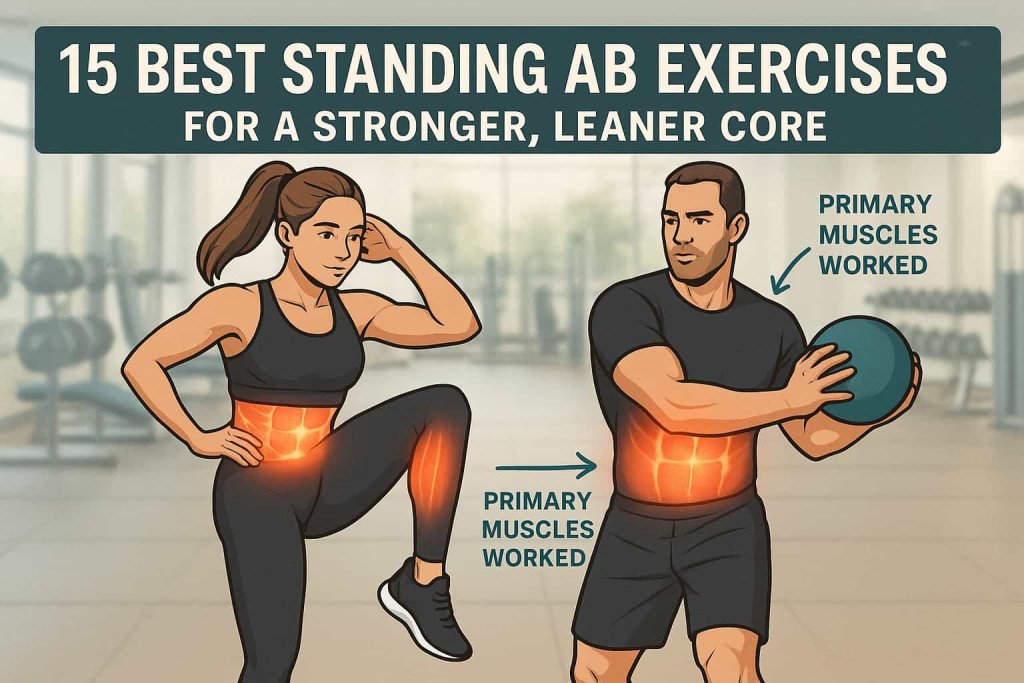
Yes, you can sculpt your abs without ever lying down—standing ab exercises are one of the most effective ways to build a stronger, leaner core.
Unlike floor crunches, standing ab moves train your abs in a functional, upright position. They engage stabilizing muscles, improve posture, and reduce strain on your neck and back. Whether you’re a beginner, recovering from injury, or simply tired of crunches, these exercises provide a safe and powerful alternative.
In this guide, we’ll cover 15 of the best standing ab exercises, their benefits, step-by-step instructions, and tips to maximize your results.
Benefits of Standing Ab Exercises
Standing core workouts go beyond six-pack aesthetics. Here’s why they matter:
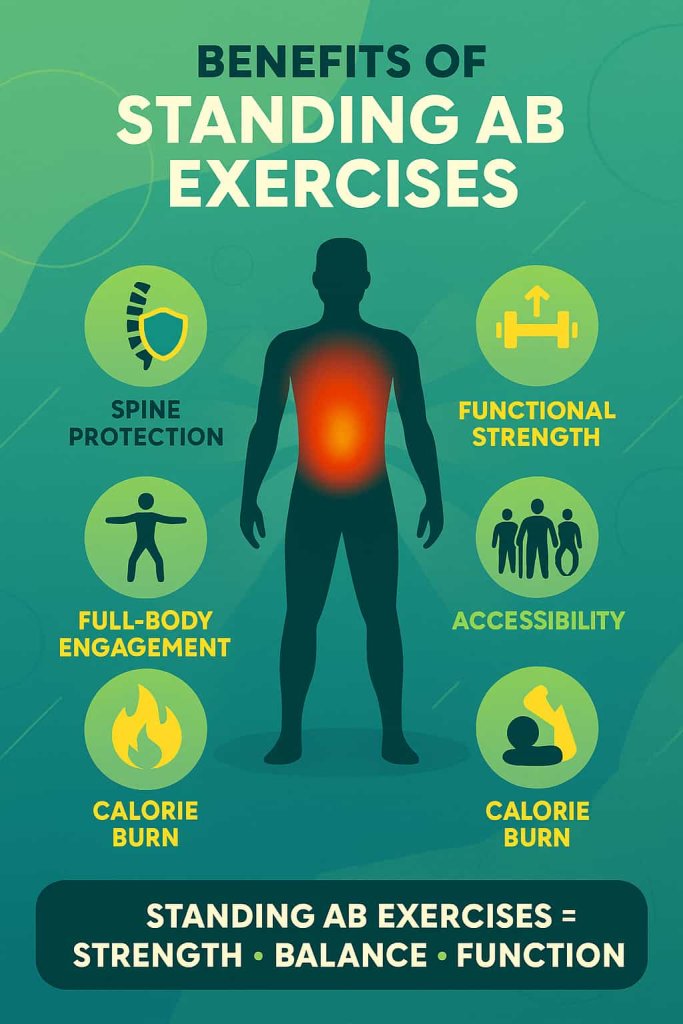
- Protect Your Spine: Reduce neck and lower back strain compared to floor exercises.
- Full-Body Engagement: Improve balance, coordination, and stability by working deep core muscles.
- Functional Strength: Carry over to sports, daily movements, and lifting.
- Accessibility: Suitable for seniors, postpartum individuals, and anyone who dislikes lying on the floor.
- Calorie Burn: Standing ab movements often involve large muscle groups, increasing energy expenditure.
👉 According to Peloton (2025), standing abs increase core activation because your body must resist gravity and momentum while staying upright.
15 Best Standing Ab Exercises
Most people think ab training means crunches and sit-ups on the floor—but standing ab exercises are just as effective for building core strength, improving posture, and burning calories. They also mimic real-life movements, making your core strong and functional for sports and daily activities.
Below is a complete guide to the 15 best standing ab exercises with step-by-step instructions and pro tips.
1. Standing Cat–Cow
How to do it:
- Stand with feet hip-width apart, hands on thighs.
- Round your spine forward (cat), tucking chin to chest.
- Arch your back while lifting chest and looking slightly upward (cow).
Muscles worked: Abs, erector spinae, obliques.
Benefits: Warms up the spine and core while improving flexibility and posture.
Trainer Tip: Exhale as you round forward, inhale as you open up. Use this as a dynamic warm-up before tougher core work.
2. Standing Pelvic Tilts
How to do it:
- Stand tall, hands on hips.
- Gently tilt pelvis forward and backward while keeping legs straight.
Muscles worked: Lower abs, hip flexors.
Benefits: Builds awareness of pelvic positioning—essential for spinal alignment and core stability.
Trainer Tip: Keep movements small and controlled. Think of “tucking the tailbone” rather than swaying the hips.
3. Standing Oblique Crunch
How to do it:
- Lift right knee while bringing right elbow down to meet it.
- Return and switch sides.
Muscles worked: Obliques, rectus abdominis.
Benefits: Strengthens side abs while improving coordination and balance.
Pro Tip: Keep chest lifted; don’t hunch forward. Imagine lifting up and over rather than collapsing.
4. Cross-Body Knee to Elbow
How to do it:
- Drive right knee across body toward left elbow.
- Alternate sides.
Muscles worked: Obliques, transverse abdominis.
Benefits: Adds rotational strength while improving hip mobility.
Trainer Tip: Rotate from the torso, not just the shoulders.
5. Standing Bicycle Crunch
How to do it:
- Mimic a bicycle crunch in standing position.
- Lift knee and twist opposite elbow across the body.
Muscles worked: Abs, obliques, hip flexors.
Benefits: Great alternative to floor bicycles; improves balance and coordination.
Variation: Hold light dumbbells for added resistance.
6. Standing Side Crunch with Leg Lift
How to do it:
- Stand tall, lift one leg out to the side.
- Simultaneously crunch torso toward the raised leg.
Muscles worked: Obliques, hip abductors.
Benefits: Combines core and lower-body strengthening in one move.
Trainer Tip: Control the lift; avoid swinging the leg.
7. High Knee Pull-Down
How to do it:
- Extend arms overhead.
- Pull them down sharply while driving one knee up toward the chest.
- Alternate sides.
Muscles worked: Core, shoulders, hip flexors.
Benefits: Excellent calorie-burner that engages both upper and lower body.
Why it works: Mimics an athletic “power move,” improving coordination and endurance.
8. Standing Wood Chop
How to do it:
- Hold a dumbbell or medicine ball overhead to one side.
- Rotate and bring the weight diagonally down toward the opposite hip.
- Return and repeat.
Muscles worked: Obliques, transverse abdominis, shoulders.
Benefits: Builds rotational strength crucial for sports like tennis, baseball, and golf.
Trainer Tip: Move with control—avoid jerking or rushing.
9. Diagonal Chop with Band
How to do it:
- Anchor a resistance band low to the ground.
- Pull it upward across your body diagonally, finishing high.
Muscles worked: Core, shoulders, lats.
Benefits: Adds resistance to rotation, strengthening stabilizers and improving athletic performance.
Why it works: Builds anti-rotation strength, protecting the spine during twisting sports.
10. Standing Torso Twist
How to do it:
- Hold arms at chest height.
- Twist torso side to side in a controlled motion.
Muscles worked: Obliques, spinal stabilizers.
Benefits: Improves spinal mobility and coordination.
Variation: Hold a medicine ball or dumbbell for added resistance.
11. Offset Overhead March
How to do it:
- Hold a dumbbell or kettlebell overhead in one hand.
- Slowly march, lifting knees toward chest.
Muscles worked: Abs, obliques, shoulders.
Benefits: Strengthens anti-lateral flexion—a key stabilizer for posture.
Trainer Tip: Resist leaning to the weighted side. Keep core tight.
12. Standing Triple Crunch
How to do it:
- Lift one knee up, crunch forward.
- Then add a side crunch to each side.
- Reset and repeat.
Muscles worked: Rectus abdominis, obliques, hip flexors.
Benefits: Engages core in three directions—flexion, rotation, and lateral flexion.
Why it works: Maximizes ab activation in a single move.
13. Standing Side Bends (Weighted)
How to do it:
- Hold a dumbbell in one hand, other hand on hip.
- Bend sideways toward the weight, then return upright.
Muscles worked: Obliques.
Benefits: Isolates the obliques for targeted strengthening.
Pro Tip: Keep torso straight; avoid leaning forward or backward.
14. Suitcase Carry
How to do it:
- Hold a heavy dumbbell or kettlebell in one hand.
- Walk slowly and upright, resisting the pull to the side.
Muscles worked: Core stabilizers, obliques, grip strength.
Benefits: Builds functional strength, grip endurance, and posture.
Trainer Tip: Move slowly, core braced. Imagine balancing a glass of water on your head.
15. Standing Knee Tuck with Twist
How to do it:
- Raise one knee while twisting torso toward it.
- Alternate sides with control.
Muscles worked: Lower abs, obliques.
Benefits: Great finisher—combines flexion + rotation for maximum ab engagement.
Why it works: Activates multiple ab layers simultaneously.
Common Mistakes to Avoid in Standing Ab Exercises
- Using momentum instead of slow, controlled movements.
- Leaning forward or backward instead of staying upright.
- Forgetting to engage the core throughout the movement.
- Skipping full range of motion.
- Choosing weights that are too heavy too soon.
👉 Fixing these mistakes ensures better results and reduces injury risk.
Who Should Do Standing Ab Exercises?
- Beginners: Easier to learn than floor crunches, no equipment required.
- Seniors: Gentle on joints and safer for the spine.
- Postpartum women: A safe core option (with medical clearance).
- Athletes: Boosts rotational strength for golf, tennis, swimming, and baseball.
- Office workers: Improves posture and relieves tension after sitting.
👉 These exercises are truly for everyone, regardless of fitness level.
How to Add Standing Ab Exercises to Your Routine
- Warm-Up First: Start with cat–cow and pelvic tilts.
- Pick 4–6 Moves: Do 12–15 reps each, 2–3 rounds.
- Progression: Add light dumbbells, resistance bands, or medicine balls.
- Frequency: 2–3 times per week, alternating with other core workouts.
👉 Example Quick Routine:
- Standing Oblique Crunch – 15 reps/side
- Wood Chop – 12 reps/side
- Suitcase Carry – 20 steps/side
- High Knee Pull-Down – 15 reps/side
Repeat 2–3 rounds.
FAQs About Standing Ab Workouts
1. Are standing ab exercises as effective as crunches?
Yes. Research shows they can activate deeper stabilizers and are more functional for posture and movement.
2. Can standing ab moves burn belly fat?
They strengthen your core but fat loss depends on overall calorie balance and cardio.
3. Do I need equipment for these exercises?
No. Bodyweight is enough, but resistance bands and dumbbells add challenge.
4. How long before I see results?
With consistency 3x per week, most people notice stronger, tighter abs in 4–6 weeks.
5. Are these safe for seniors?
Yes. Standing core moves are joint-friendly and often safer than floor crunches.
6. Can I do them every day?
Yes, but 2–3 focused sessions per week are enough for strength. Daily light versions (like torso twists) are fine.
Conclusion
Standing ab exercises are a powerful, spine-friendly way to strengthen your core, improve posture, and burn calories—without lying down.
Start with 3–4 moves, progress to resistance, and stay consistent. Over time, you’ll build a leaner, stronger core that supports every movement in your life.
👉 Ready to take action? Add these standing ab exercises to your next workout and feel the difference.