
Floor exercises are one of the most effective ways to build strength, tone muscles, and improve flexibility—without any equipment.
You can do them anywhere, anytime, and still get a full-body workout that engages your core, glutes, legs, and upper body.
Understanding the right floor exercises helps you stay consistent, burn calories, and develop functional strength safely. In this guide, we’ll cover the top 20 moves, their benefits, and trainer-backed tips to maximize your results.
Benefits of Floor Exercises
- No equipment needed: Ideal for home workouts or travel.
- Low-impact: Gentle on joints while still improving strength and endurance.
- Core engagement: Most moves recruit your abs, lower back, and stabilizers.
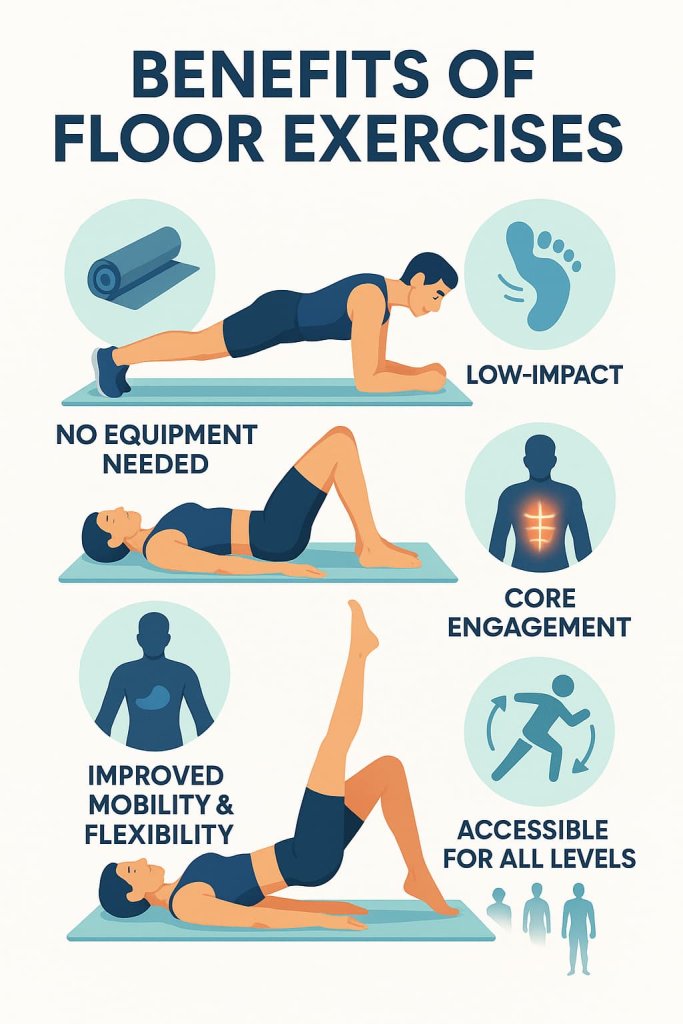
- Improved mobility and flexibility: Many floor movements enhance range of motion.
- Accessible for all levels: Suitable for beginners to advanced exercisers.
👉 According to Harvard Health (2024), consistent bodyweight and floor training can boost metabolism, preserve lean muscle, and improve bone density—especially as you age.
20 Best Floor Exercises for a Stronger, Toned Body
Each exercise below includes why it works, muscles worked, how to do it, and a trainer tip.
1. Glute Bridge
Why it works: The glute bridge strengthens your posterior chain — glutes, hamstrings, and lower back — while improving hip mobility and core activation. It’s especially effective for correcting weak glutes from prolonged sitting and relieving lower-back tightness.
Muscles worked: Gluteus maximus, hamstrings, erector spinae, and transverse abdominis.
How to do it:
- Lie flat on your back with knees bent and feet shoulder-width apart.
- Engage your core and press through your heels to lift your hips upward.
- Squeeze your glutes at the top until your body forms a straight line from shoulders to knees.
- Hold for 2–3 seconds, then lower slowly.
Trainer Tip: Keep your ribs tucked and core braced. Avoid pushing from your toes — drive from your heels for maximum glute activation.
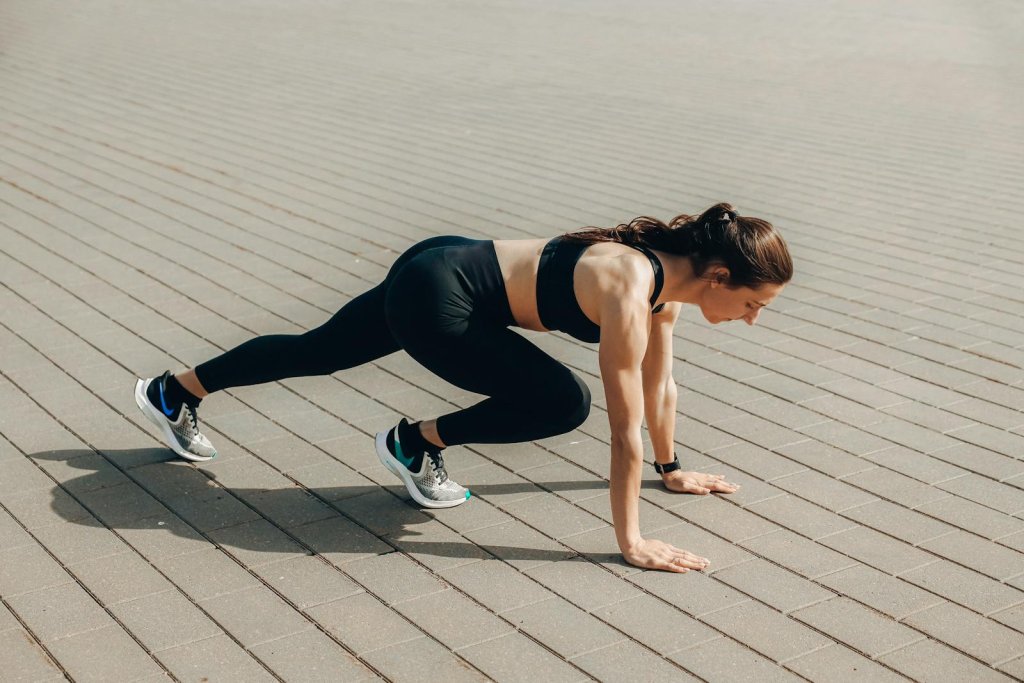
2. Forearm Plank
Why it works: One of the best full-body stabilizers, the plank enhances core endurance, spinal alignment, and posture. It engages deep stabilizing muscles that protect your lower back and improve everyday strength.
Muscles worked: Rectus abdominis, obliques, transverse abdominis, shoulders, glutes.
How to do it:
- Get onto your forearms with elbows directly under your shoulders.
- Extend your legs behind you and balance on your toes.
- Keep your body straight — avoid arching or sagging.
- Hold for 30–60 seconds, breathing steadily.
Trainer Tip: Squeeze your glutes and quads to create total-body tension. Keep your gaze down to maintain neck alignment.
3. Bird-Dog
Why it works: Improves balance, coordination, and spinal stability. This low-impact move strengthens the lower back and teaches your core to stabilize while limbs move — ideal for anyone dealing with posture issues.
Muscles worked: Core, glutes, spinal erectors, deltoids.
How to do it:
- Start on all fours, hands under shoulders, knees under hips.
- Extend your right arm forward and left leg backward.
- Pause for 2 seconds while keeping hips level.
- Return and repeat on the other side.
Trainer Tip: Move slowly and avoid twisting. Imagine balancing a glass of water on your back to maintain perfect alignment.
4. Bicycle Crunch
Why it works: A dynamic move that targets both upper and lower abs while enhancing rotational control and calorie burn. It’s more effective for obliques than standard crunches.
Muscles worked: Obliques, rectus abdominis, hip flexors.
How to do it:
- Lie on your back with hands behind your head and knees lifted.
- Bring your right elbow toward your left knee as you straighten your right leg.
- Alternate sides in a slow, pedaling motion.
Trainer Tip: Keep your shoulder blades lifted and twist from your torso — not your neck.
5. Superman Hold
Why it works: Strengthens your posterior chain, improving spinal stability and counteracting slouching. It’s great for posture and back health.
Muscles worked: Lower back, glutes, hamstrings, shoulders.
How to do it:
- Lie face down with arms extended overhead.
- Lift arms, chest, and legs simultaneously off the floor.
- Hold for 3–5 seconds, then return slowly.
Trainer Tip: Exhale as you lift. Keep your chin tucked to avoid neck strain.
6. Side Plank
Why it works: Builds oblique and hip strength while improving balance and stability. Studies show it reduces spinal loading compared to standard planks.
Muscles worked: Obliques, glute medius, shoulder stabilizers.
How to do it:
- Lie on your side, elbow under shoulder, feet stacked.
- Lift hips until your body forms a straight line.
- Hold for 30–60 seconds, then switch sides.
Trainer Tip: Engage your abs to prevent your hips from dipping. For an extra challenge, raise your top leg.
7. Clamshells
Why it works: Activates glute medius and improves hip stability — vital for runners and anyone with knee pain.
Muscles worked: Glute medius, hip rotators, outer thighs.
How to do it:
- Lie on your side with knees bent and feet together.
- Keep feet touching as you lift the top knee open.
- Pause, then lower slowly.
Trainer Tip: Use a mini resistance band above your knees for more burn.
8. Reverse Crunch
Why it works: Focuses on lower abdominals while minimizing strain on your neck or spine.
Muscles worked: Lower abs, hip flexors, transverse abdominis.
How to do it:
- Lie flat with hands beside you.
- Pull knees toward your chest, lifting hips off the floor.
- Slowly lower back down without touching the floor.
Trainer Tip: Move in control — avoid using momentum.
9. Flutter Kicks
Why it works: Builds core endurance and sculpts lower abs while boosting cardiovascular engagement.
Muscles worked: Lower abs, hip flexors, quads.
How to do it:
- Lie on your back with legs extended and hands under hips.
- Lift both legs off the floor.
- Alternate small, quick kicks up and down.
Trainer Tip: Keep your lower back pressed into the floor. Slow down if your abs fatigue early.
10. Floor Push-Up
Why it works: Classic compound move that strengthens your chest, shoulders, triceps, and core. Great for upper-body definition and pushing power.
Muscles worked: Pectorals, triceps, deltoids, core.
How to do it:
- Begin in a plank position.
- Lower your body until your chest nearly touches the floor.
- Press back up without locking elbows.
Trainer Tip: Engage your core and keep your neck neutral. Drop to knees if needed for proper form.
11. Hip Circles
Why it works: Improves hip joint range of motion, reducing stiffness and increasing athletic mobility.
Muscles worked: Glutes, hip flexors, core stabilizers.
How to do it:
- On all fours, lift one knee to the side.
- Make slow circular motions forward and backward.
Trainer Tip: Don’t rush — perform controlled, large circles to mobilize your hips effectively.
12. Leg Raises
Why it works: Strengthens lower abs, hips, and core stability.
Muscles worked: Lower abs, hip flexors.
How to do it:
- Lie flat with legs straight.
- Lift both legs to a 90° angle.
- Slowly lower them back down without touching the ground.
Trainer Tip: Place hands under hips for lower-back support.
13. Dead Bug
Why it works: One of the safest ways to train your core for stability and back protection.
Muscles worked: Core stabilizers, obliques, hip flexors.
How to do it:
- Lie on your back with arms and knees raised.
- Extend one arm and the opposite leg.
- Return to start, then switch.
Trainer Tip: Keep your lower back flat to the floor throughout.
14. Floor Y-T-I Raises
Why it works: Corrects rounded shoulders by strengthening postural muscles.
Muscles worked: Rear delts, traps, rhomboids.
How to do it:
- Lie face down with arms extended.
- Lift arms into “Y,” then “T,” then “I” shapes, pausing briefly each time.
Trainer Tip: Focus on squeezing shoulder blades — not swinging arms.
15. Glute Kickbacks
Why it works: Builds glute strength and definition, improving hip extension and athletic performance.
Muscles worked: Glutes, hamstrings, core.
How to do it:
- Start on hands and knees.
- Extend one leg straight back and up.
- Squeeze your glutes at the top.
Trainer Tip: Keep hips level and core engaged.
16. Lying Side Leg Lifts
Why it works: Tones thighs, enhances hip control, and supports knee alignment.
Muscles worked: Outer thighs, glute medius, hip abductors.
How to do it:
- Lie on one side with bottom leg bent.
- Lift top leg upward slowly, pause, then lower.
Trainer Tip: Slightly point your toes down to emphasize outer hip engagement.
17. Plank Shoulder Taps
Why it works: Boosts shoulder stability and challenges your core to resist rotation.
Muscles worked: Core, deltoids, triceps, obliques.
How to do it:
- Begin in a high plank position.
- Lift one hand to tap the opposite shoulder.
- Alternate while keeping hips steady.
Trainer Tip: Widen your stance for better stability and minimize hip sway.
18. Floor Chest Fly
Why it works: Stretches and strengthens the chest while improving shoulder mobility.
Muscles worked: Pectorals, anterior delts, biceps.
How to do it:
- Lie flat, holding light dumbbells (optional).
- With slight elbow bend, open arms out to the sides.
- Bring them together above your chest, then lower slowly.
Trainer Tip: Don’t let weights touch the ground — maintain constant tension.
19. Seated Russian Twist
Why it works: Strengthens obliques and improves rotational power — essential for athletes and core tone.
Muscles worked: Obliques, rectus abdominis, hip flexors.
How to do it:
- Sit with knees bent, lean back slightly.
- Twist your torso to each side, touching the floor beside you.
Trainer Tip: Keep chest up and twist from the waist, not just the arms.
20. Pelvic Floor (Kegel) Exercise
Why it works: Builds deep-core and pelvic control, improving stability and bladder health. Regular practice supports posture and lower-back safety.
Muscles worked: Pelvic floor, transverse abdominis, deep core stabilizers.
How to do it:
- Contract your pelvic muscles (like stopping urination).
- Hold for 3–5 seconds, then relax.
- Repeat 10–15 times.
Trainer Tip: Perform 2–3 sets daily. Breathe normally and avoid tightening abs or glutes.
(Source: MedlinePlus, 2024)
Sample Floor Workout Plan
| Level | Focus | Example Routine | Frequency |
|---|---|---|---|
| Beginner | Form & control | Glute bridge, plank, bird-dog, clamshells | 3× per week |
| Intermediate | Strength & endurance | Plank, side plank, leg raises, floor push-ups | 4× per week |
| Advanced | Total-body tone | Superman hold, Russian twists, Y-T-I raises, hip circles | 4–5× per week |
✅ Trainer Tip: Pair floor exercises with light cardio (like brisk walking or jump rope) for faster results.
Common Mistakes to Avoid
- Rushing through reps—focus on control.
- Arching your lower back during core moves.
- Skipping warm-ups or cool-down stretches.
- Not breathing properly (exhale during exertion).
Safety Tips and Modifications
Stay safe and get the best results by following these quick tips:
- Warm up for 5–10 minutes before starting to prevent injuries.
- Use a yoga mat for joint support and comfort.
- Focus on form over speed — slow, controlled reps build real strength.
- Try modifications like knee planks or smaller leg lifts if needed.
- Breathe properly: exhale on effort, inhale on return.
- Listen to your body — stop if you feel sharp pain.
- Cool down with light stretching after each workout.
✅ Trainer Tip: Progress gradually and focus on technique — not intensity.
FAQ
1. Can I get fit with floor exercises only?
Yes! When done consistently, floor workouts can tone muscles, build strength, and improve flexibility.
2. How often should I do floor workouts?
Aim for 3–5 times per week, alternating muscle groups.
3. Are floor exercises good for beginners?
Absolutely. They’re gentle, joint-friendly, and easy to progress over time.
4. Do I need a yoga mat?
A mat adds comfort and grip but isn’t mandatory.
5. What’s the best time to do them?
Morning or after light warm-up—any time you can move safely and consistently.
6. Can I lose weight with floor workouts?
Yes, when paired with a calorie-controlled diet and consistent effort.
7. Are they safe for people with back pain?
Most are, but always consult a physiotherapist for tailored modifications.
Conclusion
Floor exercises are simple, versatile, and incredibly effective for building strength and mobility at home. Whether you’re a beginner or advanced, these moves target every major muscle group—no gym required.
Start with 15–20 minutes a day and progress gradually.
Your strength, posture, and confidence will thank you!
References
- CDC — Physical Activity Guidelines (Adults) (Dec 20, 2023): Weekly activity targets and muscle-strengthening ≥2 days/week; supports frequency/progression and pairing floor work with strength. CDC
- Harvard Health — Injury prevention guidelines (Mar 27, 2024): Recommends 5–10 minute warm-ups to increase oxygen delivery, lubricate joints, and expand ROM; backs the “warm up first” safety tip. Harvard Health
- U.S. HHS — Physical Activity Guidelines for Americans, 2nd ed. (PDF): Notes warm-up and cool-down as valid parts of an activity plan; supports adding cool-down stretches after floor sessions. health.gov
- NHS — Physical activity guidelines (Adults 19–64) (Reviewed May 22, 2024): Official UK guidance on strength, balance, flexibility and links to “how to warm up” and “how to stretch after exercise.” nhs.uk
- Harvard Health — Exercise & fitness overview (Sep 27, 2024): Evidence-based benefits of regular exercise (mood, sleep, chronic-disease risk), supporting the “why” behind consistent floor training. Harvard Health
- CDC — Overcoming barriers to physical activity (Feb 5, 2025): Advises to warm up/cool down and increase gradually, directly reinforcing the safety and modification guidance. CDC
- ACE Fitness — Plank effectiveness/variations: Explains why planks train core isometrically and how to scale them—backs “form over speed” and beginner modifications. ACE Fitness