
Foam roller exercises for seniors can help you feel less tight and move more comfortably by improving short-term flexibility and easing “tight-feeling” muscles. Many people use foam rolling as a gentle warm-up or cooldown because it may help reduce soreness and improve range of motion when done with safe pressure and positioning.
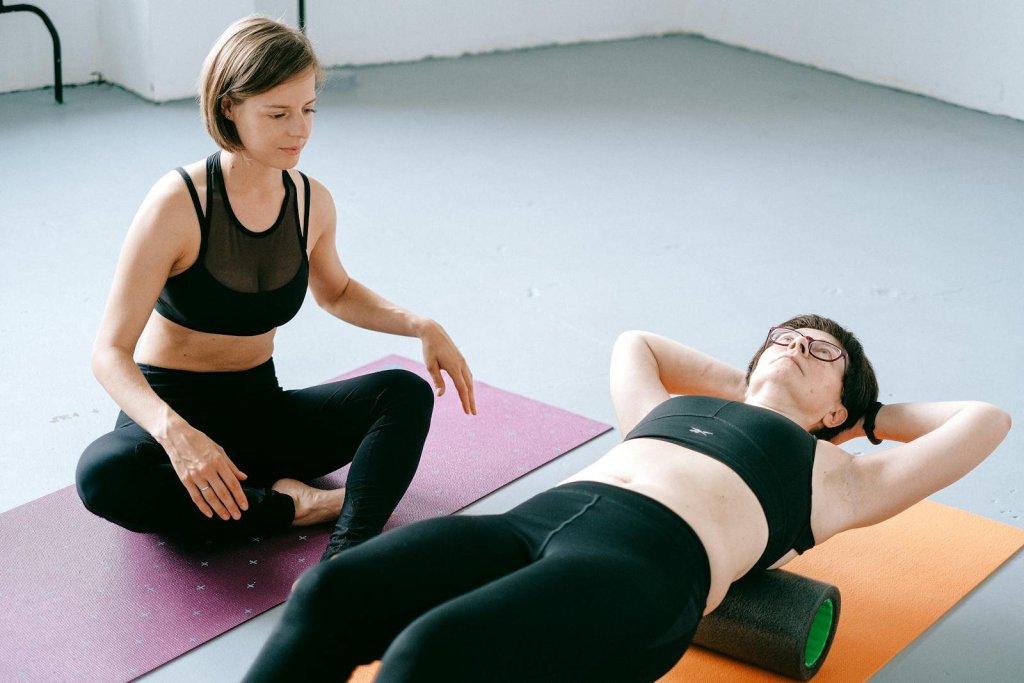
This guide covers the safest, most senior-friendly foam roller targets (legs, glutes, upper back) and a simple routine you can repeat at home.
Quick safety rules for seniors
Use these rules every time you foam roll (especially if you’re new):
- Keep discomfort mild to moderate. Stop if you feel sharp pain, numbness, tingling, dizziness, or symptoms that spread.
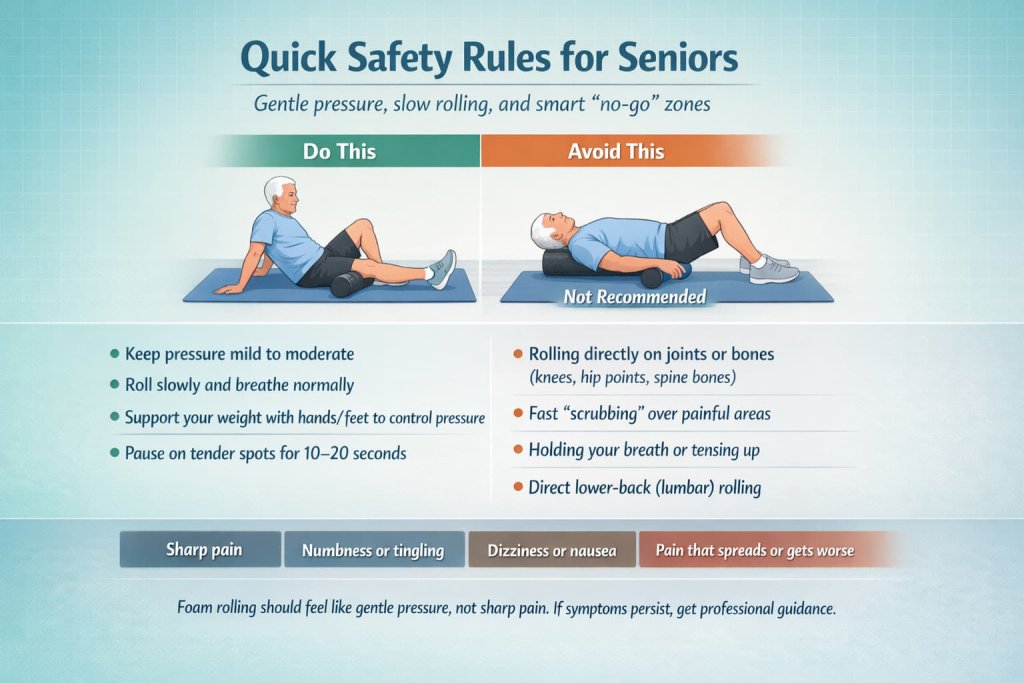
- Avoid rolling directly on joints or bones (knees, hips points, spine bones).
- Go slow and breathe. Fast rolling usually increases irritation.
- Skip direct lower-back rolling. The American Council on Exercise recommends avoiding direct rolling on the lumbar spine.
7 Best foam roller exercises for seniors
A senior-friendly foam rolling routine can help you feel less stiff and move more comfortably. These 7 gentle exercises focus on the safest areas to reduce tight muscles without overdoing it.
1) Calf roll (lower leg)
Why it works: Calves often tighten from walking, standing, or sitting with feet down. Gentle rolling can help your ankles feel less stiff during daily movement.
Muscles worked: Gastrocnemius and soleus (calves).
How to do it:
- Sit on the floor with the roller under one calf.
- Keep the other foot on the floor for support (this controls pressure).
- Roll slowly from just above the ankle to below the knee.
- Pause on tender spots for 10–20 seconds while breathing calmly.
- Switch sides.
Trainer Tip: If it feels too intense, keep more weight on your hands and the supporting leg.
2) Hamstring roll (back of thigh)
Why it works: Tight hamstrings can make bending, walking, and posture feel harder. Slow rolling may help you feel looser temporarily before stretching or walking.
Muscles worked: Hamstrings (back of thigh).
How to do it:
- Sit with the roller under the back of one thigh.
- Place hands behind you and keep the other foot on the ground for support.
- Roll from just above the knee to the bottom of the glute (avoid the sit-bone).
- Move slowly and breathe—no rushing.
- Switch sides.
Trainer Tip: Keep your spine tall and ribs relaxed so you don’t “brace” and hold your breath.
3) Quad roll (front of thigh)
Why it works: Quads can feel tight from stairs, squats, or long sitting. Rolling may make standing up and walking feel smoother.
Muscles worked: Quadriceps (front of thigh).
How to do it:
- Lie face down and place the roller under one front thigh.
- Use forearms/hands to support your body (like a gentle plank).
- Roll from mid-thigh toward the hip crease, then back to mid-thigh.
- Keep pressure light to moderate.
- Switch sides.
Trainer Tip: If floor work is uncomfortable, do a shorter range (mid-thigh only) and keep most weight in your arms.
4) Outer hip and glute roll (side of hip “pocket”)
Why it works: The outer hip and glute area often tightens with walking and sitting. Gentle rolling here may reduce that “tight band” feeling around the hip.
Muscles worked: Glute med/min, upper glute max, tensor fasciae latae (TFL).
How to do it:
- Sit on the roller and shift slightly to one side (glute/outer hip).
- Keep one foot planted on the floor to control pressure.
- Roll slowly over the upper glute and outer hip area.
- Avoid rolling directly on the bony point of the hip.
- Switch sides.
Trainer Tip: If you feel sharp, pinpoint pain on the side of the hip, reduce pressure and move slightly more into the glute.
5) Glute roll (back pocket)
Why it works: Glute tightness can show up as hip stiffness after sitting. Rolling can feel especially helpful before walking or gentle strengthening.
Muscles worked: Glute max and deep hip rotators.
How to do it:
- Sit on the roller and lean slightly to one side.
- Roll across the “back pocket” of the glute (not the tailbone).
- Pause briefly on tight spots while breathing slowly.
- Switch sides.
Trainer Tip: Keep the movement small and controlled—this is a “massage,” not a workout.
6) Upper-back roll (thoracic spine area only)
Why it works: Many seniors feel upper-back stiffness from forward posture and sitting. Rolling the upper/mid-back (not the low back) can help you feel more open through the chest and shoulders.
Muscles worked: Upper back soft tissue around the thoracic spine (not the spine itself).
How to do it:
- Lie on your back with the roller under your upper/mid-back (below shoulder blades).
- Support your head with your hands and keep feet on the floor.
- Lift hips slightly only if comfortable (or keep them down for less pressure).
- Roll slowly a few inches up and down the upper/mid-back.
- Stop before you reach the lower back.
Trainer Tip: Keep the roller higher (upper/mid-back only) and avoid rolling into the lower back.
7) Lat/side-back roll (gentle side of torso)
Why it works: Tight lats can make reaching overhead or behind your back feel restricted. This is a great “mobility helper” area for seniors—just keep it gentle.
Muscles worked: Latissimus dorsi and side-back soft tissue.
How to do it:
- Lie slightly on your side with the roller under the outer rib/side-back area.
- Keep your bottom arm comfortably overhead or in front (whichever feels better).
- Roll slowly from the side-back toward the armpit area (avoid direct armpit pressure).
- Keep range small and pressure light.
- Switch sides.
Trainer Tip: If ribs feel tender, use less bodyweight and shorten the rolling zone.
Who Should Avoid Foam Rolling or Talk to a Clinician First
Foam rolling is usually safe when it stays gentle, but seniors should be extra careful if there are medical risks or new symptoms. Talk to a clinician (or physical therapist) before foam rolling if you have:

- Unexplained swelling, redness, warmth, or sudden pain in a leg
- A history of blood clots, circulation problems, or you’re on blood thinners (ask what pressure is safe)
- A recent fracture, surgery, joint replacement, or you’re following post-op precautions
- Severe osteoporosis or a high fall/fracture risk (pressure and floor transitions may not be appropriate)
- Open wounds, skin infections, or fragile/bruising-prone skin in the area you want to roll
- Numbness, tingling, burning, or pain that travels down an arm or leg
- Severe balance issues that make getting down to the floor or back up unsafe
- Any condition where pressure on soft tissue is restricted by your medical team
Stop right away and seek guidance if foam rolling causes sharp pain, dizziness, increased numbness/tingling, or symptoms that worsen after your session.
Best “dose” for results without overdoing it
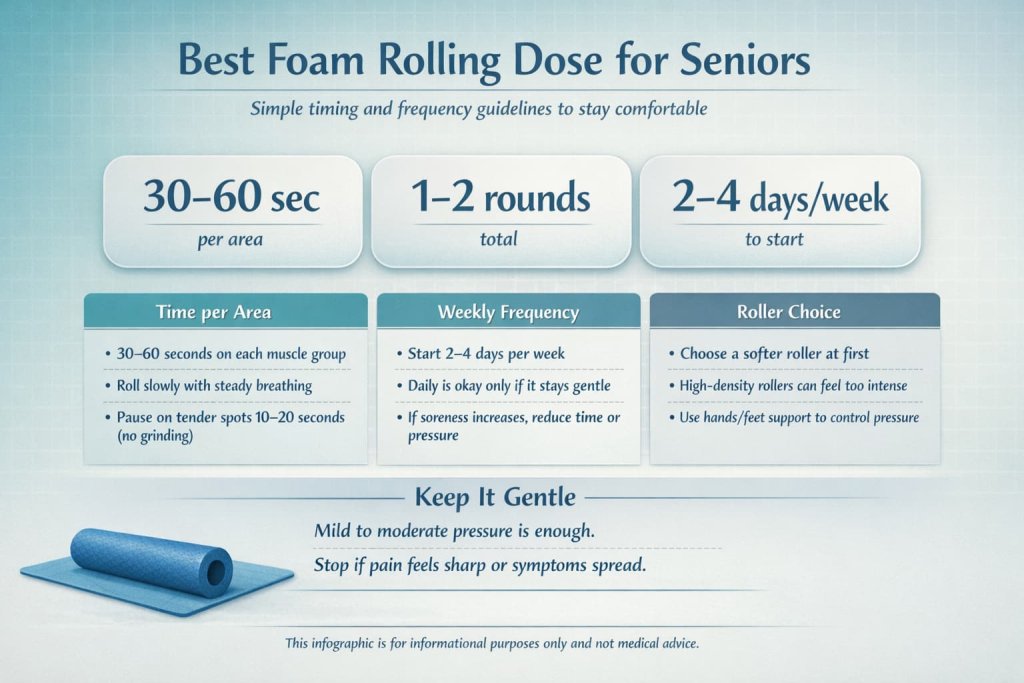
A senior-friendly starting point:
- 30–60 seconds per area, 1–2 rounds total
- 2–4 days per week to start (daily is fine if it feels good and stays gentle)
- Use a softer roller at first (high-density rollers can be too intense)
Equipment and setup
You only need:
- A foam roller (smooth, medium or soft density is usually best for beginners)
- A mat or carpet
- A chair or wall nearby for support getting up and down
A simple 10-minute routine (easy order)
Use this order 2–4 days per week:
- Calves (30–45 sec each)
- Hamstrings (30–45 sec each)
- Quads (30–45 sec each)
- Glutes/outer hips (30–45 sec each)
- Upper back (30–60 sec)
- Lats (30–45 sec each)
Finish with a short walk around the room and relaxed breathing.
What to Do After Foam Rolling
Foam rolling works best when you follow it with simple movement that helps your body “use” the new range of motion.
- Walk slowly for 1–2 minutes to let your muscles relax and circulation normalize
- Do gentle stretches for the area you rolled (20–30 seconds, no forced range)
- Practice easy mobility moves (ankle circles, heel-to-toe rocks, or hip hinges with support)
- Drink water and keep the rest of your day’s activity light if you’re new to rolling
- If you feel sore the next day, reduce pressure and cut rolling time in half next session
A good rule: foam rolling should leave you feeling looser and more comfortable—not beat up. If it consistently increases pain or irritation, switch to lighter pressure or use a softer tool (like a massage ball) and get personalized advice.
FAQs
Are foam roller exercises safe for seniors?
They can be safe when pressure is gentle, you avoid joints/bony areas, and you skip direct lower-back rolling. Start with short sessions and stop if pain feels sharp or symptoms spread.
How long should seniors foam roll each muscle?
A good starting range is 30–60 seconds per area, keeping discomfort mild to moderate.
Should seniors foam roll every day?
You can, but you don’t have to. Many seniors do well with 2–4 days per week, increasing only if it feels consistently good.
What foam roller is best for seniors?
Most beginners do best with a smooth, softer or medium-density roller. Very hard rollers can be too intense at first.
Can foam rolling replace stretching?
Not really. Foam rolling may help you feel looser short term, and many people pair it with light stretching and walking for best results.
Should I foam roll if I have arthritis?
It depends on the joint and your sensitivity. Avoid rolling directly over joints and focus on surrounding muscles. If it flares symptoms, stop and ask a clinician.
Does foam rolling “break up knots” permanently?
Foam rolling may reduce the feeling of tightness and improve short-term range of motion, but strong claims about permanently “breaking up” tissue aren’t well supported. If you want a realistic, practical overview of what foam rolling can (and can’t) do, see Harvard Health Publishing.
Conclusion
Foam roller exercises for seniors work best when they’re gentle, consistent, and focused on the safest areas—calves, thighs, glutes, upper back, and lats. Start with short rolling sessions, keep pressure comfortable, and use the routine above to feel looser before walking, light strength training, or stretching.
References
- Cheatham et al. – Effects of Self-Myofascial Release Using a Foam Roll or Roller Massager (Systematic Review) – PubMed Central
- Wiewelhove et al. – Meta-Analysis: Foam Rolling on Performance and Recovery – Frontiers in Physiology
- Hughes & Ramer – Systematic Review: Foam Rolling Duration, ROM, Recovery – PubMed Central
- Pearcey et al. – Foam Rolling and Delayed-Onset Muscle Soreness – PubMed Central
- CDC – Older Adult Physical Activity Guidelines Overview