
The inverted row is a beginner-friendly bodyweight pulling exercise that helps build upper-back, arm, and core strength while reinforcing better pulling mechanics. It matters because many people do far more pushing than pulling, and adding a solid horizontal row can help create a more balanced upper-body program.
In practical terms, the inverted row is easy to scale, works with common gym equipment, and can fit into strength, posture-focused, and pull-up progression routines. Guidance from the CDC also supports doing muscle-strengthening activity at least 2 days per week, which makes exercises like the inverted row a smart addition to a balanced plan.
What Is the Inverted Row?
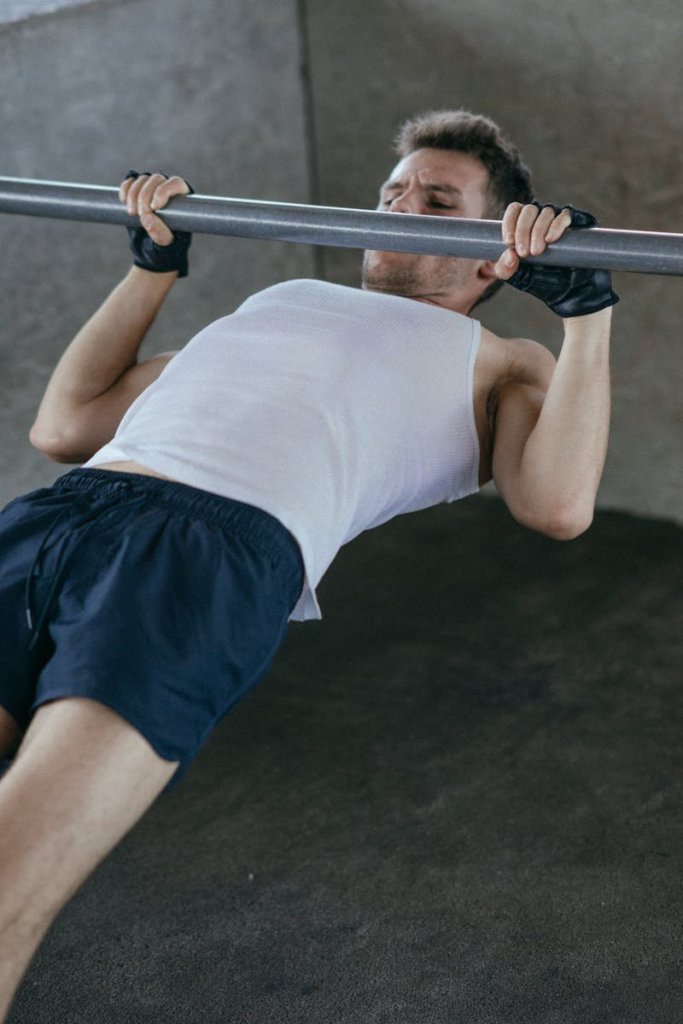
The inverted row is a horizontal pulling exercise done under a fixed bar, Smith machine bar, or suspension trainer. You hang underneath the bar with your heels on the floor, keep your body in a straight line, and pull your chest toward the bar. The movement mainly trains the upper back and arms, but it also challenges the trunk to stay braced throughout the rep.
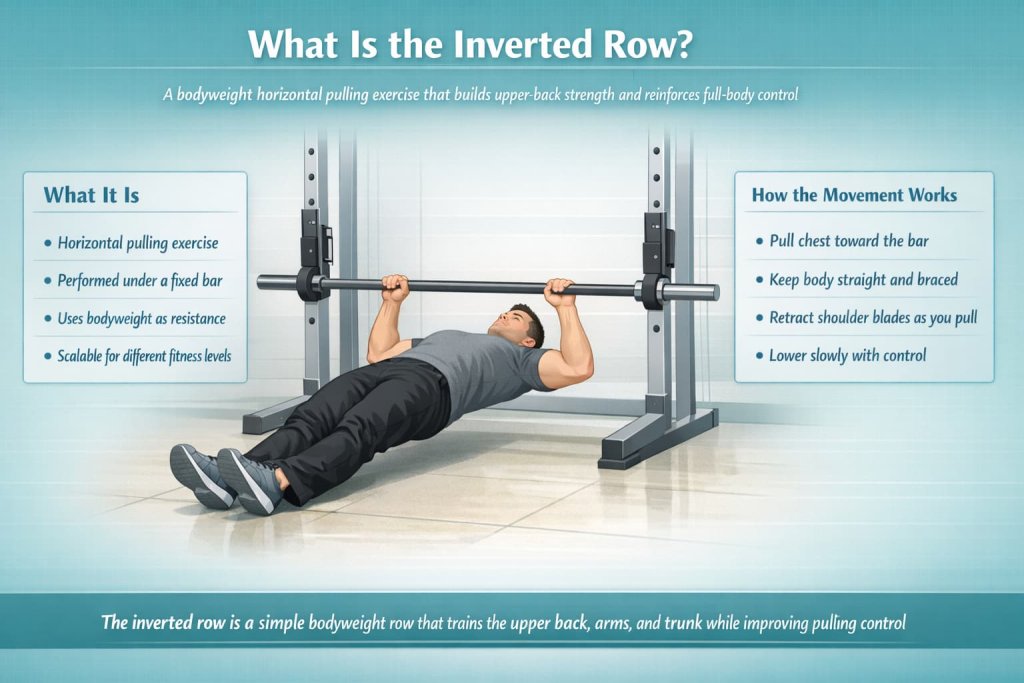
The American Council on Exercise describes the exercise with a straight-body setup, heels on the floor, shoulder blades retracting as you pull, and a slow return to the start.
How to Do the Inverted Row
How to do it:
- Set a bar around waist height in a rack or use a Smith machine or suspension trainer.
- Lie under the bar and grab it with an overhand grip about shoulder width or slightly wider.
- Place your heels on the floor and straighten your body from head to heels.
- Brace your abs and keep your ribs down.
- Pull your chest toward the bar by driving your elbows back.
- Squeeze your shoulder blades together near the top.
- Lower yourself with control until your arms are straight again.
- Repeat for controlled reps.
Inverted Row Muscles Worked
The inverted row mainly trains the muscles that pull the elbows back and help stabilize the shoulder blades. In most lifters, the key muscles worked include:
- Latissimus dorsi
- Rhomboids
- Middle trapezius
- Lower trapezius
- Rear deltoids
- Biceps
- Forearms
- Core stabilizers
ACE’s back-exercise guidance places the inverted row among common back-training movements and describes strong involvement from the upper-back pulling muscles during the motion.
Inverted Row Variations
1. Bent-Knee Inverted Row
Why it works:
The bent-knee inverted row is one of the best starting points for beginners because it reduces the amount of bodyweight you need to pull. Keeping the knees bent and feet flat on the floor shortens the lever, which makes it easier to stay braced and use clean rowing form. This version is helpful for learning how to retract the shoulder blades and pull the chest toward the bar without losing body position.
Muscles worked:
This variation mainly works the latissimus dorsi, rhomboids, middle trapezius, rear deltoids, biceps, forearms, and core stabilizers. Because the load is lighter than stricter versions, it can also help beginners feel the upper-back muscles working more clearly.
How to do it:
- Set the bar at about waist height.
- Lie underneath it and grab the bar with an overhand grip.
- Bend your knees and place your feet flat on the floor.
- Keep your body straight from shoulders to knees.
- Pull your chest toward the bar while driving your elbows back.
- Squeeze your shoulder blades together at the top.
- Lower yourself slowly to the start position.
Trainer Tip:
Think about keeping your hips lifted the whole time. If the hips drop, the exercise becomes less effective and turns into more of a partial pull.
2. Straight-Leg Inverted Row
Why it works:
The straight-leg inverted row increases difficulty because your body stays longer and more horizontal, which means you have to pull a greater percentage of your bodyweight. It is a strong progression once the bent-knee version feels controlled. This variation builds more full-body tension and demands better core stability during each rep.
Muscles worked:
It targets the lats, rhomboids, middle and lower traps, rear deltoids, biceps, forearms, and core. The straight-body position also increases demand on the glutes and abs to help maintain alignment.
How to do it:
- Set a bar in a rack or Smith machine.
- Lie under the bar and grip it slightly wider than shoulder width.
- Extend your legs fully with your heels on the floor.
- Keep your body in a straight line from head to heels.
- Pull your chest toward the bar without letting the hips sag.
- Pause briefly at the top.
- Lower back down with control.
Trainer Tip:
Do not rush to this version if you cannot keep a straight body line. Quality matters more than making the exercise harder too soon.
3. Feet-Elevated Inverted Row
Why it works:
The feet-elevated inverted row is a more advanced progression because raising the feet makes your body closer to parallel with the floor. That increases the load and makes the upper back, arms, and trunk work harder. It is a useful option for lifters who have outgrown basic bodyweight rows but still want a challenging horizontal pull.
Muscles worked:
This variation heavily trains the lats, rhomboids, middle traps, lower traps, rear deltoids, biceps, forearms, and core stabilizers. Because the body angle is more demanding, the glutes and abs also play a bigger support role.
How to do it:
- Set the bar securely and place a bench or box in front of it.
- Lie under the bar and rest your heels on the bench.
- Grab the bar with an overhand grip.
- Keep your body straight from head to heels.
- Pull your chest toward the bar while keeping the ribs down.
- Squeeze at the top without shrugging.
- Lower slowly until the arms are straight again.
Trainer Tip:
Start with a low bench rather than the highest setup possible. A moderate elevation is often enough to make the exercise much harder.
4. Suspension Trainer Row
Why it works:
The suspension trainer row is highly adjustable and works well for many fitness levels. Because the straps move freely, this version allows a more natural wrist and shoulder position, which can feel more comfortable for some people. It also makes it easy to change difficulty just by moving your feet.
Muscles worked:
It works the lats, rhomboids, middle traps, rear deltoids, biceps, forearms, and core. The unstable nature of the straps also increases the demand on smaller stabilizing muscles around the shoulders and trunk.
How to do it:
- Hold the suspension trainer handles and lean back with your arms straight.
- Walk your feet forward or backward to set the difficulty.
- Keep your body straight and brace your core.
- Pull your chest toward the handles by driving the elbows back.
- Keep your shoulders down and away from the ears.
- Pause briefly when your hands reach your ribs.
- Lower back with control.
Trainer Tip:
The more upright you are, the easier the row becomes. The more horizontal you are, the harder it gets. Use that simple adjustment to match the exercise to your level.
5. Underhand Inverted Row
Why it works:
The underhand inverted row changes the grip to a supinated position, which often increases biceps involvement and may feel smoother at the elbows for some lifters. It can be a useful variation for people who want a slightly different pulling feel or who are trying to add more arm contribution to the movement.
Muscles worked:
This version still trains the lats, rhomboids, middle traps, rear deltoids, and core, but it often places slightly more emphasis on the biceps and forearms because of the hand position.
How to do it:
- Set up under the bar as you would for a regular inverted row.
- Grab the bar with an underhand grip about shoulder width apart.
- Place your heels on the floor and straighten your body.
- Brace your abs and keep your chest lifted.
- Pull your chest toward the bar while keeping the elbows close to the sides.
- Pause near the top.
- Lower slowly to the starting position.
Trainer Tip:
If the underhand grip bothers your wrists, switch back to a standard overhand grip or use suspension handles for a more comfortable hand position.
Why the Inverted Row Matters
The inverted row is useful because it gives you a rowing pattern without needing heavy dumbbells or a cable machine. It can help beginners learn how to control the shoulder blades, improve pulling coordination, and build the strength needed for harder exercises later. The National Academy of Sports Medicine also highlights inverted rows as a useful option in pull-up progressions, with difficulty adjusted by leg position and body angle.
Another advantage is that the inverted row is a closed-chain style upper-body exercise. Research published in PubMed Central found greater shoulder and trunk muscle activation in closed-chain compared with open-chain exercises in the tested conditions, which helps explain why bodyweight rows often feel so demanding even without heavy external load. That does not mean inverted rows are always better than other rows, but it does support their value in programs that want upper-body pulling plus trunk control.
Form Tips for Better Results
Good inverted rows usually come down to body position and control. Keep your body rigid instead of letting the hips sag. Think about pulling the chest to the bar rather than yanking with the arms. Try to keep the shoulders down instead of shrugging toward the ears. NASM coaching cues also note that straighter legs make the exercise harder, while bent knees usually make it more manageable.
A few simple cues help a lot:
- Keep your body like a plank
- Lead with the chest
- Pull elbows toward the ribs
- Pause briefly at the top
- Lower under control
Common Inverted Row Mistakes
Letting the hips drop
When the hips sag, the body loses tension and the movement becomes less efficient. Keep your glutes and abs lightly braced.
Shrugging the shoulders
This often turns the row into a neck-dominant movement. Keep the shoulders away from the ears as you pull.
Using momentum
Fast, swinging reps usually reduce control. A slower lowering phase generally makes the exercise more effective.
Pulling the chin instead of the chest
Aim to bring the middle chest toward the bar. That usually keeps the row cleaner.
Setting the bar too low too soon
Many beginners do better with a higher bar or bent knees first, then progress over time.
Inverted Row Benefits
Builds upper-back strength
The inverted row trains the muscles that support rowing, climbing, and many daily pulling tasks.
Supports pull-up progressions
Because your feet stay on the floor, this exercise gives you a more manageable way to practice upper-body pulling strength before moving to pull-ups. NASM specifically includes inverted rows in pull-up improvement advice.
Improves body control
You are not just pulling with the arms. You are also resisting hip drop and maintaining trunk tension.
Easy to scale
You can change the angle, bar height, and leg position without needing a full equipment upgrade.
Fits many programs
The inverted row works in beginner plans, athletic programs, general strength routines, and posture-focused training splits.
Inverted Row for Better Posture
The inverted row is often described as a posture-friendly exercise because it trains upper-back muscles that help with scapular retraction and shoulder control. That said, no single exercise can fix posture on its own. Better posture usually comes from a mix of strength, movement habits, workstation setup, and training balance. Still, rows can be a useful part of that bigger picture, especially for people who spend a lot of time sitting or doing pressing exercises. Evidence on scapular and shoulder-focused exercise supports the value of strengthening these areas in well-designed programs.
How to Make the Inverted Row Easier or Harder
You can scale this exercise in several simple ways.
To make it easier:
- Raise the bar
- Bend the knees
- Reduce range slightly while learning control
- Use fewer reps with better form
To make it harder:
- Lower the bar
- Straighten the legs
- Elevate the feet
- Add a pause at the top
- Slow the lowering phase
This is one reason the inverted row works so well across fitness levels. Beginners can start with a comfortable angle, while stronger lifters can make it surprisingly tough.
Who Should Try the Inverted Row?
The inverted row can be a strong option for:
- Beginners who are not ready for pull-ups
- Lifters who want more horizontal pulling volume
- People building upper-back and arm strength
- Home or garage gym users with a bar setup
- Anyone looking for a scalable bodyweight back exercise
Who Should Be Careful?
This exercise may need modification if you currently have shoulder, elbow, wrist, or neck pain with pulling movements. People recovering from recent upper-body injury should get individualized guidance before loading the movement. If the standard bar setup feels awkward, a suspension trainer or grip change may feel better. Since this is health-related exercise content, it is safest to treat pain during training as a sign to stop and reassess rather than force reps.
Sample Inverted Row Workout Ideas
Here are a few simple ways to program the inverted row.
For beginners
- 2 to 3 sets of 6 to 10 reps
- Rest 60 to 90 seconds
- Use bent knees or a higher bar
For general strength
- 3 to 4 sets of 8 to 12 reps
- Rest 60 to 120 seconds
- Use a body angle that makes the last few reps challenging
For pull-up progressions
- Pair inverted rows with hangs, assisted pull-ups, or lat pulldowns
- Use 3 sets of 6 to 10 controlled reps
- Focus on chest-to-bar quality instead of rushing reps
Inverted Row vs Other Row Exercises
Inverted row vs seated cable row
The seated cable row gives you easier load progression with plates or weight stacks. The inverted row gives you more bodyweight control and a simple setup when you do not have a cable machine.
Inverted row vs bent-over row
The bent-over row can usually be loaded heavier, but it also requires more hip-hinge endurance and setup skill. The inverted row is often easier for beginners to learn.
Inverted row vs suspension row
These are very similar. Suspension rows often feel more adjustable and may allow a more natural hand position.
Frequently Asked Questions
Is the inverted row good for beginners?
Yes. It is one of the most beginner-friendly pulling exercises because you can reduce difficulty by raising the bar or bending the knees.
Does the inverted row help with pull-ups?
Yes. It can help build pulling strength, upper-back control, and body tension that carry over well to pull-up progressions.
What muscles do inverted rows work the most?
They mainly work the upper back, lats, rear shoulders, biceps, forearms, and core stabilizers.
Are inverted rows enough for back training?
They can be a very good back exercise, but many people benefit from combining them with other pulls such as pulldowns, pull-ups, or dumbbell and cable rows for more complete training variety.
Should I use an overhand or underhand grip?
Most people start with an overhand grip. An underhand grip can be a useful variation if it feels better and matches your goal.
How many inverted rows should I do?
A common starting point is 2 to 4 sets of 6 to 12 reps, depending on your strength and overall program.
Are inverted rows better than pull-ups?
Not better across the board. They are usually easier to learn and easier to scale, while pull-ups are a more demanding vertical pull.
Conclusion
The inverted row is a simple, effective exercise for building back strength, improving pulling mechanics, and adding more balance to your upper-body training. It is scalable, practical, and useful for both beginners and experienced lifters. Add it to your routine two or more times per week as part of a balanced strength program, focus on clean form, and progress the angle over time.
References
- National Academy of Sports Medicine (NASM) — How To Get Better at Pull-Ups
- World Health Organization (WHO) — Physical Activity
- PubMed — Electromyography of Shoulder Muscles During Closed Kinetic Chain Exercises: A Systematic Review and Meta-Analysis
- PubMed Central — Role of the Kinetic Chain in Shoulder Rehabilitation