
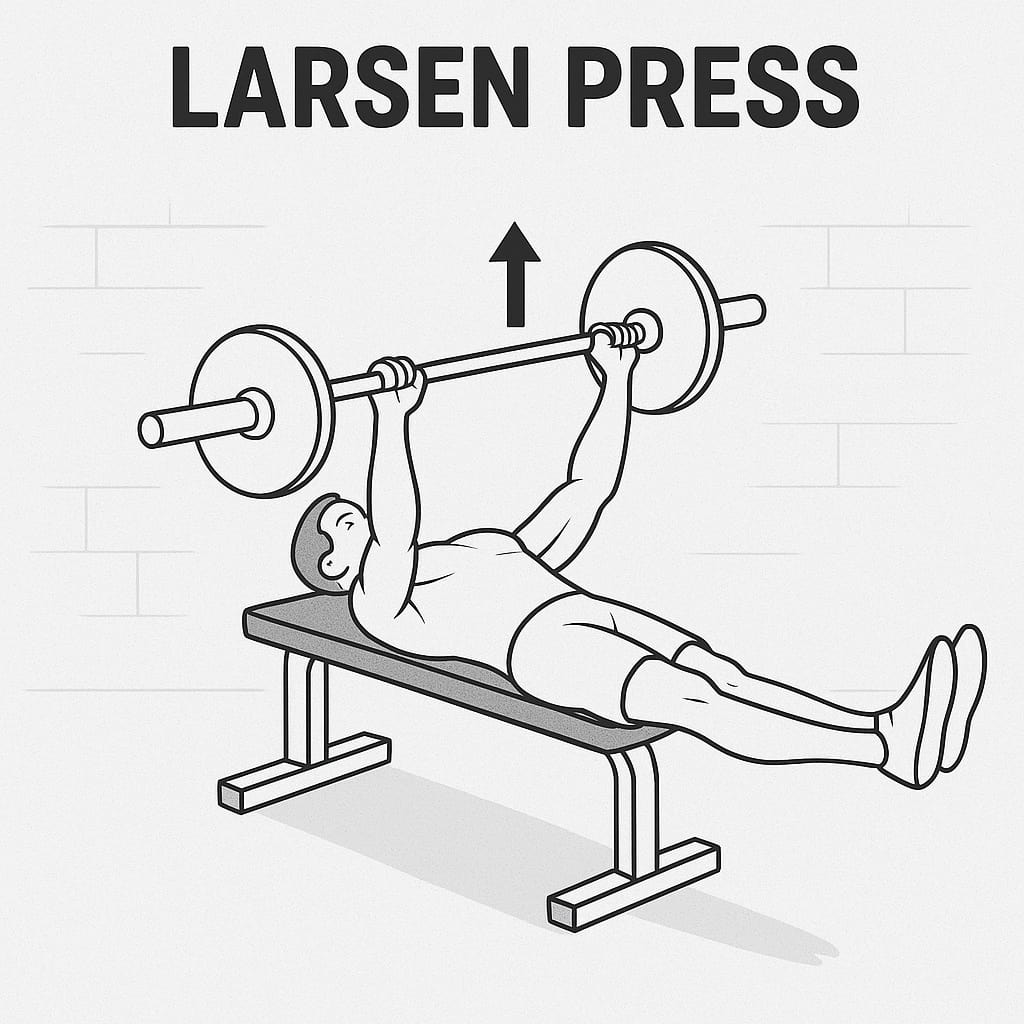
The Larsen Press is a bench-press variation where you lift with your legs extended off the ground, eliminating leg drive and forcing your upper body to handle all the work.
This simple tweak changes everything—it isolates the chest, shoulders, and triceps more intensely, engages your core, and helps identify weak points in your bench form. Named after elite powerlifter Adrian Larsen, this lift has gained popularity among strength athletes looking for both performance and injury-friendly modifications.
In this guide, you’ll learn how to perform the Larsen Press correctly, why it’s effective, reasons you might skip it, how to incorporate it into your program, and five powerful bench-press hacks to push your training forward.
What Is the Larsen Press?
The Larsen Press looks almost identical to a standard barbell bench press, except your legs don’t touch the ground. Instead, they’re extended straight out or rested on a bench. By removing leg drive, the exercise places all the tension on your upper body and core.
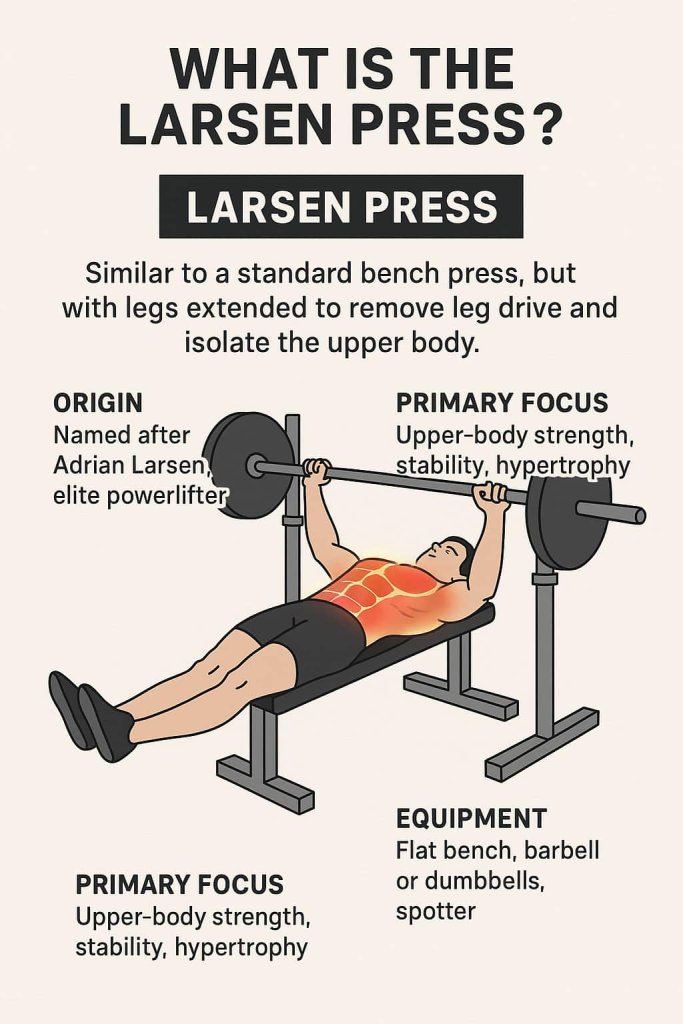
- Origin: Named after Adrian Larsen, an elite powerlifter known for his record-breaking benches despite lower-body limitations.
- Primary Focus: Upper-body strength, stability, and hypertrophy.
- Equipment Needed: Flat bench, barbell or dumbbells, and safety arms/spotter.
How to Perform the Larsen Press (Step by Step)
- Setup: Lie flat on a bench, retract your shoulder blades, and grip the bar slightly wider than shoulder-width.
- Leg Position: Unrack the bar, then lift both legs so they extend straight in front of you. Keep your core tight.
- Descent: Lower the bar slowly to the middle of your chest, keeping wrists stacked over elbows.
- Press: Drive the bar up in a smooth arc, maintaining upper-back tightness.
- Repeat: Perform controlled reps for your set.
Trainer Tip: Start with lighter weights than your regular bench press. Without leg drive, your numbers will drop—but your strength gains will rise.
5 Surprising Bench-Press Hacks You Need to Try
When it comes to building a strong and powerful chest, the bench press is the go-to exercise. But if you’ve been pressing the same way for months (or years), chances are your progress has slowed. The good news? A few simple hacks can breathe new life into your training. Below are five surprising bench-press tweaks that will challenge your muscles, expose weaknesses, and spark fresh gains.
1. Use the Larsen Press for Upper-Body Isolation
Why it works: The Larsen Press is a bench press variation performed with your feet completely off the ground, often dangling straight or resting lightly on another bench. Without the ability to drive through your legs, the chest, shoulders, and triceps must handle the entire load.
- Benefit: This isolates the upper body and helps you build raw pressing strength.
- Trainer Insight: If you’ve relied too much on leg drive, you’ll quickly notice weak points in your bar path or lockout strength.
👉 Try adding Larsen Presses at the end of your bench session for 3–4 sets of moderate weight.
2. Build Core Stability with Elevated Legs
How to do it: Perform your bench press with both legs straightened and held in the air (like a hollow-body hold).
Effect: This forces your abs and obliques to stabilize your torso while preventing arching or shifting. It essentially turns the bench press into a chest-and-core hybrid movement.
- Variation: If balance is too tough, rest your legs on another bench parallel to yours. You’ll get stability while still reducing leg drive.
- Why it’s useful: Many lifters neglect anti-extension strength, and this hack helps reinforce proper bracing for bigger lifts.
👉 Add this as an accessory movement with lighter weights (60–70% of your usual working sets).
3. Improve Range of Motion for Better Gains
Mechanism: A flatter back (less arch) means the bar travels further. More distance equals greater time under tension, which is crucial for hypertrophy.
- Result: This tweak leads to deeper chest activation and can help lifters struggling with strength off the chest.
- Hack Upgrade: Use paused reps at the chest. Holding the bar for 1–2 seconds before pressing removes momentum, making your pecs and triceps do all the work.
👉 Competitive powerlifters often use this to simulate meet conditions, but bodybuilders benefit from the added muscle-building stimulus too.
4. Diagnose Weaknesses Without Leg Drive
Problem: Leg drive often hides technique flaws. You might think your form is flawless—until you take away your lower-body assistance.
Solution: Returning to the Larsen Press (yes, it deserves a second mention) exposes whether your issue lies in:
- Bar path (bringing it too high or low)
- Lockout strength (triceps giving out)
- Initial push from the chest
Benefit: It’s a perfect diagnostic tool for lifters stuck at plateaus.
👉 Use it periodically to test your true upper-body pressing ability.
5. Add Variations for Extra Challenge
Once you’ve mastered the hacks above, level up with these advanced variations:
- Dumbbell Larsen Press: Trains each arm independently, fixing muscle imbalances.
- Feet-on-Bench Press: Same leg-drive reduction, but with better balance for beginners.
- Banded Larsen Press: Resistance bands increase load at the top, making lockouts brutally effective.
- Spoto Press: Lower the bar, pause just above your chest, and press. This variation (popularized by Eric Spoto) hammers through sticking points and skyrockets control.
👉 Rotate these into your training every 4–6 weeks to keep progressing without burning out.
Common Mistakes to Avoid
- Arching your back excessively: Defeats the purpose of this variation.
- Dropping legs mid-set: Reduces core engagement and stability.
- Going too heavy too soon: Start lighter than your max bench to master form.
Benefits of the Larsen Press
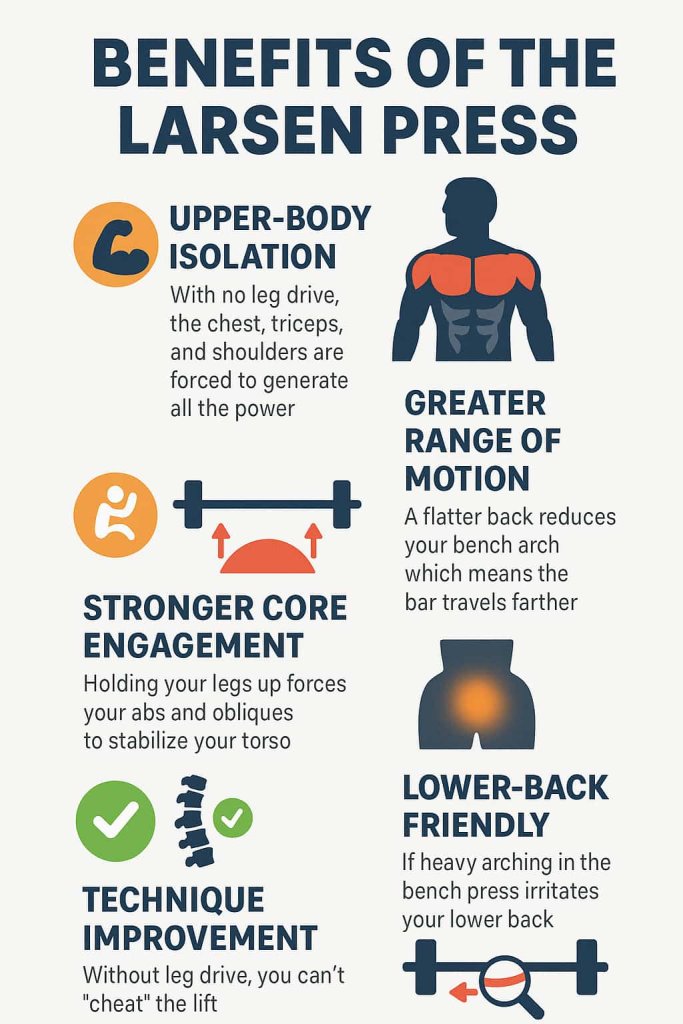
1. Upper-Body Isolation
With no leg drive, the chest, triceps, and shoulders are forced to generate all the power. This builds raw pressing strength and muscle mass.
2. Greater Range of Motion
A flatter back reduces your bench arch, which means the bar travels farther, giving you more stretch and tension on the chest.
3. Stronger Core Engagement
Holding your legs up forces your abs and obliques to stabilize your torso. This makes the Larsen Press not just a chest-builder, but a sneaky core workout too.
4. Lower-Back Friendly
If heavy arching in the bench press irritates your lower back, the Larsen Press reduces stress by flattening your spine.
5. Technique Improvement
Without leg drive, you can’t “cheat” the lift. It reveals flaws in bar path, lockout strength, or chest drive, making it a great diagnostic tool.
Why You Might Skip the Larsen Press
Despite its benefits, the Larsen Press isn’t for everyone.
- Stability Concerns: Without your legs on the ground, the lift can feel wobbly. On narrow benches, this can become a safety issue.
- Not Essential for All Lifters: If you already have great leg drive and bench mechanics, this exercise may not add much extra benefit.
- Beginner Complexity: New lifters may struggle to stabilize the bar, making standard bench variations safer starting points.
Expert Note: Jen Thompson, an 11-time world champion, cautions that the Larsen Press can make lifters unnecessarily unstable and may not be worth the risk for everyone.
How to Incorporate the Larsen Press into Your Training
1. As a Primary Strength Exercise
Replace your standard bench press once a week with Larsen Press sets.
- 3–5 sets of 3–5 reps
- Heavy but controlled loads
- Rest 2–3 minutes between sets
2. As a Hypertrophy Finisher
After your main bench work, add Larsen Presses for muscle growth.
- 2–3 sets of 8–12 reps
- Focus on slow tempo and time under tension
3. In the Off-Season
When you’re not peaking for competition, the Larsen Press is excellent for building mass and reinforcing good mechanics.
4. As a Diagnostic Tool
Use paused Larsen reps to expose sticking points or bar path flaws. This will carry over to your standard bench press.
5. Warm-Up or Form Reinforcement
Do lighter Larsen sets before heavy benching to practice upper-back tightness and bar control.
FAQ Section
1. Is the Larsen Press better than the standard bench press?
Not better—just different. It isolates the upper body more and removes leg drive, making it a great accessory lift.
2. Will the Larsen Press increase my regular bench press strength?
Yes. By targeting chest and triceps in a disadvantaged position, it improves bottom-end strength and carryover.
3. Can beginners do the Larsen Press?
Yes, but start light. Beginners should first master the regular bench press before adding this variation.
4. Does the Larsen Press hurt your back?
Actually, it can be lower-back friendly since it reduces arching. Just keep your core tight.
5. Should I use dumbbells or a barbell?
Both work. Dumbbells add balance and coordination demands, while a barbell allows heavier loading.
6. How many sets and reps should I do?
For strength: 3–5 sets of 4–6 reps.
For hypertrophy: 3–4 sets of 8–12 reps.
7. Is this exercise safe without a spotter?
Use safety pins or a spotter—especially when lifting near failure.
Conclusion
The Larsen Press is one of the smartest bench-press hacks you can add to your training. By eliminating leg drive, it builds pressing strength, improves range of motion, strengthens your core, and highlights weaknesses in your technique.
Whether you’re a powerlifter chasing numbers or a gym-goer wanting a stronger chest, this variation deserves a spot in your routine.
👉 Next workout, swap one of your bench sets for the Larsen Press—you’ll feel the difference instantly.