
The best upper ab exercises strengthen the upper portion of your rectus abdominis by focusing on controlled trunk flexion from the ribcage down. These exercises help you build a more defined core, improve posture, and support daily movement patterns. Understanding how upper ab activation works helps you train safely, efficiently, and with better long-term results.

Most people feel their “upper abs” more during curling motions (crunching, hollow holds, curl-ups). This guide breaks down the most effective exercises, shows proper technique, and offers pro tips, regressions, and safety guidelines.
Benefits of Upper Ab Exercises
Upper ab strengthening offers several evidence-based advantages:
- Builds visible core definition by thickening the rectus abdominis
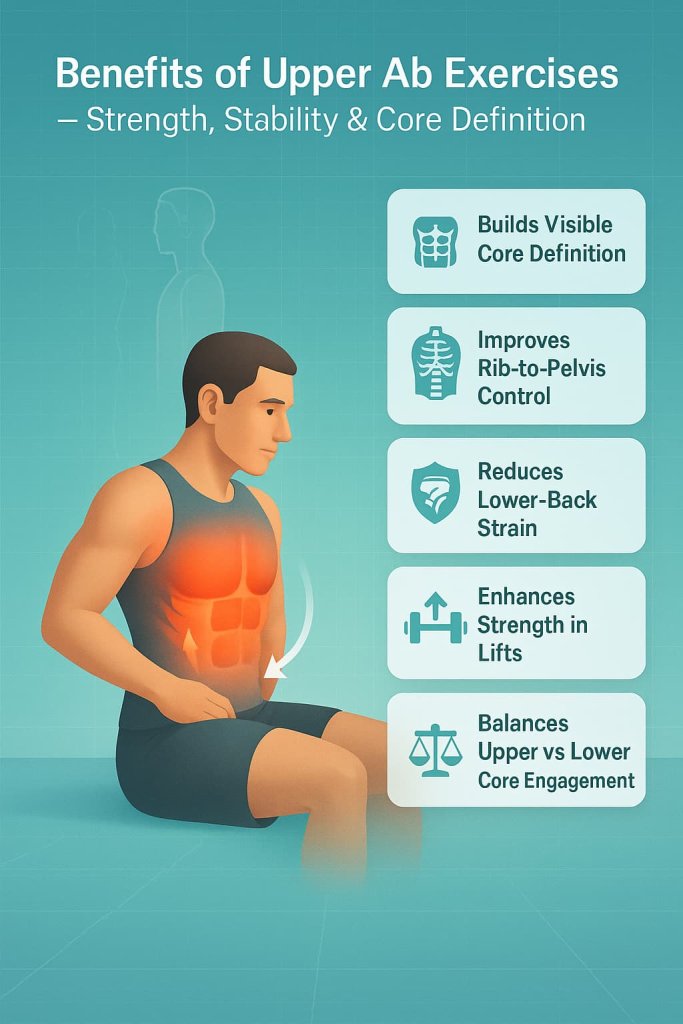
- Improves rib-to-pelvis control (important for posture and breathing mechanics)
- Reduces strain on the lower back by enhancing overall trunk stability
- Supports performance in lifts like squats, deadlifts, push-ups, and overhead exercises
- Helps balance “upper vs lower” core engagement for better symmetry
Warm-Up Before You Begin
A short warm-up prepares the spine, hips, and core for flexion-based movements.
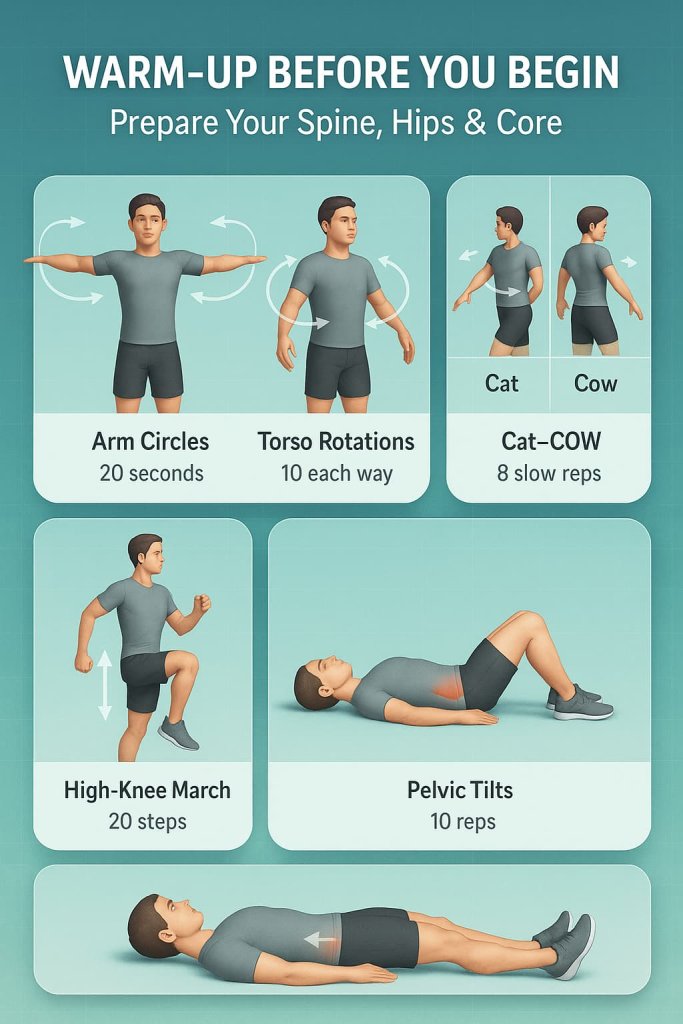
Quick Warm-Up (2–3 Minutes)
- Arm circles – 20 seconds
- Torso rotations – 10 each way
- Cat–cow – 8 slow reps
- High-knee march – 20 steps
- Pelvic tilts – 10 reps
Trainer Tip: Move slow and stay relaxed. Warm muscles engage more effectively and safely.
17 Best Upper Ab Exercises
Strengthen the upper portion of your rectus abdominis with these effective, science-backed movements. Each exercise helps improve core definition, stability, and posture with safe, controlled technique.
1. Basic Crunch
Why it works:
This classic movement emphasizes pure spinal flexion, allowing the upper rectus abdominis to do most of the work without heavy hip-flexor involvement. It creates a strong contraction where people typically “feel” their upper abs the most.
Muscles worked:
Rectus abdominis (upper region emphasis).
How to do it:
- Lie on your back, knees bent, feet hip-width apart.
- Cross arms over your chest or place hands lightly behind ears.
- Exhale as you curl your ribcage toward your pelvis.
- Lift shoulder blades off the floor without pulling the neck.
- Pause briefly at the top to increase tension.
- Lower slowly with full control.
Trainer Tip:
Imagine sliding your ribs down toward your belly button rather than pulling with your head.
2. Long-Arm Crunch
Why it works:
Extending your arms overhead lengthens the lever, making your upper abs work harder to pull your torso upward. This increases difficulty without needing added weight.
Muscles worked:
Rectus abdominis.
How to do it:
- Lie on your back with arms extended overhead.
- Keep biceps close to your ears and legs bent.
- Lift shoulders and upper back off the floor in one smooth curl.
- Avoid swinging the arms; keep them still.
- Lower slowly.
Trainer Tip:
Use a slow 2–3 second lifting phase to increase time under tension.
3. Vertical Leg Crunch
Why it works:
Raising the legs reduces hip-flexor contribution and intensifies upper ab recruitment. The vertical leg angle forces a higher torso lift.
Muscles worked:
Rectus abdominis, deep core stabilizers.
How to do it:
- Lie on your back, legs straight up over hips.
- Reach your arms toward your toes.
- Curl your chest upward, lifting shoulder blades fully.
- Lower back down slowly.
Trainer Tip:
Focus on curling upward, not reaching further—height of the shoulder lift matters more than touching the toes.
4. Toe-Touch Crunch
Why it works:
Creates a narrow, high-tension movement that increases the top-end contraction of the upper abs.
Muscles worked:
Rectus abdominis, obliques (secondary).
How to do it:
- Lift legs vertically.
- Raise both hands toward your toes.
- Curl shoulder blades off the ground with each rep.
- Keep lower back anchored.
Trainer Tip:
Relax your neck and lead with your chest, not your chin.
5. Cross-Body Crunch
Why it works:
Adds rotation, increasing oblique activation while still emphasizing upper ab curl.
Muscles worked:
Rectus abdominis, internal/external obliques.
How to do it:
- Lie flat with hands behind head.
- Bring your right shoulder toward your left knee.
- Return to start and switch sides.
- Keep elbows wide.
Trainer Tip:
Initiate the twist from the ribcage, not the elbows.
6. Hollow Body Hold
Why it works:
Creates full-body tension and strong anti-extension control, heavily taxing the upper abs to maintain the curved spine position.
Muscles worked:
Rectus abdominis, transverse abdominis, hip flexors.
How to do it:
- Lie down and flatten your lower back into the floor.
- Lift shoulders, arms, and legs off the ground.
- Hold the hollow “banana” shape without arching.
Trainer Tip:
If you shake, that’s normal—maintain form by tucking ribs down tightly.
7. Hollow Rock
Why it works:
Adds gentle movement to the hollow position, increasing core endurance and constant upper ab tension.
Muscles worked:
Rectus abdominis, entire core.
How to do it:
- Start in a hollow body hold.
- Rock forward and backward in small, smooth motions.
- Keep body shape consistent throughout.
Trainer Tip:
Tiny rocks are more effective and safer than big swings.
8. V-Up
Why it works:
Combines upper and lower-body movement, demanding strong upper ab initiation to lift the torso upward.
Muscles worked:
Rectus abdominis, hip flexors.
How to do it:
- Lie flat with arms extended overhead.
- Lift legs and torso simultaneously.
- Meet in a “V” at the top.
- Lower with control.
Trainer Tip:
Exhale sharply during the lift to increase core contraction.
9. Jackknife Sit-Up
Why it works:
Less explosive than a V-up, allowing controlled upper ab recruitment and easier mastery for beginners.
Muscles worked:
Rectus abdominis, hip flexors.
How to do it:
- Lie on your back.
- Lift one leg at a time.
- Reach the opposite hand toward the raised leg.
- Alternate sides.
Trainer Tip:
Engage your lower back to avoid rounding too early.
10. Stability Ball Crunch
Why it works:
Allows a larger range of motion than floor crunches, increasing stretch and contraction of the upper abs.
Muscles worked:
Rectus abdominis, obliques.
How to do it:
- Sit on a stability ball and walk your feet forward.
- Position lower back on the ball.
- Curl your torso upward.
- Lower until your shoulders extend slightly past neutral.
Trainer Tip:
Keep hips tucked so ribs don’t flare during the descent.
11. Cable Rope Crunch
Why it works:
Provides constant tension and allows progressive overload, helping build thicker upper abs.
Muscles worked:
Rectus abdominis.
How to do it:
- Kneel facing a cable machine.
- Hold the rope beside your temples.
- Curl your torso downward until elbows move toward knees.
- Return slowly.
Trainer Tip:
Keep hips still—this isolates the spine flexion movement.
12. Kneeling Weighted Crunch
Why it works:
Adds load in a simple setup, helping stimulate hypertrophy without complicated equipment.
Muscles worked:
Upper rectus abdominis.
How to do it:
- Kneel on the floor holding a small plate to your chest.
- Curl forward slowly, rounding upper spine.
- Pause and return controlled.
Trainer Tip:
Use light weights; this movement is about tension, not heavy lifting.
13. Decline Bench Crunch
Why it works:
The downward slope increases resistance, making it harder for the upper abs to initiate each rep.
Muscles worked:
Rectus abdominis.
How to do it:
- Set the bench at a moderate decline.
- Lie back with feet secured.
- Crunch upward, lifting shoulders.
- Lower smoothly.
Trainer Tip:
Focus on a slow eccentric (lowering) phase for added intensity.
14. Long-Lever Plank
Why it works:
Moving elbows forward increases mechanical disadvantage, dramatically boosting upper ab tension.
Muscles worked:
Rectus abdominis, transverse abdominis.
How to do it:
- Get into a standard plank.
- Walk elbows forward 3–5 inches.
- Hold with ribs tucked and hips level.
Trainer Tip:
If your lower back arches, reset immediately to avoid strain.
15. Plank With Reach
Why it works:
Challenging anti-rotation forces requires strong upper ab stabilization.
Muscles worked:
Rectus abdominis, obliques, shoulder stabilizers.
How to do it:
- Start in a high plank.
- Lift one arm forward briefly.
- Keep hips square.
- Alternate sides.
Trainer Tip:
Move slowly—rushing reduces core engagement.
16. Ab-Wheel Rollout (Modified or Full)
Why it works:
Creates one of the strongest anti-extension demands, heavily activating the rectus abdominis.
Muscles worked:
Rectus abdominis, deep core stabilizers.
How to do it:
- Begin on knees holding the wheel.
- Roll forward under control.
- Stop before losing core tension.
- Pull back using your abs.
Trainer Tip:
Start with short rollouts and gradually increase your range.
17. Hanging Knee Raise (Upper-Ab Focus)
Why it works:
Curling the ribcage while raising the knees activates the upper portion of the abs more than simply lifting legs.
Muscles worked:
Rectus abdominis, hip flexors (secondary).
How to do it:
- Hang from a bar with a firm grip.
- Lift knees upward.
- Add a slight upper spine curl at the top.
- Lower with control.
Trainer Tip:
The torso curl is what makes this an upper-ab movement—avoid swinging.
How Often Should You Train Upper Abs? (Expert Guidance)
Most people get great results with:
- 2–3 upper ab sessions per week
- 2–4 sets per exercise
- 8–20 reps for dynamic moves
- 10–30 seconds for holds
Avoid daily high-volume ab training—it can irritate the hip flexors, neck, and lower back.
Common Mistakes to Avoid
- Pulling on the neck during crunches
- Using momentum instead of ribcage flexion
- Overarching the lower back during planks or hollow holds
- Rushing reps
- Training only “upper abs” and skipping oblique/lower ab balance
- Expecting spot-reduction (fat loss comes from overall lifestyle)
Safety Guidelines for Upper Ab Training
Training your upper abs should feel challenging—not painful. Follow these quick safety rules to protect your neck, spine, and hips during core work.
- Don’t pull on your neck. Lead the movement from your ribcage, not your chin.
- Keep your lower back supported. Gently press it into the floor during crunches.
- Avoid using momentum. Slow, controlled reps build more strength with less risk.
- Choose the right level. Start with basic crunches if hollow holds or V-ups feel too hard.
- Stop if you feel pain. Sharp back, neck, or hip pain means the exercise is too intense.
- Watch your hip flexors. Keep ribs down and pelvis slightly tucked to avoid arching.
- Breathe properly. Exhale on the effort, inhale on the lowering phase.
- Check medical conditions. If you have back issues, hernias, or recent surgeries, get clearance first.
This content is for informational purposes only and not medical advice.
People Also Ask (Quick Answers)
Can you isolate upper abs?
Not fully, but you can emphasize them with curling movements.
Do upper ab exercises reduce belly fat?
No—fat loss is whole-body, not regional.
Are crunches bad for your back?
For healthy individuals, controlled crunches are generally safe and supported by research. Avoid jerky form.
What’s the fastest way to define upper abs?
Combine upper ab training with calorie control, protein-rich nutrition, full-body strength, and cardio.
Is the hollow hold good for upper abs?
Yes—one of the most effective isometric options.
FAQ
1. How long does it take to see upper ab definition?
Most people see changes in 4–8 weeks with consistent training + nutrition.
2. Should I train upper abs on back day or leg day?
Abs pair well with either—but best after the main lifts.
3. What’s better: crunches or sit-ups?
Crunches activate the upper abs more and are gentler on the lower back.
4. Are stability-ball crunches better than floor crunches?
They provide a longer range of motion and often stronger activation.
5. Do weighted ab exercises build a thicker core?
Yes, external load increases muscle thickness over time.
6. Can beginners do upper ab exercises daily?
No—rest is essential. Stick to 2–3 sessions weekly.
7. Is an ab wheel too advanced?
Start with mini-range rollouts on knees until stability improves.
Conclusion
Upper ab training doesn’t have to be complicated. The right mix of crunch-based moves, stability variations, hollow positions, and weighted exercises can help you build a stronger, more defined core. Train consistently, use perfect form, and pair your workouts with smart nutrition and overall strength training.
Ready to take the next step? Start with 3–4 exercises from this list and rotate new ones in every 2–3 weeks to keep progressing.
References
- ACSM – Progression Models in Resistance Training for Healthy Adults (2009):
https://pubmed.ncbi.nlm.nih.gov/19204579/ - Nelson GA et al. – Electromyographic Activity of the Rectus Abdominis During a Variety of Abdominal Exercises (J Strength Cond Res):
https://pubmed.ncbi.nlm.nih.gov/21912295/ - McGill S. – To Crunch or Not to Crunch: An Evidence-Based Examination of Spinal Flexion Exercises and Their Potential Risks:
https://www.researchgate.net/publication/232156729_To_Crunch_or_Not_to_Crunch - SpineHealth.org – Breaking Down the Exercises that Break Down Your Spine:
https://spinehealth.org/article/breaking-down-the-exercises-that-break-down-your-spine/ - Willardson JM – Core Stability Training: Applications to Sports Conditioning Programs (J Strength Cond Res):
https://journals.lww.com/nsca-jscr/abstract/2007/08000/core_stability_training__applications_to_sports.54.aspx