
The banded glute bridge exercise is a glute-focused bridge variation that uses a loop band (usually above your knees) to help you keep your knees tracking out, increase hip muscle demand, and improve hip control. It’s simple, joint-friendly for many people, and easy to progress at home with minimal equipment.
What Is the Banded Glute Bridge Exercise?
A banded glute bridge is the standard glute bridge performed on the floor, plus a small loop band that adds outward resistance at the knees (or sometimes around the thighs). Your job is to keep gentle pressure “out” on the band while you lift and lower your hips.
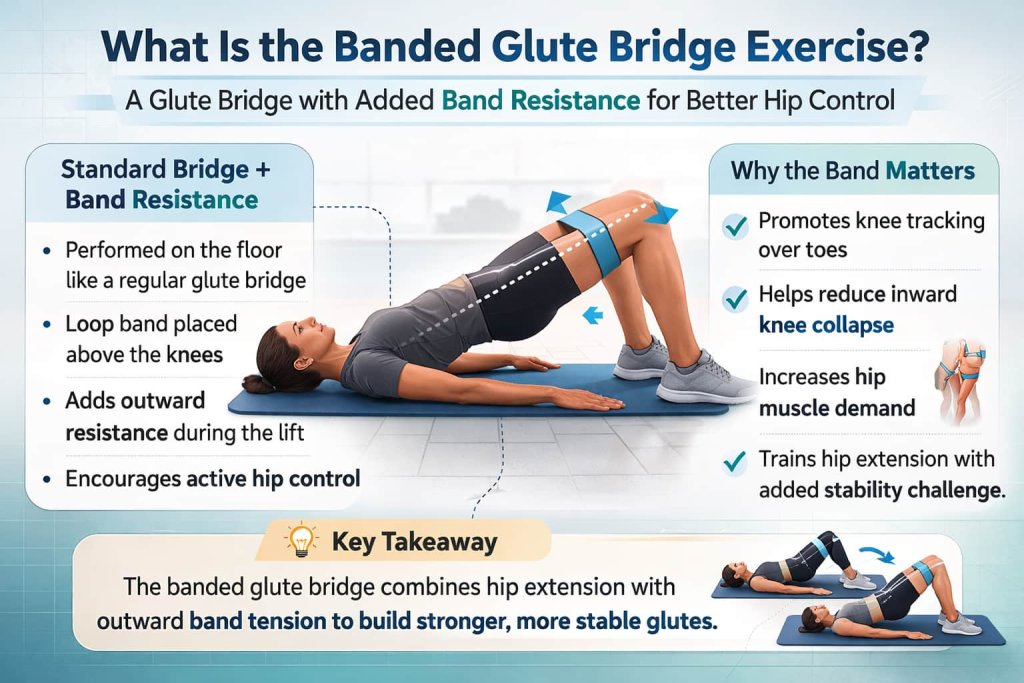
That outward pressure encourages better hip stability (especially preventing knees from collapsing inward) while you train hip extension (the main bridge motion).
How to Do the Banded Glute Bridge Exercise Correctly
Setup and band placement
Most people do best starting with the band just above the knees (mid-thigh). This setup gives you a clear cue to gently press outward as you bridge.
Banded glute bridge exercise (step-by-step)
How to do it (bullets):
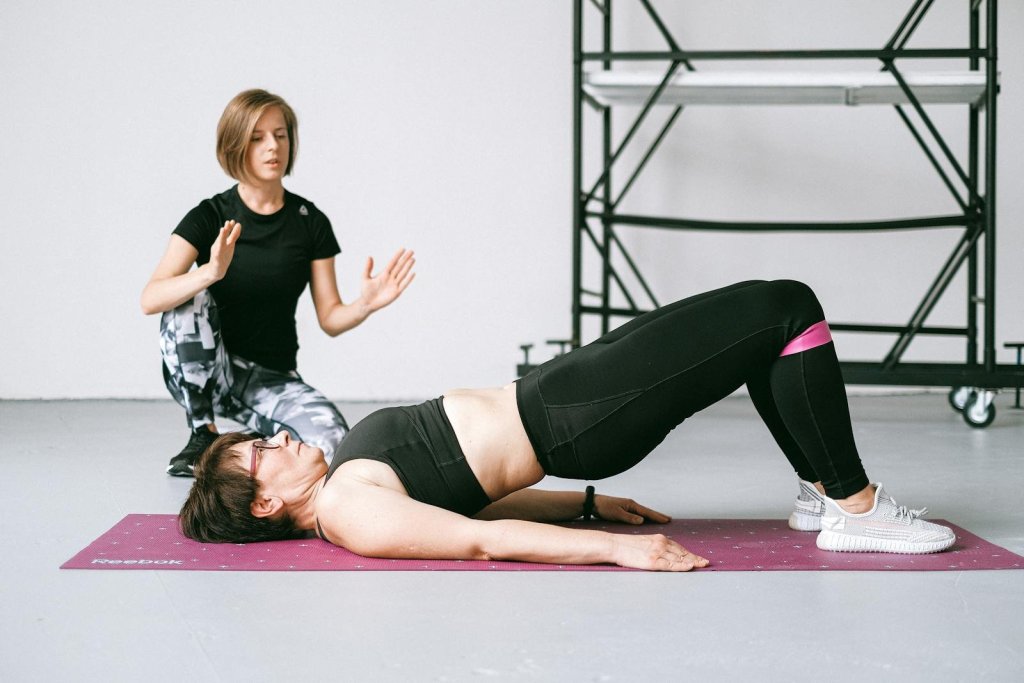
- Lie on your back with knees bent and feet flat, about hip-width apart.
- Place a loop band just above your knees and keep light outward tension on it.
- Gently brace your core so your ribs stay down (avoid flaring up).
- Press through your heels/midfoot and lift your hips until your body forms a straight line from shoulders to knees.
- Pause briefly at the top and squeeze your glutes (not your low back).
- Lower with control and keep band tension the whole time.
- Repeat for your target reps.
Muscles worked:
Gluteus maximus (primary), gluteus medius/minimus (hip stability), hamstrings (assist), and core muscles for trunk control.
Trainer Tip:
If you feel your hamstrings cramp, walk your feet a little closer to your hips, keep your toes relaxed, and focus on a smooth glute squeeze at the top—without pushing your ribs up.
Benefits of the Banded Glute Bridge Exercise
Done consistently with good form, banded glute bridges may help you:
- Build stronger glutes and improve hip extension strength
- Improve hip control and knee tracking awareness (useful carryover for squats, lunges, and step-ups)
- Train your core and hips to work together during a simple movement pattern
- Add challenge without heavy weights (helpful for home workouts)
Mayo Clinic includes the bridge as a core-strengthening move and describes the basic lift pattern (hips aligning with knees and shoulders) as a useful checkpoint when you’re learning the movement.
Who Should Do the Banded Glute Bridge (And Who Should Skip It)
Good choice if you want:
- Stronger glutes with minimal equipment
- Better knee tracking (avoid knees caving in)
- A beginner-friendly hip exercise for home workouts
Skip it or get guidance first if you have:
- Sharp or worsening back/hip/groin/knee pain
- Numbness, tingling, or symptoms down the leg
- A recent surgery/injury and you were told to avoid bridges
- Poor control even on an easy version (hips twist, ribs flare, pain increases)
What You Need to Do Banded Glute Bridges
Equipment:
- Loop mini band
- Non-slip floor or exercise mat
Band tips:
- Start light, progress only if form stays clean
- Place the band just above the knees (mid-thigh)
- Keep gentle outward pressure (don’t force knees wide)
Common Mistakes That Stop Glute Gains
1) Over-arching the low back at the top
If your ribs flare and your lower back takes over, you’ll feel it in your spine instead of your glutes. Keep your ribcage “stacked” over your pelvis and lift with your hips.
2) Losing band tension (knees collapsing inward)
The band only helps if you stay gently pressing out. Think: “knees track over the middle toes” rather than forcing a wide stance.
3) Feet too far away
Feet too far out often shifts effort into hamstrings. Aim for a position where, at the top, your shins are close to vertical.
4) Pushing through toes
Drive through heels/midfoot and keep your toes light. This helps bias the glutes.
5) Rushing reps
Slow down. A controlled lower and a brief squeeze at the top usually makes the exercise feel more “glute-heavy.”
How Many Reps and Sets Should You Do?
Use these simple starting ranges, then progress gradually:
- For learning form and glute activation: 2–3 sets of 8–12 reps, 1–2 second squeeze at the top
- For endurance: 2–3 sets of 12–20 reps
- For strength progression at home: 3–5 sets of 6–10 reps with a thicker band and a longer top pause
If your form breaks (knees cave, ribs flare, or you feel low-back strain), reduce band tension or reps.
Best Progressions and Variations
Easier options
- Bodyweight bridge (no band): master the movement first
- Mini band with lighter tension: keep perfect knee tracking
- Shorter range of motion: lift only as high as you can control
Harder options
- Longer pause at the top: 3–5 seconds per rep
- 1.5 reps: up → halfway down → up again → down (one rep)
- Single-leg banded bridge: higher demand, but only if your pelvis stays level
Research on elastic resistance suggests that band use and placement can change muscle activation and increase demand on the hip muscles; one commonly cited paper on this topic is indexed on PubMed.
When to Avoid the Banded Glute Bridge (Safety Notes)
Skip the exercise or get guidance from a qualified professional if you have:
- Sharp or worsening pain (especially in the low back, hip, or groin)
- Numbness, tingling, or symptoms traveling down the leg
- A recent surgery or injury where you’ve been told to avoid bridging
- Trouble controlling the movement even with regressions
A simple safety rule: if you can’t keep a steady brace and a controlled lift, regress the exercise until you can.
Frequently Asked Questions
Should the band go above or below the knees?
Most people place it just above the knees for a clear cue to press outward and maintain knee tracking. If you’re new, start there before experimenting with other placements.
Why do I feel banded glute bridges in my hamstrings instead of glutes?
Common causes are feet too far away, pushing through toes, or rushing the reps. Move feet slightly closer, drive through heels/midfoot, and add a 1–2 second glute squeeze at the top.
How tight should the band be?
Tight enough that you feel gentle resistance when pressing your knees out—but not so tight that your knees flare wide or your form breaks.
Are banded glute bridges good for beginners?
Yes, as long as you can keep a neutral spine and control the movement. Start with a light band (or no band) and build up.
Can I do banded glute bridges every day?
You can do them frequently if intensity is moderate and form stays clean. Many people do well with 2–4 sessions per week and adjust based on soreness and recovery.
What’s better: banded glute bridge or hip thrust?
Hip thrusts usually allow heavier loading and may be better for building strength at higher intensities, while banded glute bridges are excellent for home training, technique, and controlled glute work. Both can fit in a good program.
Conclusion
The banded glute bridge exercise is a simple, effective way to train your glutes and hip control with minimal equipment. Focus on a steady core brace, smooth reps, and consistent outward band tension—and progress by adding pauses, reps, or a stronger band as your form improves.
References
- Mayo Clinic – Core Strength Exercises (Includes Bridge Guidance)
- PubMed – Bishop et al. (2018) EMG of Glute Muscles With/Without Elastic Resistance
- NIH PubMed Central – Bishop et al. (2018) Full-Text EMG Study
- International Journal of Strength and Conditioning – Band-Resisted Abduction and Hip Exercise Muscle Activity