
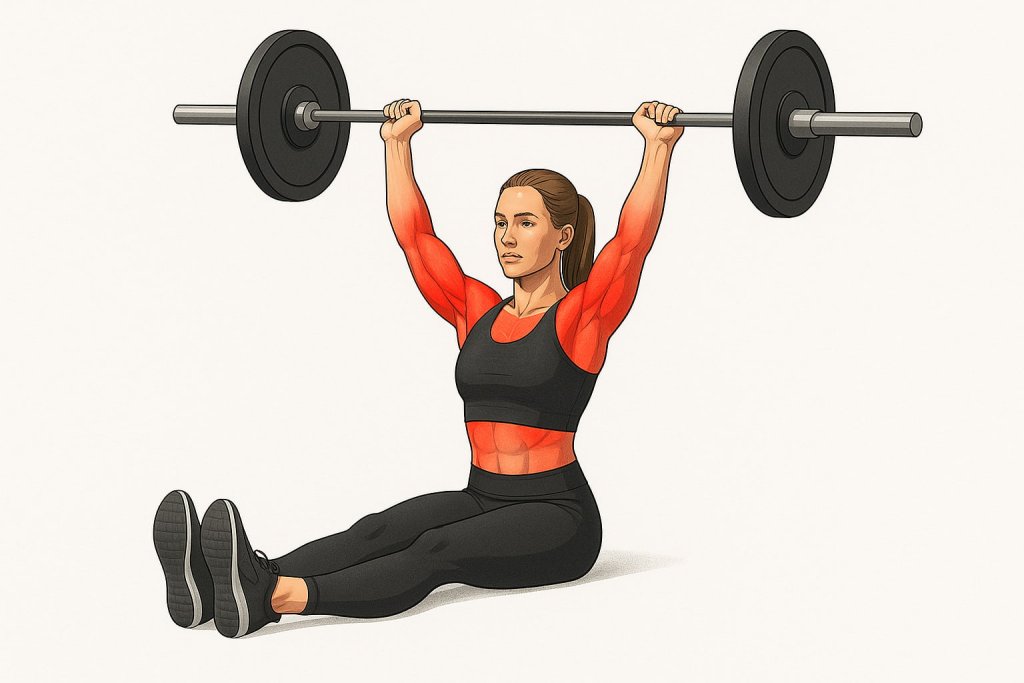
The Z Press is one of the most effective exercises for building powerful shoulders and a rock-solid core.
This seated overhead press variation forces you to rely solely on your upper body and core strength by eliminating any leg drive. The Z Press, named after legendary strongman Žydrūnas “Big Z” Savickas, is a go-to for athletes and lifters aiming to boost pressing power, improve posture, and enhance overall stability.
In this guide, we’ll cover the benefits, proper form, variations, and expert tips to help you master the Z Press for maximum results.
What Is the Z Press?
The Z Press is a seated overhead pressing exercise performed with your legs extended straight in front of you. By removing lower-body involvement, it places maximum demand on your shoulders, triceps, and core. It’s typically done with a barbell, but dumbbells, kettlebells, and even landmine setups are popular alternatives.
This unique setup challenges your hip mobility, hamstring flexibility, and spinal alignment while building strict upper-body pressing strength.
Key Benefits of the Z Press
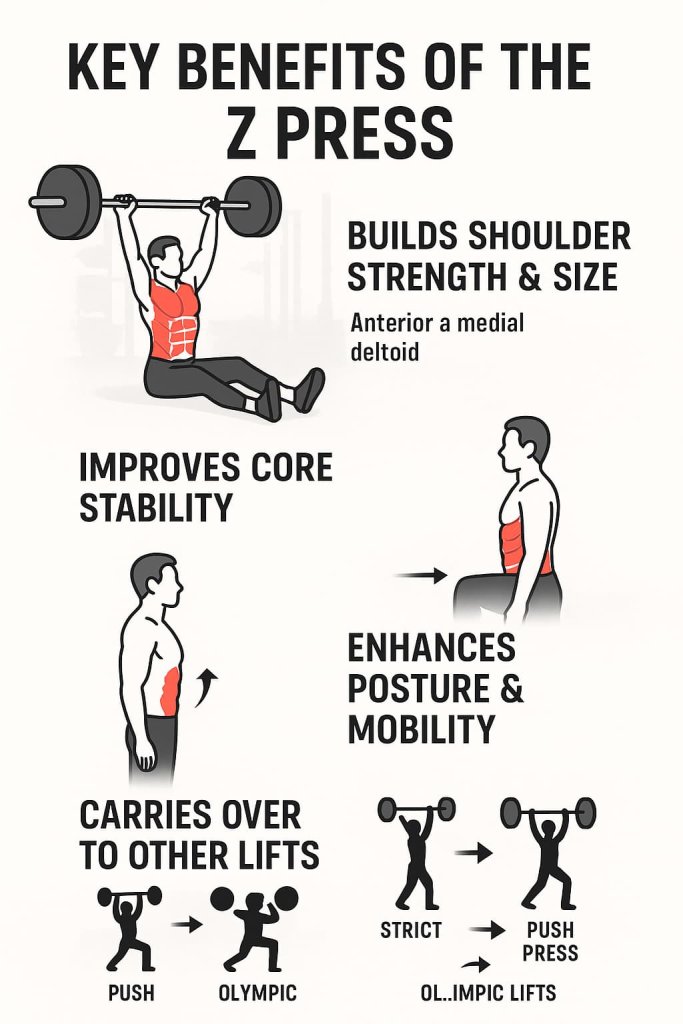
1. Builds Shoulder Strength & Size
- Targets the anterior and medial deltoids intensely.
- Trains pressing mechanics without relying on momentum.
- Promotes balanced muscle development across the upper body.
2. Improves Core Stability
- Your abs, obliques, and lower back work overtime to keep you upright.
- Enhances anti-extension and anti-rotation strength.
- Improves transfer to other lifts like overhead presses and jerks.
3. Enhances Posture & Mobility
- Encourages upright thoracic spine positioning.
- Improves hip flexor and hamstring flexibility over time.
- Strengthens stabilizers around the scapula for better shoulder health.
4. Carries Over to Other Lifts
- Helps improve strict press, push press, and jerk performance.
- Builds lockout strength for Olympic lifting and strongman events..
Muscles Worked
Primary:
- Anterior & medial deltoids
- Triceps brachii
- Trapezius
Secondary:
- Abdominals
- Obliques
- Erector spinae
- Hip flexors
How to Perform the Z Press (Step-by-Step)
- Setup
- Sit on the floor with legs extended straight.
- Place a loaded barbell on safety pins or a rack at shoulder height.
- Grip the bar slightly wider than shoulder-width.
- Brace
- Engage your core, squeeze glutes, and keep torso upright.
- Avoid leaning back or slouching.
- Press
- Inhale, then press the bar directly overhead.
- Lock elbows out at the top without flaring ribs.
- Lower
- Slowly return the bar to the starting position under control.
- Exhale and reset for the next rep.
Common Mistakes to Avoid
- Leaning Back Too Much – Risks lower back strain and defeats the purpose of strict pressing.
- Bouncing the Bar – Keep the movement controlled to maximize muscle activation.
- Poor Core Engagement – Weak bracing leads to instability and reduced strength gains.
- Lack of Mobility – Tight hamstrings or hips can cause slumping—use an elevated platform if needed.
Z Press Variations & Progressions
Below are popular variations and progressions to suit different goals, mobility levels, and training styles.
1. Dumbbell Z Press
Why It Works:
Using dumbbells instead of a barbell allows each arm to move independently, which improves unilateral strength and helps correct muscular imbalances. It also provides a greater range of motion, enabling deeper shoulder engagement.
How to Do It:
- Sit on the floor with legs straight, chest up, and core braced.
- Hold a dumbbell in each hand at shoulder height, palms facing forward or slightly in.
- Press both dumbbells overhead until arms are fully extended, keeping your ribcage down.
- Slowly lower to the starting position with control.
Pro Tip: If shoulder mobility is limited, start with a neutral grip (palms facing each other) to reduce strain.
2. Kettlebell Z Press
Why It Works:
The offset center of gravity of a kettlebell forces the rotator cuff and stabilizers to work harder to keep the weight balanced overhead. Great for improving shoulder stability and control.
How to Do It:
- Clean the kettlebell to a rack position with the handle angled diagonally.
- Keep your wrist neutral and elbow under the bell.
- Press overhead while keeping the bell stable—avoid letting it tilt or sway.
- Lower under control.
Pro Tip: Start light, as kettlebells demand more stability than dumbbells or barbells.
3. Unilateral Z Press
Why It Works:
Pressing with one arm at a time increases anti-rotation demands, forcing the core and obliques to prevent your torso from twisting. This also gives each arm focused workload.
How to Do It:
- Hold one dumbbell or kettlebell at shoulder height.
- Keep your non-working arm out to the side for balance.
- Press overhead without leaning or twisting.
- Complete all reps on one side, then switch.
Pro Tip: Keep your glutes engaged to maintain posture—leaning back is a sign of core fatigue.
4. Elevated Z Press
Why It Works:
Sitting on a small platform, weight plates, or yoga blocks reduces hamstring flexibility demands, making it easier for those with tight hips or hamstrings to maintain an upright torso.
How to Do It:
- Sit on the platform with legs extended and back tall.
- Perform the press using a barbell, dumbbells, or kettlebells.
- Focus on a smooth, vertical press path.
Pro Tip: This is a great entry-level variation if you can’t sit tall in the standard Z Press yet.
5. Landmine Z Press
Why It Works:
The angled pressing path of a landmine is easier on the shoulders and wrists, making it ideal for beginners, those recovering from injury, or lifters with limited mobility. It still challenges the core and shoulders but in a more joint-friendly way.
How to Do It:
- Sit facing the landmine with the barbell loaded on one end.
- Hold the barbell end with both hands or one hand for a unilateral press.
- Press the bar forward and upward along the landmine’s arc.
- Return with control.
Pro Tip: Use this variation as a strength-building regression before moving to vertical Z Presses.
Programming the Z Press
- Strength: 3–5 sets of 4–6 reps, heavier load.
- Hypertrophy: 3–4 sets of 8–12 reps, moderate load.
- Endurance/Stability: 2–3 sets of 12–15 reps, lighter load with pauses.
Safety & Mobility Tips
- Warm up shoulders, hips, and hamstrings before training.
- Keep the bar path straight to avoid shoulder impingement.
- If mobility limits form, use partial range and work toward full extension.
FAQs About the Z Press
1. Is the Z Press better than the overhead press?
Not necessarily better—just different. The Z Press removes leg drive, making it harder on the core and shoulders.
2. Can beginners do the Z Press?
Yes, but start with light dumbbells or a PVC pipe to learn form.
3. What if I have tight hamstrings?
Use an elevated seat or bend knees slightly to maintain posture.
4. How often should I do it?
1–2 times per week is plenty for most lifters.
5. Is the Z Press safe for my lower back?
Yes, if done with proper bracing—avoid leaning excessively.
6. Can I use the Smith machine?
Yes, it’s a good option for controlled movement and safety.
7. What’s a good substitute for the Z Press?
Pike push-ups, kneeling presses, and Arnold presses are good alternatives.
Conclusion
The Z Press is a powerhouse movement for building shoulder strength, enhancing core stability, and improving posture. By forcing strict form and eliminating lower-body assistance, it develops pressing power that carries over to virtually every other lift.