
Shin splint exercises are targeted movements that help reduce lower-leg pain, improve load tolerance, and support a safe return to running when paired with proper rest and training adjustments. Understanding how and when to use these exercises matters because shin splints—often called medial tibial stress syndrome (MTSS)—are commonly linked to overuse, sudden training increases, and limited lower-leg strength or control.
Most clinical guidance emphasizes a combined approach: temporary activity modification, gradual strengthening of the calves and shins, flexibility work, and a progressive return to impact. Reputable resources such as Mayo Clinic, NHS, and sports medicine organizations consistently recommend this strategy rather than relying on one quick fix.
Below is a practical, evidence-aligned list of the 10 best shin splint exercises, followed by safety tips, FAQs, and references.
What Are Shin Splints?
Shin splints usually describe exercise-related pain along the inner or front edge of the shin bone (tibia). The discomfort often appears during or after running and can worsen when training volume or intensity increases too quickly.
Common contributors include:
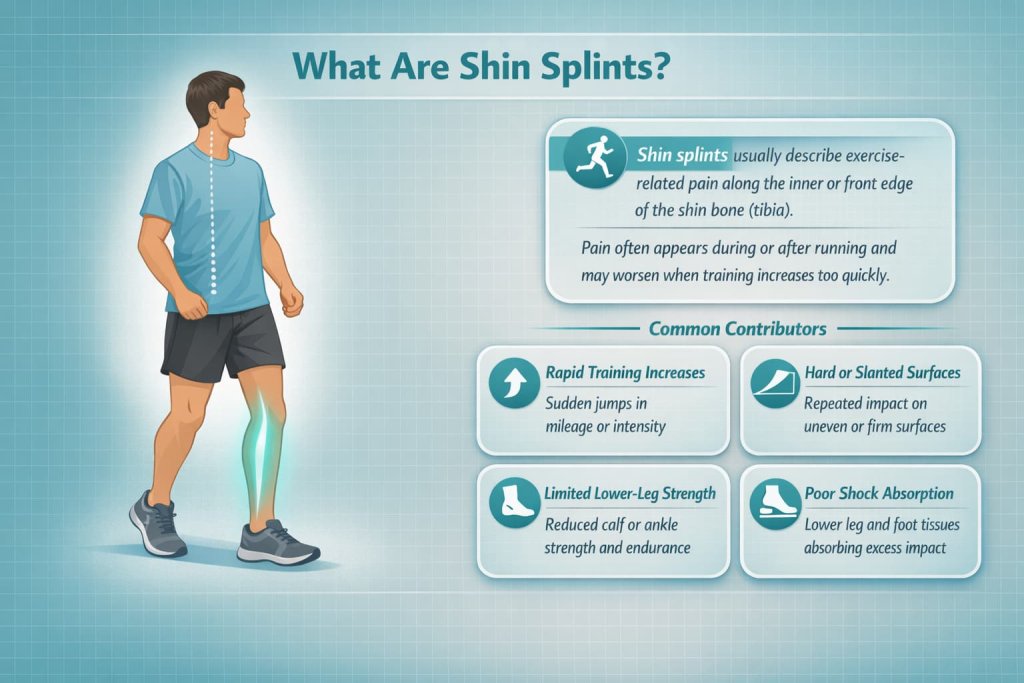
- Rapid mileage or intensity jumps
- Running on hard or slanted surfaces
- Limited calf or ankle strength
- Poor shock absorption from the lower leg and foot
Why Shin Splint Exercises Important
Well-chosen shin splint exercises may help:
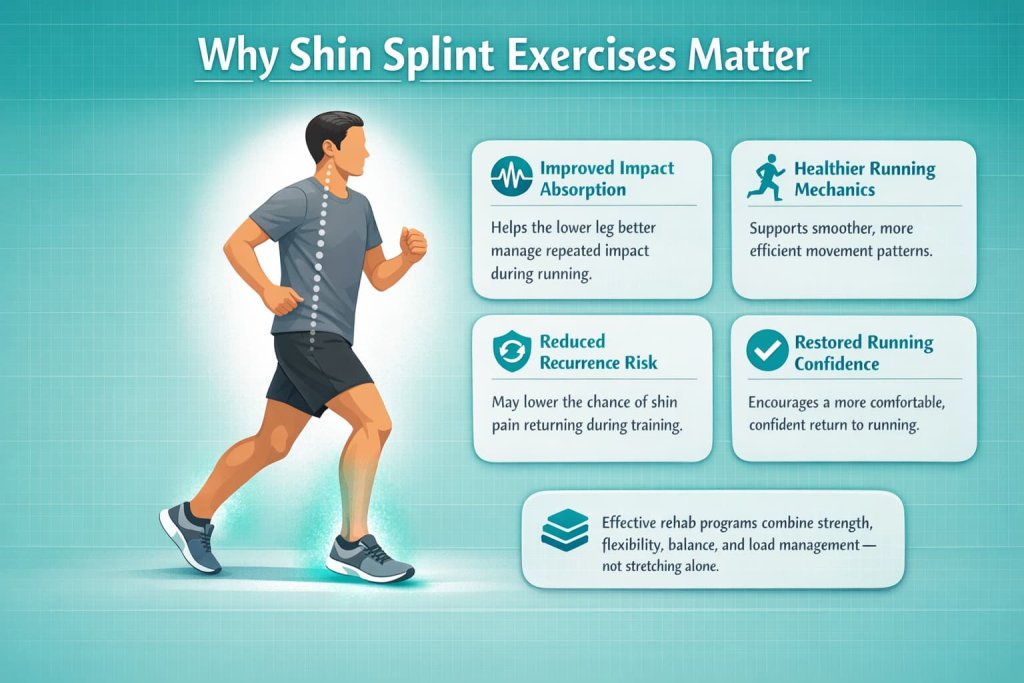
- Improve the lower leg’s ability to absorb impact
- Support healthier running mechanics
- Reduce recurrence risk when returning to training
- Restore confidence in running without sharp shin pain
Most rehab programs combine strength, flexibility, balance, and load management rather than focusing on stretching alone.
10 Best Shin Splint Exercises
These shin splint exercises focus on improving lower-leg strength, flexibility, and impact tolerance to support recovery. When combined with proper rest and gradual training progression, they may help you return to running more safely and confidently.
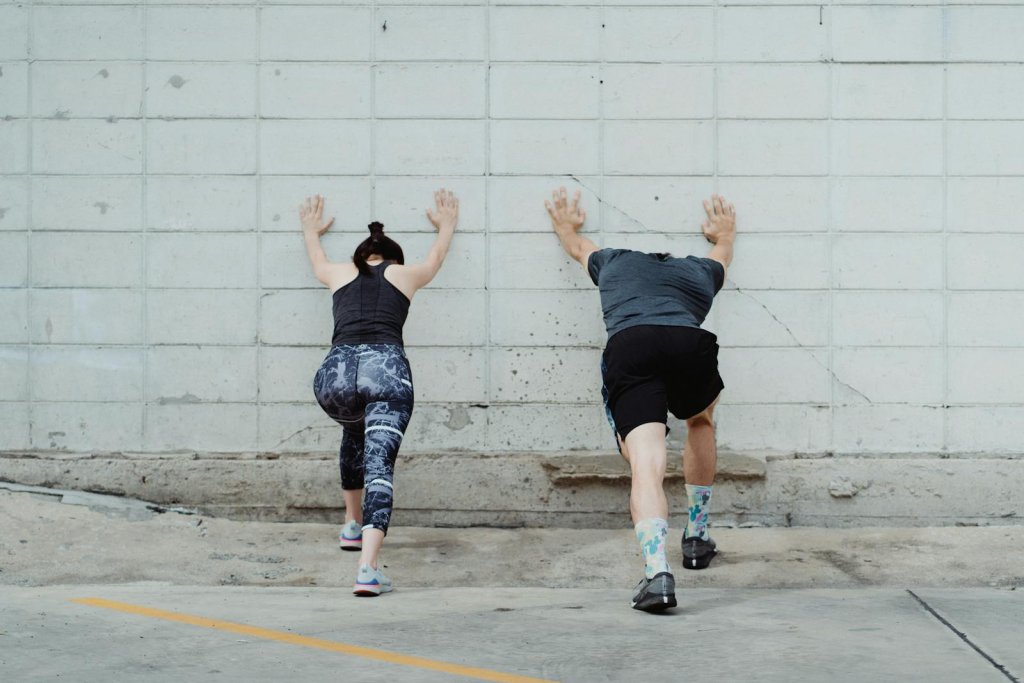
1. Standing Calf Stretch
Why it works:
Tight calf muscles can increase traction forces along the shin bone during running. This stretch helps maintain calf flexibility, which may reduce excessive tension transferred to the tibia with repeated impact.
Muscles worked:
Gastrocnemius (primary), with secondary involvement of the Achilles tendon
How to do it:
- Stand facing a wall and place both hands on it for support
- Step one foot back while keeping the heel flat on the floor
- Keep the back knee straight and chest upright
- Gently lean forward until you feel a stretch in the back calf
- Hold, then switch sides
Trainer Tip:
Avoid bouncing or forcing the heel down—gentle, sustained tension is more effective and safer for irritated shins.
2. Seated Soleus Stretch
Why it works:
The soleus plays a key role in shock absorption during mid-stance while running. Improving its flexibility may help distribute impact forces more evenly through the lower leg.
Muscles worked:
Soleus (deep calf muscle)
How to do it:
- Sit upright on a chair with both feet flat on the floor
- Step one foot slightly back under the chair
- Keep the heel down and bend the knee forward
- Lean slightly forward until a stretch is felt low in the calf
- Hold, then switch sides
Trainer Tip:
This stretch feels subtler than a standing calf stretch—focus on controlled positioning rather than intensity.
3. Eccentric Calf Raises
Why it works:
Eccentric strengthening helps improve the calf’s ability to absorb and control load during landing and push-off, which is often emphasized in shin splint rehabilitation programs.
Muscles worked:
Gastrocnemius, soleus, Achilles tendon complex
How to do it:
- Stand on both feet and rise onto your toes
- Shift your weight onto one leg
- Slowly lower the heel back to the floor over 3–5 seconds
- Return to the start and repeat before switching sides
Trainer Tip:
The lowering phase is the priority—move slowly and stop if sharp pain appears.
4. Tibialis Anterior Toe Raises
Why it works:
The tibialis anterior controls foot lowering after heel strike. Strengthening it can reduce excessive strain on the front of the shin during running.
Muscles worked:
Tibialis anterior, ankle dorsiflexors
How to do it:
- Stand tall with feet hip-width apart
- Lift your toes while keeping heels on the ground
- Pause briefly at the top
- Lower toes back down with control
- Repeat for smooth, controlled reps
Trainer Tip:
Use a wall or chair for balance and focus on slow, deliberate movement rather than speed.
5. Resistance Band Dorsiflexion
Why it works:
This exercise builds endurance and control in the shin muscles, helping them better manage repetitive impact during running.
Muscles worked:
Tibialis anterior, ankle stabilizers
How to do it:
- Sit with legs extended
- Loop a resistance band around the forefoot
- Anchor the band securely
- Pull the toes toward the shin against the band
- Slowly return to the starting position
Trainer Tip:
Choose light resistance first—fatigue, not strain, is the goal.
6. Heel Walks
Why it works:
Heel walking challenges the anterior lower-leg muscles in a functional, low-impact manner that mimics the demands of gait control.
Muscles worked:
Tibialis anterior, ankle dorsiflexors
How to do it:
- Stand tall and lift the forefoot so only heels touch the floor
- Walk forward slowly for a short distance
- Keep steps controlled and posture upright
- Rest, then repeat
Trainer Tip:
Short distances are sufficient—quality control matters more than duration.
7. Single-Leg Balance
Why it works:
Improved balance enhances ankle and foot stability, which can help distribute forces more evenly through the shin during each step.
Muscles worked:
Ankle stabilizers, foot intrinsics, lower-leg muscles
How to do it:
- Stand on one leg with the other knee slightly bent
- Keep hips level and chest upright
- Hold steady without gripping the toes
- Switch sides after each set
Trainer Tip:
Progress by closing your eyes or standing on a softer surface once pain-free balance is established.
8. Short-Foot Exercise
Why it works:
Activating intrinsic foot muscles supports arch control and load sharing, which may reduce stress transmitted upward to the shin.
Muscles worked:
Intrinsic foot muscles, arch stabilizers
How to do it:
- Stand barefoot with weight evenly distributed
- Gently draw the ball of the foot toward the heel
- Keep toes relaxed and flat
- Hold briefly, then release
Trainer Tip:
This is a subtle movement—avoid curling the toes or gripping the floor.
9. Hip Abductor Strengthening
Why it works:
Hip strength influences lower-limb alignment. Better control at the hips may help limit excessive tibial stress during running.
Muscles worked:
Gluteus medius, gluteus minimus, hip stabilizers
How to do it:
- Lie on your side with legs stacked
- Lift the top leg upward while keeping hips stable
- Lower with control
- Repeat before switching sides
Trainer Tip:
Slow reps with proper alignment are more effective than high volume.
10. Controlled Walk-Run Progression
Why it works:
Gradual exposure to impact allows bone and soft tissue to adapt safely, supporting a more reliable return to running.
Muscles worked:
Lower-leg muscles, hips, and overall running musculature
How to do it:
- Begin with short walk-run intervals
- Keep running segments easy and controlled
- Increase distance before speed or intensity
- Monitor symptoms between sessions
Trainer Tip:
If pain worsens during or after sessions, scale back rather than pushing forward.
When to Start Shin Splint Exercises
You should begin shin splint exercises only after acute pain has started to settle, not at the peak of symptoms. Most guidance recommends starting when everyday activities like walking are comfortable and pain is no longer sharp or worsening.
In general, it may be appropriate to start exercises when:
- Pain during daily walking is minimal or improving
- Shin discomfort feels diffuse rather than sharply localized
- Symptoms do not worsen later the same day or the next morning
Early rehab should focus on low-load mobility and gentle strengthening, not impact. Starting too aggressively or too soon can increase stress on the tibia and delay recovery.
How to Return to Running Safely After Shin Splints
A safe return to running should be gradual and structured, allowing the lower leg time to adapt to impact again. Most sports medicine guidance recommends using a walk–run progression rather than jumping straight back into continuous running.
Key principles include:
- Begin with short run intervals separated by walking
- Increase total distance before adding speed or hills
- Allow at least 24–48 hours between run sessions early on
- Monitor next-day symptoms; pain should not steadily worsen
If shin pain increases during a session or lingers into the following day, reduce volume or return to the previous stage before progressing again.
When to See a Healthcare Professional
While many cases of shin splints improve with proper load management and exercise, some symptoms require medical evaluation to rule out more serious conditions.
Seek assessment from a qualified healthcare professional if:
- Pain is localized to one small, specific spot on the shin
- Pain occurs at rest or during the night
- Swelling, redness, numbness, or weakness is present
- Symptoms do not improve after several weeks of modified activity
- Pain worsens despite reduced training and rehab exercises
These signs may indicate a stress reaction, stress fracture, or another condition that needs individualized care.
How Often Should You Do Shin Splint Exercises?
Most rehab guidelines suggest:
- Strength exercises: 2–3 times per week
- Mobility/stretching: Daily or after activity
- Running progression: Only when pain is improving and does not worsen day-to-day
Organizations like American Academy of Orthopaedic Surgeons emphasize gradual progression and symptom monitoring.
Common Mistakes to Avoid
- Pushing through sharp or worsening pain
- Increasing mileage and speed at the same time
- Relying on stretching alone without strengthening
- Ignoring footwear wear or surface changes
Who Should Be Careful With Shin Splint Exercises?
You should seek professional guidance if:
- Pain is focal to one small spot on the bone
- Pain occurs at rest or at night
- Swelling, numbness, or weakness develops
- Symptoms fail to improve after several weeks
Both NHS and Mayo Clinic recommend medical evaluation to rule out stress fractures when symptoms persist or worsen.
FAQs About Shin Splint Exercises
1. Can shin splint exercises cure shin splints?
Exercises may help support recovery, but most guidance recommends combining them with rest, load management, and gradual return to running.
2. Should I stop running completely?
Many runners benefit from temporary reduction or modification rather than complete rest, depending on pain severity.
3. How long does recovery usually take?
Mild cases may improve within a few weeks, while persistent symptoms can take longer if training errors continue.
4. Are shin splints the same as stress fractures?
No. Shin splints involve diffuse pain, while stress fractures are typically more localized and require medical diagnosis.
5. Do shoes matter for shin splints?
Yes. Worn-out or inappropriate footwear may contribute to excessive lower-leg loading.
6. Can beginners do these exercises?
Yes, when performed gradually and pain-free.
Conclusion
Shin splint exercises work best when they are part of a bigger plan—one that respects recovery, strengthens the lower leg, and reintroduces running progressively. By addressing both training load and movement capacity, you can reduce setbacks and return to running with more confidence.
If pain persists or worsens, consult a qualified healthcare or sports medicine professional before continuing.