
Plyometric exercises for beginners can help you build power, coordination, and fitness when you start with low-impact drills, focus on soft landings, and progress gradually.

Understanding how to use them the right way matters because plyometrics place more stress on your muscles, tendons, and joints than regular bodyweight exercise, so good technique and smart progression come first. According to the National Strength and Conditioning Association and ACE, beginner plyometric training should emphasize landing control, low training volume, and simple movement patterns before higher or faster jumps.
What are plyometric exercises?
Plyometric exercises are fast, explosive movements that use a quick muscle stretch followed by a strong contraction. This is often called the stretch-shortening cycle. In simple terms, your body loads and unloads force quickly, like when you hop, jump, or bound. That is why plyometrics are commonly used to improve lower-body power, jumping ability, and athletic movement.
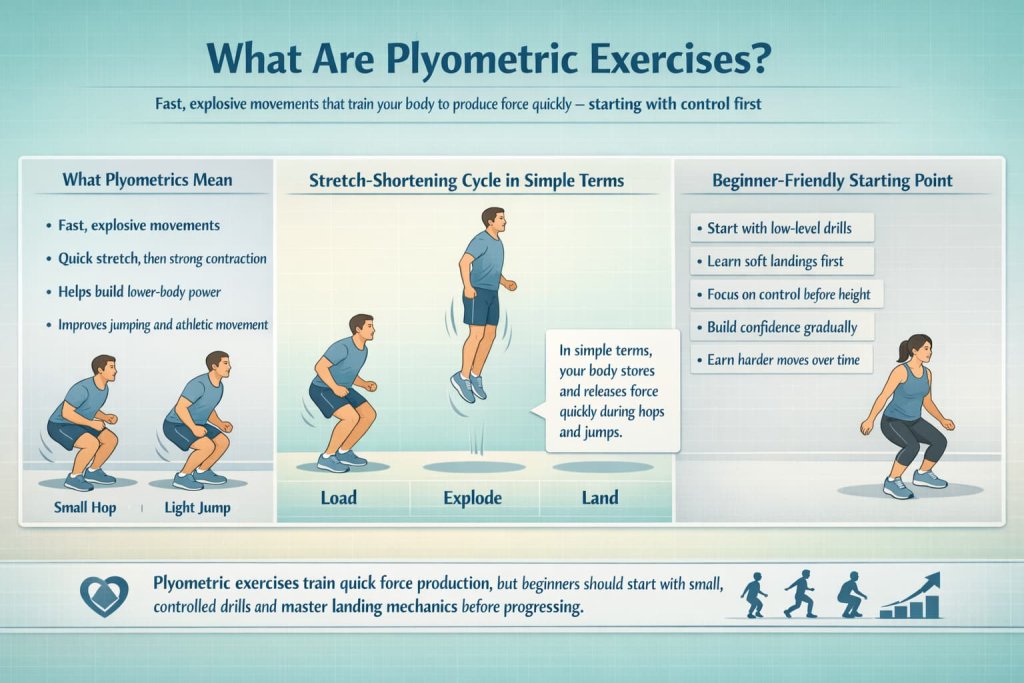
For beginners, though, plyometrics should not mean max-effort box jumps right away. A safer starting point is controlled, low-level jumping and hopping drills that teach you how to absorb force well before you try to produce more of it. ACE highlights exactly that idea in its plyo progression guidance: earn the harder exercises by showing good control on the easier ones first.
12 best plyometric exercises for beginners
Build power, coordination, and confidence with these beginner-friendly plyometric exercises designed to improve fitness without jumping into advanced drills too soon. Each move focuses on simple technique, soft landings, and steady progression so you can train safely and effectively.
1. Ankle pogo hops
How to do it:
- Stand tall with feet hip-width apart.
- Keep your knees slightly soft.
- Make quick, small hops off the balls of your feet.
- Land quietly and keep the movement springy.
- Start with 10 to 20 seconds.
Why it works:
This teaches reactive ankle stiffness and rhythm without asking for a deep jump. It is one of the simplest ways to introduce plyometric timing.
Muscles worked:
Calves, ankles, feet, and lower leg stabilizers.
Trainer Tip:
Keep the hops low. Think “quick and quiet,” not “high and hard.”
2. Snap downs
How to do it:
- Stand tall with arms overhead.
- Quickly pull your arms down as you drop into a quarter squat.
- Land with feet flat, chest up, and knees tracking over toes.
- Pause and reset between reps.
- Do 6 to 8 reps.
Why it works:
Snap downs teach landing mechanics before bigger jumping drills. That is valuable because beginners need to learn how to absorb force well.
Muscles worked:
Glutes, quads, hamstrings, calves, and core.
Trainer Tip:
Make the landing quiet and stable. If your knees cave inward, slow down and shorten the range.
3. Squat jumps
How to do it:
- Stand with feet about shoulder-width apart.
- Lower into a small squat.
- Jump straight up with control.
- Land softly and return to the start.
- Do 5 to 8 reps.
Why it works:
This is a classic beginner plyometric exercise that builds jumping confidence and lower-body power with a simple vertical pattern.
Muscles worked:
Quads, glutes, hamstrings, calves, and core.
Trainer Tip:
Do not chase maximum height at first. Clean takeoff and clean landing matter more.
4. Line hops forward and back
How to do it:
- Imagine a line on the floor.
- Hop forward over the line, then back again.
- Keep the hops small and controlled.
- Stay light on your feet.
- Work for 10 to 20 seconds.
Why it works:
Line hops add a gentle change-of-direction demand without requiring much space or height.
Muscles worked:
Calves, quads, glutes, and ankle stabilizers.
Trainer Tip:
Start slowly. Speed should only increase after you can stay balanced.
5. Side-to-side line hops
How to do it:
- Stand beside an imaginary line.
- Hop lightly from one side to the other.
- Keep your torso tall and your landing quiet.
- Use small ranges first.
- Perform 10 to 20 seconds.
Why it works:
This introduces lateral force control, which many beginners lack if they only train straight up and down.
Muscles worked:
Glutes, calves, quads, adductors, and lateral hip stabilizers.
Trainer Tip:
Do not let the knees collapse inward as you land.
6. Skater step jumps
How to do it:
- Shift your weight onto one leg.
- Push sideways into a small jump to the other side.
- Land under control on the opposite leg or with a light toe tap for support.
- Repeat back and forth.
- Do 5 to 8 reps per side.
Why it works:
This drill improves lateral coordination and teaches you to control side-to-side force.
Muscles worked:
Glute medius, glutes, quads, calves, and core.
Trainer Tip:
Begin with a step-and-hop version instead of a big leap.
7. Jumping jacks with soft landings
How to do it:
- Stand tall with feet together.
- Jump your feet out while raising your arms.
- Jump back to the starting position.
- Stay light and controlled.
- Do 10 to 20 reps.
Why it works:
This is a very accessible entry point to repeated low-level plyometric movement for many beginners.
Muscles worked:
Calves, quads, glutes, shoulders, and core.
Trainer Tip:
Keep the contact light. Do not let this turn into heavy stomping.
8. Box step-off to stick landing
How to do it:
- Stand on a very low box or step.
- Step off, not jump off.
- Land on both feet and hold the landing for 2 to 3 seconds.
- Reset and repeat.
- Do 4 to 6 reps.
Why it works:
This drill focuses almost entirely on landing skill, which is exactly what many beginners need most.
Muscles worked:
Glutes, quads, hamstrings, calves, and core.
Trainer Tip:
Use a very low surface. The goal is landing quality, not height.
9. Tuck jump prep
How to do it:
- Stand with feet hip-width apart.
- Perform a small jump and bring one or both knees slightly upward.
- Land softly in a stable quarter squat.
- Reset between reps.
- Do 4 to 6 reps.
Why it works:
This introduces a slightly faster, more dynamic jump while still keeping the effort controlled for beginners.
Muscles worked:
Hip flexors, quads, glutes, calves, and core.
Trainer Tip:
Keep this small at first. It is a prep drill, not a max tuck jump.
10. Low box jump
How to do it:
- Stand in front of a low, stable box.
- Lower into a shallow squat.
- Jump onto the box with both feet.
- Stand tall on top, then step down carefully.
- Perform 4 to 6 reps.
Why it works:
A low box jump can be a good beginner progression because landing on an elevated surface may reduce some landing impact compared with jumping up and landing back on the floor.
Muscles worked:
Glutes, quads, hamstrings, calves, and core.
Trainer Tip:
Use only a low box you feel fully confident with. Never rush box jumps.
11. Split squat jump prep
How to do it:
- Start in a split stance with one foot forward and one foot back.
- Lower into a small split squat.
- Perform a light jump or quick switch with minimal height.
- Land softly and reset your balance.
- Repeat for 4 to 6 reps per side.
Why it works:
This helps beginners build single-leg control, coordination, and lower-body power in a more controlled split stance.
Muscles worked:
Quads, glutes, hamstrings, calves, and core.
Trainer Tip:
Keep the jump small at first. Focus on balance and smooth landings before adding speed.
12. Lateral step hop
How to do it:
- Stand next to a low step or small marker.
- Step sideways and add a small hop over or onto the space.
- Land softly with knees slightly bent.
- Step back and repeat on the other side.
- Perform 5 to 8 reps per side.
Why it works:
This introduces lateral movement in a simple way and helps improve balance, coordination, and side-to-side control.
Muscles worked:
Glutes, quads, calves, adductors, and lateral hip stabilizers.
Trainer Tip:
Stay low and controlled. Do not rush the hop if your landing feels unstable.
Why beginners should start with low-impact plyometric exercises
Low-impact beginner drills help you learn the two skills that matter most in plyometrics: producing force and landing safely. The National Strength and Conditioning Association notes that proper landing mechanics are central to plyometric training, and ACE recommends using progressions that reduce impact and improve movement quality before intensity goes up.
That matters because beginners usually need time to build:
- ankle stiffness and control
- hip and knee alignment
- balance and coordination
- confidence with repeated jumping
- tolerance for impact
Starting with smaller jumps and shorter ground contacts can make the training more manageable while still helping you improve power, rhythm, and general fitness. Research reviews indexed in PubMed also show that plyometric training can improve power, jump performance, sprint ability, and lower-body strength, but most of that evidence comes from structured programs rather than random high-volume jumping.
Before you start plyometric exercises for beginners
A short warm-up helps prepare your body for jumping. Mayo Clinic notes that warming up raises body temperature and blood flow, which can help reduce muscle soreness and lessen injury risk.
Try 5 to 10 minutes of:
- brisk marching or light jogging in place
- ankle circles
- bodyweight squats
- hip hinges
- calf raises
- easy rehearsal hops without full effort
It is also smart to do plyometrics early in the workout, after your dynamic warm-up and before you get tired. ACE supports performing plyometric drills while you are fresh rather than fatigued.
How often should beginners do plyometric exercises?
For most beginners, 2 to 3 sessions per week is a practical starting point, especially when sessions are short and mixed into a broader program. Research summaries indexed in PubMed commonly describe short-term plyometric programs using around 2 to 3 weekly sessions for several weeks, rather than daily jumping.
A simple starting format is:
- 2 sessions per week
- 3 to 5 exercises per session
- 2 to 3 sets each
- 4 to 8 reps for jumps, or 10 to 20 seconds for light hops
- full rest between sets so quality stays high
Plyometric training is about quality, not exhaustion. Once your landings get loud, your knees drift, or your jump height drops a lot, the useful work is usually over.
Common mistakes beginners should avoid
Doing too much too soon
One of the fastest ways to make plyometrics feel rough on the body is to pile on volume before you have good movement control. Progression matters more than intensity at the start, which is a point ACE emphasizes in beginner plyometric progressions.
Landing loudly
A heavy landing often means you are not absorbing force well. Beginners should aim for quiet, controlled contacts. ACE and the National Strength and Conditioning Association both emphasize landing quality as a key teaching point.
Using tired legs
Fatigue changes mechanics. That is why plyometric drills are generally better placed early in a workout after your warm-up. ACE supports this sequencing in its training guidance.
Skipping strength basics
Plyometrics work better when you also build general strength. Basic squats, split squats, glute bridges, calf raises, and step-ups can make jumping drills safer and more productive over time. This is consistent with broader conditioning principles described by the National Strength and Conditioning Association.
Benefits of plyometric exercises for beginners
When programmed well, beginner plyometric training may help improve several areas of fitness.
Better lower-body power
Plyometrics are widely used to develop explosive strength in the legs, especially for movements like jumping, sprinting, and quick changes of direction. The National Strength and Conditioning Association explains this clearly in its plyometric training guidance.
Improved coordination and body control
Because these drills require timing, balance, and landing awareness, they can help you move more efficiently, not just more forcefully. This is one reason ACE includes progression and control as key parts of beginner plyometric work.
More athletic movement for daily training
Even if you are not an athlete, beginner plyometrics can make other forms of exercise feel better by improving rhythm, stiffness control, and lower-body responsiveness. Research indexed in PubMed suggests plyometric training may support broader physical performance outcomes beyond jumping alone.
A useful addition to a balanced routine
The CDC recommends at least 150 minutes of moderate-intensity activity per week, or 75 minutes of vigorous activity, plus muscle-strengthening work on at least 2 days weekly. Plyometric work fits best as part of that bigger routine, not as your only form of training.
Who should avoid or modify plyometric exercises for beginners?
Plyometric drills are not the best starting point for everyone. You should pause and get professional advice first if you have:
- recent lower-body injury
- significant joint pain
- poor balance or frequent falls
- severe deconditioning
- uncontrolled medical issues that affect exercise safety
- pain that worsens during jumping
This is especially important because beginner plyometrics still involve repeated impact, even when the drills are simple. A lower-impact strength and mobility program may be a better entry point first.
Beginner plyometric workout example
Here is a simple sample session:
Warm-up
- 2 minutes brisk march
- 10 bodyweight squats
- 10 calf raises
- 10 ankle rocks per side
- 2 easy practice rounds of line hops
Main workout
- Ankle pogo hops: 2 sets of 15 seconds
- Snap downs: 2 sets of 6 reps
- Squat jumps: 2 sets of 5 reps
- Side-to-side line hops: 2 sets of 15 seconds
- Box step-off to stick landing: 2 sets of 4 reps
Cool-down
- easy walking
- calf stretch
- quad stretch
- hip flexor stretch
Mayo Clinic notes that stretching is generally best when muscles are already warm, which is why cool-down stretching tends to make more sense than long static stretches before explosive work.
Do plyometric exercises for beginners actually work?
They can. Reviews and meta-analyses indexed in PubMed show that plyometric training can improve jumping, sprint performance, lower-body strength, and other power-related outcomes in healthy adults and athletes. At the same time, those benefits depend on structured programming and realistic progressions, not random all-out jumping.
For true beginners, the most valuable early result is often not a huge jump increase. It is better landing control, better movement confidence, and better tolerance for faster, more athletic training.
FAQs about plyometric exercises for beginners
Are plyometric exercises safe for beginners?
They can be safe for many beginners when you start with low-impact drills, keep the volume low, and focus on soft landings. They are less appropriate when pain, recent injury, or poor balance is already present. ACE makes this gradual progression especially clear in its beginner guidance.
How many plyometric exercises should a beginner do?
A good starting point is 3 to 5 exercises in one session, with 2 to 3 sets each. More is not automatically better.
Can I do beginner plyometrics at home?
Yes, many beginner drills like line hops, pogo hops, squat jumps, and skater step jumps can be done at home if you have enough space and a stable surface.
Should beginners do plyometrics every day?
Usually no. Most beginners do better with 2 to 3 sessions weekly so they can recover and keep quality high. PubMed-indexed research on plyometric programming supports this more moderate weekly structure.
What surface is best for beginner plyometric exercises?
A flat, stable surface with a bit of give is usually more comfortable than a very hard, slippery floor. The key is traction and control.
Do I need to be strong before starting plyometrics?
You do not need to be advanced, but basic strength helps. If bodyweight squats, step-ups, and controlled landings already feel difficult, build those first.
What is the easiest plyometric exercise for beginners?
Ankle pogo hops, snap downs, and simple line hops are often among the easiest starting points because they keep impact and complexity lower.
Conclusion
Plyometric exercises for beginners can be a smart way to build power, fitness, and coordination, but the best results come from starting simple. Focus on low-impact drills, quiet landings, short sessions, and gradual progress. Build the basics first, stay consistent, and let technique lead the way.
If you are creating a beginner routine, choose just a few drills from this list, practice them twice a week, and progress only when your landings stay smooth and controlled.