
A kettlebell halo is an exercise in which you slowly circle a light kettlebell around your head while keeping your head and torso steady. It provides practice in controlled shoulder movement and can fit into an upper-body warm-up.

Good form matters because the weight travels close to your head. Start with a manageable load, maintain a secure grip, and stay within a comfortable range. These seven tips will help you focus on the movement without rushing or forcing your shoulders.
What Is a Kettlebell Halo?
A kettlebell halo involves holding one kettlebell with both hands and guiding it around your head. You usually grip the horns, which are the sides of the handle.
In the standing version, the bell travels from your chest, over one shoulder, behind your head, and around the other shoulder.
The basic goal is to move your arms smoothly while keeping the rest of your body steady.
Kettlebell Halo Muscles Worked
The exercise involves several areas working together. Harvard Health Publishing, in guidance published August, 2025, identifies the shoulders, upper back, forearms, and core.
| Muscle group or area | Role during the movement |
|---|---|
| Deltoids and other shoulder muscles | Help guide and support the arms |
| Trapezius and rhomboids in the upper back | Participate in controlling the shoulder region |
| Forearms and hands | Maintain your grip on the handle |
| Core muscles | Help keep your torso steady as the load changes position |
These roles describe muscle involvement. They do not establish which muscle works hardest or how much muscle growth the exercise produces.
Kettlebell Halo Benefits: What to Expect
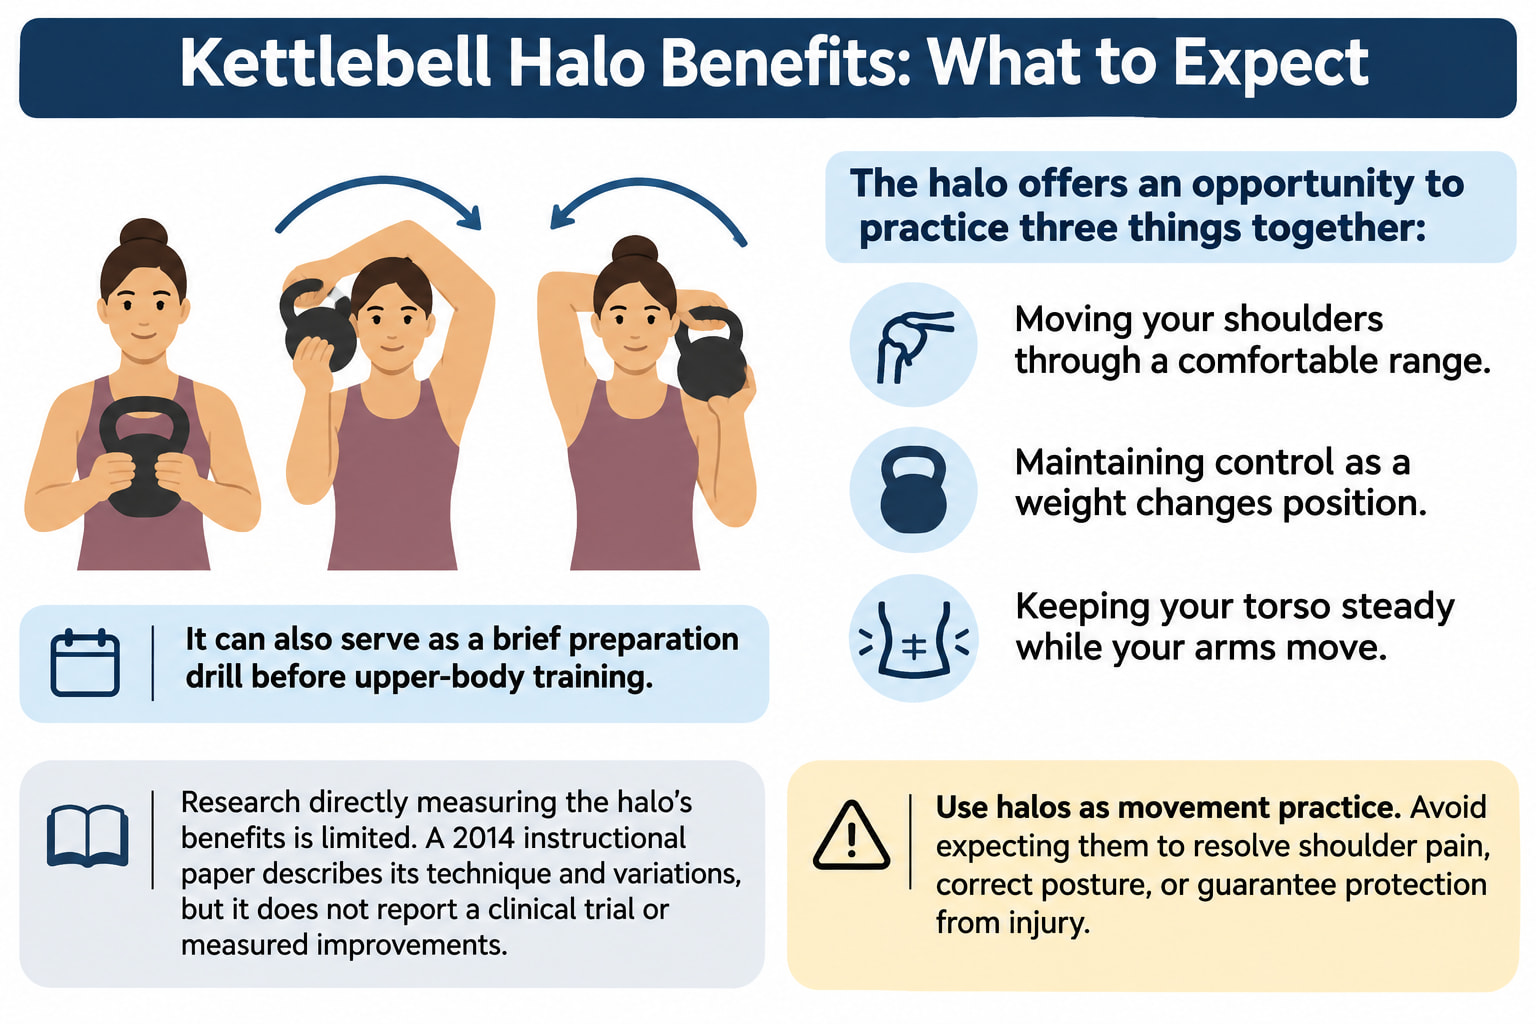
The halo offers an opportunity to practice three things together:
- Moving your shoulders through a comfortable range.
- Maintaining control as a weight changes position.
- Keeping your torso steady while your arms move.
It can also serve as a brief preparation drill before upper-body training.
Research directly measuring the halo’s benefits is limited. A 2014 instructional paper describes its technique and variations, but it does not report a clinical trial or measured improvements.
Use halos as movement practice. Avoid expecting them to resolve shoulder pain, correct posture, or guarantee protection from injury.
How to Do a Kettlebell Halo
Begin with the standing version and a light kettlebell.
- Set your stance. Stand with your feet approximately shoulder-width apart.
- Secure your grip. Hold the horns with both hands, wrapping your fingers around the handle.
- Bring the bell to your chest. In the commonly taught inverted starting position, its flat base faces upward.
- Stand tall. Keep your head comfortably upright and engage your trunk enough to maintain your position.
- Begin the circle. Guide the bell beside one side of your head, allowing your elbows to bend and move.
- Pass behind your head. Keep enough clearance to avoid contact. Let the bell change orientation naturally with your arms.
- Return to the front. Continue around the other side until the bell reaches your chest.
- Reset and repeat. Pause briefly if needed, then perform repetitions in both directions.
One complete circle back to the starting position counts as one repetition. You can finish a few repetitions in one direction before switching, or alternate after each circle.
7 Kettlebell Halo Form Tips for Better Shoulder Control
1. Start With a Light Kettlebell
Choose a weight that lets you guide the entire circle without rushing, leaning, or struggling to hold the handle.
A practical check is whether you can return to the chest and pause comfortably with a secure grip. If you need momentum to finish the repetition, reduce the load.
Your first priority is learning a repeatable movement. Increasing weight can wait until the exercise feels consistently controlled.
2. Hold the Horns With Neutral Wrists
Keep your wrists generally aligned with your forearms. Avoid allowing the weight to fold them sharply forward, backward, or sideways.
Neutral wrists do not mean freezing the kettlebell in one orientation. The bell tilts as it travels around your head, and your arms move with it.
Maintain a secure grip throughout the circle. If the handle feels awkward or your grip becomes unreliable, stop and reset before continuing.
3. Keep Your Torso Steady
Stand tall with your ribs comfortably positioned over your pelvis. Engage your abdomen enough to limit unnecessary movement, and breathe naturally.
Watch for leaning backward as the bell passes behind your head or bending sideways to make room. These changes can make the circle appear easier while shifting movement away from the intended pattern.
If you cannot stay steady, reassess the weight and the path you are trying to use.
4. Guide the Bell Close to Your Head
Use a compact path while leaving enough space to avoid touching your head or neck.
Let your bent elbows change position as they guide the bell. They may rise as it moves behind you; you do not need to keep them pinned to your sides.
Avoid sending the kettlebell into a wide circle. Keep the movement deliberate and comfortable rather than trying to reach as far as possible.
5. Keep Your Head and Neck Still
Look generally forward and keep your head comfortably upright.
Notice whether you duck, jut your chin forward, or tilt your head every time the bell passes behind it. These are useful signs to reassess your setup.
Move the weight around your head while maintaining clearance. If that requires an uncomfortable position, stop instead of repeatedly moving your neck out of the way.
6. Move Slowly Within a Comfortable Range
Use a smooth pace that allows you to notice changes in your grip and posture. A brief pause at the front can help you reset between circles.
Avoid trying to drop the kettlebell as low down your back as possible. Choose a path that fits your available movement.
Stop if the exercise causes pain. Forcing a larger circle is not a useful progression.
7. Practice Both Directions With Equal Control
Give both directions attention, whether you alternate repetitions or finish a small group before switching.
You may find one direction less coordinated. Slow down and assess that direction on its own rather than rushing to match the other.
Aim for the same comfortable control each way. Do not force a painful or awkward direction simply to reach a repetition target.
How Much Weight and How Many Reps Should You Use?
Choose the load according to your control and comfort. Harvard’s introductory guidance gives 5–10 pounds as an example, but this is not a minimum or a suitable starting weight for everyone.
For repetitions, StrongFirst’s coaching guidance recommends 3–5 halos in each direction with a lighter load.
A simple starting example is:
| Detail | Practical starting point |
|---|---|
| Weight | Light enough for a smooth, comfortable circle |
| Repetitions | 3–5 in each direction |
| Total | 6–10 complete circles |
| Amount | One short round |
| Placement | During an upper-body warm-up |
This is a coaching example, not a scientifically established optimal dose.
End the round when your grip, posture, or pace becomes difficult to maintain. Focus on smoother repetitions before considering more weight or volume.
Kettlebell Halo Variations
Once you understand the standing movement, you can explore another position if it feels comfortable. Changing your stance is optional.
Tall-Kneeling Kettlebell Halo
Kneel on both knees with padding underneath them and keep your torso upright. Perform the same slow circle while maintaining a steady body position.
Use a light load and avoid leaning backward as the bell passes behind your head.
Half-Kneeling Kettlebell Halo
Place one knee on a padded surface and the opposite foot on the floor in front of you. Leave enough width between your legs to feel stable.
Keep your hips and torso facing forward while performing the halo. Choose standing halos if kneeling is uncomfortable.
When to Stop or Get Individual Guidance
Stop if halos cause shoulder, neck, or wrist pain. Do not keep repeating the movement to see whether the discomfort will disappear.
If you have an existing shoulder or neck condition, a recent injury or surgery, or a shoulder replacement, ask your clinician or physical therapist whether this exercise fits your situation.
The AAOS shoulder conditioning guidance advises against ignoring pain during exercise. It also recommends professional guidance when choosing exercises after injury or surgery. That is general shoulder-exercise advice, not a specific endorsement of halos.
Frequently Asked Questions
Are Kettlebell Halos Suitable for Beginners?
They may be suitable if you can maintain a secure grip and move comfortably around your head. Start light. If the path feels confusing or difficult to control, get help from a qualified exercise professional.
Should I Alternate Directions After Every Repetition?
You can alternate after each circle or complete several repetitions in one direction before switching. Both approaches appear in exercise instruction. Choose the approach that helps you maintain control.
Should the Kettlebell Stay Upside Down the Whole Time?
No. The common starting position has the base facing upward, but the bell changes orientation as it travels around your head. Let your arms and the bell move together without forcing your wrists.
How Do You Count Kettlebell Halo Repetitions?
Count one full circle back to your chest as one repetition. A circle to the right followed by a circle to the left equals two total repetitions. Tracking each direction separately can make the count clearer.
Should I Do Kettlebell Halos Every Day?
Daily practice is not necessary. Begin with a short amount during a workout warm-up and notice how your shoulders feel afterward and the next day before adding more practice.
Can Kettlebell Halos Help With Shoulder Pain?
Do not use halos as a self-directed solution for shoulder pain. Evidence does not establish them as an appropriate exercise for every painful shoulder condition. Ask a clinician or physical therapist which movements fit your situation.
Conclusion
The kettlebell halo gives you a way to practice controlled shoulder movement with a steady torso. Keep the weight manageable, maintain clearance around your head, and give both directions equal attention.
At your next upper-body warm-up, try a short, comfortable round and focus on making each repetition smooth before adding more.
References
- American Council on Exercise: Halo exercise instructions.
- Harvard Health Publishing: Coming full circle.
- Chang AU, Liebenson C: The Halo exercise for shoulder and thoracic spine mobility. Journal of Bodywork & Movement Therapies. 2014;18:145–147.
- StrongFirst: Essential Details for Proper Swing Grip and the Kettlebell Halo.
- Prehab: Halo — Kettlebell.
- American Academy of Orthopaedic Surgeons: Rotator Cuff and Shoulder Conditioning Program.