
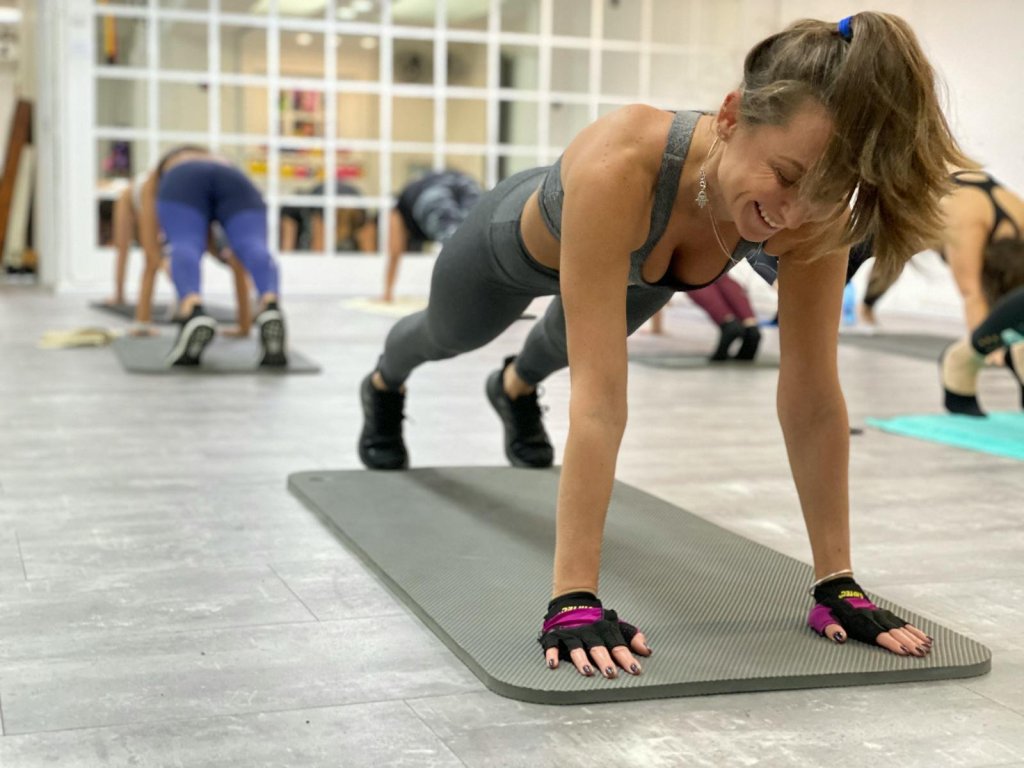
The inchworm exercise is a simple full-body movement that strengthens your core and shoulders while improving hamstring and upper-body mobility.
If you want one exercise that works well as a warm-up, a conditioning drill, or a “movement reset,” the inchworm is a great option because it blends control, stability, and flexibility in one repeatable pattern.
What is the inchworm exercise?
The inchworm is a bodyweight drill where you hinge down, walk your hands forward into a strong plank (sometimes adding a push-up), then walk your hands back or walk your feet toward your hands.
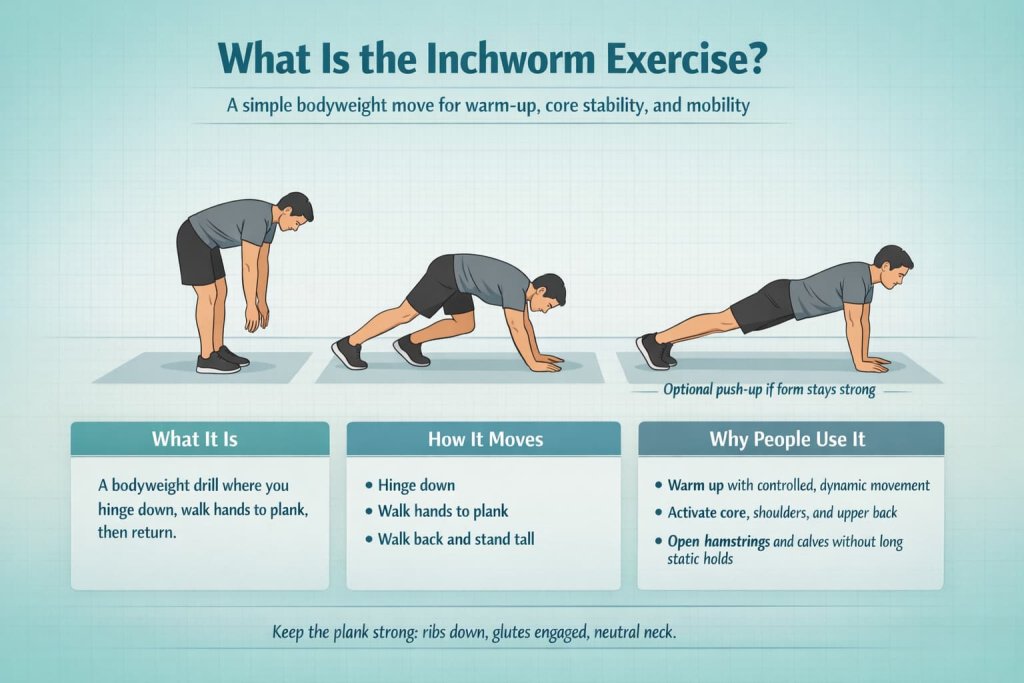
People use it to:
- Warm up the body with controlled, dynamic movement
- Activate the core, shoulders, and upper back
- Open up the hamstrings and calves without long static holds
How to do the inchworm exercise correctly
Inchworm exercise (standard)
How to do it:
- Stand tall with feet about hip-width apart and soften your knees slightly.
- Hinge at your hips and reach your hands toward the floor.
- Place your hands down and walk your hands forward until you reach a strong plank.
- In plank, squeeze glutes, brace your core, and keep your head in line with your spine.
- Optional: perform a controlled push-up (only if you can keep a rigid torso).
- Walk your hands back toward your feet, or walk your feet in with small steps.
- Stand up tall and repeat for reps.
Why it works:
It combines a hip hinge (posterior chain lengthening) with a plank (core stability) and shoulder loading (upper-body strength and control). ACE specifically cues maintaining a rigid torso and avoiding low-back sagging during the plank/push-up portion.
Trainer Tip:
Think “ribs down, glutes on” in plank. If your low back starts to dip, shorten the walkout distance or switch to an easier variation below.
Inchworm exercise variations and progressions
Choose the variation that matches your mobility and control level. Move slowly and keep your plank strong.
1) Inchworm With Knees Bent (Beginner-Friendly)
Why it works:
Bending your knees reduces hamstring tension so you can focus on the two main skills that make the inchworm effective: a clean hip hinge and a strong plank. This variation helps you maintain better spine control (less rounding to “reach” the floor) and makes it easier to keep your core braced during the walkout. It’s also a great option if your hamstrings feel tight, your lower back tends to round, or you’re learning how to coordinate breathing and bracing.
How to do it:
- Stand tall with feet hip-width apart and soften your knees.
- Hinge at the hips and place your hands on the floor (or as low as you can comfortably reach).
- Keep your knees bent as much as needed to maintain control and avoid forcing range.
- Walk your hands forward in small steps until you reach a strong plank.
- Hold 1 second, brace your core, squeeze glutes, and keep your ribs stacked over your pelvis.
- Walk your hands back toward your feet.
- Stand tall, reset your posture, and repeat.
Trainer Tip:
Aim for “clean reps,” not straight legs. If you feel your back rounding a lot, bend your knees more and shorten the walkout.
2) Inchworm to High Plank Only (No Push-Up)
Why it works:
Removing the push-up keeps the focus on plank alignment and shoulder stability without adding extra pressing stress. This is ideal if your push-up form isn’t consistent yet, you’re building wrist/shoulder tolerance, or you want the inchworm to stay more warm-up focused. The brief plank pause teaches full-body tension—core braced, glutes engaged, shoulders stable—so you get strength benefits without turning the drill into a fatigue test.
How to do it:
- Hinge down and place your hands on the floor.
- Walk your hands out to a high plank using short, controlled steps.
- Pause 1–2 seconds with a straight line from head to heels.
- Keep elbows locked but not hyperextended; press the floor away.
- Walk your hands back toward your feet.
- Stand tall and repeat.
Trainer Tip:
Think “quiet hips.” If your hips sway side to side during the hand-walk, slow down and take smaller steps.
3) Inchworm With Push-Up (Harder)
Why it works:
Adding a push-up increases the upper-body strength demand while challenging your core to stay rigid under load. It turns the inchworm into more of a strength-conditioning hybrid by combining a hinge, a plank, and a press in one continuous rep. This progression is best when you can already hold a solid plank without low-back sagging and you can control the push-up without losing trunk tension.
How to do it:
- Perform the standard inchworm walkout to a strong high plank.
- Set your body: brace core, squeeze glutes, keep ribs down.
- Lower into a controlled push-up (elbows at a comfortable angle).
- Press back up without letting your hips drop or pike up.
- Walk your hands back toward your feet.
- Stand tall and repeat.
Trainer Tip:
If your hips dip during the push-up, regress to “plank only” reps or do the push-up from knees while keeping your core braced.
4) Tempo Inchworm (Control Progression)
Why it works:
Slowing down removes momentum and forces your core and shoulders to “own” each position. A tempo inchworm builds time under tension, improves coordination, and exposes weak links—like hips swaying, ribs flaring, or low-back sagging—so you can fix them. This is one of the best ways to progress without adding equipment, because higher control usually equals higher quality strength and stability gains.
How to do it:
- Hinge down and place your hands on the floor with control.
- Walk your hands out in small steps, taking your time.
- Pause 2 seconds in a strong high plank (breathe normally).
- Walk your hands back slowly, keeping hips steady.
- Stand tall and reset before the next rep.
Trainer Tip:
Use the pause to check your form: ribs down, glutes on, neck neutral. If slow reps feel shaky, shorten the range and rebuild control first.
Inchworm exercise benefits
It’s a smart warm-up move
Most reputable fitness guidance recommends warming up with light-to-moderate movement for about 5–10 minutes before harder exercise. The inchworm fits well here because it raises your body temperature and moves multiple joints through a controlled range. This aligns with general warm-up guidance from Mayo Clinic.
It trains core stability you can actually use
A good inchworm teaches you to resist low-back sagging in plank while your shoulders support your bodyweight. That’s the kind of “bracing” skill that carries over to everyday movement and lifting.
It improves mobility while you build strength
Each rep asks your hamstrings to lengthen during the hinge and your shoulders to control the walkout and plank position. If you keep it slow and clean, you get mobility plus stability—not just a stretch.
Muscles worked by the inchworm exercise
The inchworm is a true full-body drill, but the main contributors are:
- Core: abdominals and deep trunk stabilizers (for plank control)
- Shoulders and upper back: deltoids, serratus, scapular stabilizers (for hand-walk support)
- Chest and triceps (more if you add a push-up)
- Hamstrings and calves (during the hinge and lengthening phase)
Common inchworm mistakes (and quick fixes)
Mistake 1: Low back sagging in plank
Fix: Shorten the walkout and re-brace. Aim for a straight line from head to heels (no “banana back”).
Mistake 2: Rounding aggressively to reach the floor
Fix: Bend your knees slightly and hinge more at the hips. Control matters more than touching the floor.
Mistake 3: Hands too far ahead too soon
Fix: Take smaller hand steps. Big reaches often cause shoulder shrugging and loss of core position.
Mistake 4: Wrist discomfort
Fix: Use dumbbells/push-up handles to keep wrists more neutral, or do an incline variation with hands on a bench. If wrist pain persists or is sharp, get medical guidance.
How many inchworms should you do?
A practical starting point for most people:
- Warm-up: 1–3 sets of 4–8 reps at an easy pace
- Conditioning: 2–4 sets of 6–12 reps (only if form stays clean)
- Mobility-focused finisher: fewer reps, slower tempo, more control
If you’re using inchworms as part of a warm-up, keep them smooth and non-fatiguing—your warm-up should prepare you, not exhaust you. This also fits common guidance around using dynamic movement as part of warm-ups from Hospital for Special Surgery.
Who should be careful with inchworms?
Be cautious or choose an easier variation if you have:
- Significant wrist pain with planks/push-ups
- Shoulder pain that increases when bearing weight through the hands
- Low-back pain that worsens in plank positions
- Balance issues that make the hinge-to-walkout unstable
If you have a medical condition, recent injury, or symptoms that feel sharp or worsening, it’s safest to talk with a qualified clinician before progressing.
People also ask about the inchworm exercise
Does the inchworm exercise build abs?
It can strengthen your core because you must brace and stabilize your trunk in plank. It’s not a “six-pack isolator,” but it’s very useful for real-world core control.
Is the inchworm exercise good for hamstrings?
Yes, many people feel a strong hamstring lengthening during the hinge portion. Keep it controlled and don’t force straight legs.
Should I do inchworms before or after a workout?
Most people do them before a workout as part of a dynamic warm-up.
FAQ:
How many calories do inchworms burn?
It depends on your body size, speed, and workout intensity. Inchworms are usually used for warm-ups and movement prep rather than calorie tracking.
Are inchworms safe for beginners?
Yes—if you start with a bent-knee hinge and a shorter walkout, and you stop before form breaks.
What if I can’t touch the floor?
Bend your knees more, hinge as far as you comfortably can, or use an incline inchworm with hands on a bench.
What’s the best inchworm variation for wrist pain?
Try the incline inchworm, or hold dumbbells/push-up handles to keep the wrists more neutral. If pain is sharp or persistent, get professional guidance.
How fast should I do inchworms?
Slow enough to keep a strong plank and controlled steps. Rushing usually turns it into a sloppy stretch instead of a quality strength-and-mobility drill.
Can I do inchworms every day?
Many people can, especially at low volume as a warm-up. If your wrists, shoulders, or hamstrings feel overworked, reduce reps or frequency.
Conclusion
The inchworm exercise is a high-value, low-equipment move: it warms you up, reinforces core bracing, and improves mobility when you do it with control. Start with the easiest variation that lets you keep a strong plank, then progress by slowing tempo or adding a push-up once your form is solid.