
The knee plank exercise builds core strength safely by reducing pressure on your lower back.
It’s a beginner-friendly plank variation where you balance on your knees instead of your toes, allowing you to strengthen your abs, glutes, and spine stabilizers without excessive strain.
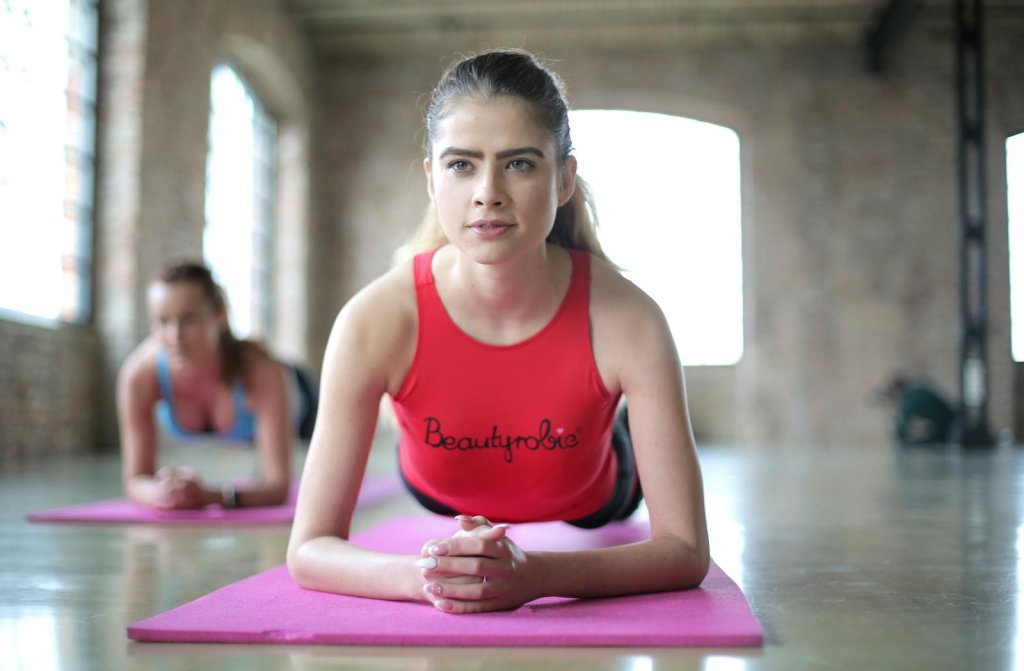
Understanding how to perform the knee plank properly is key to developing a strong, stable core that supports posture and everyday movement.
This guide covers the benefits, correct form, common mistakes, variations, safety tips, and FAQs — all backed by current evidence-based exercise principles.
Why the Knee Plank Exercise Works
The knee plank works because it targets your deep core stabilizers through isometric (static) tension.
By supporting your body weight on your forearms or hands and knees, the exercise shortens the lever arm, lowering spinal load while maintaining engagement in the same muscles used in a full plank.
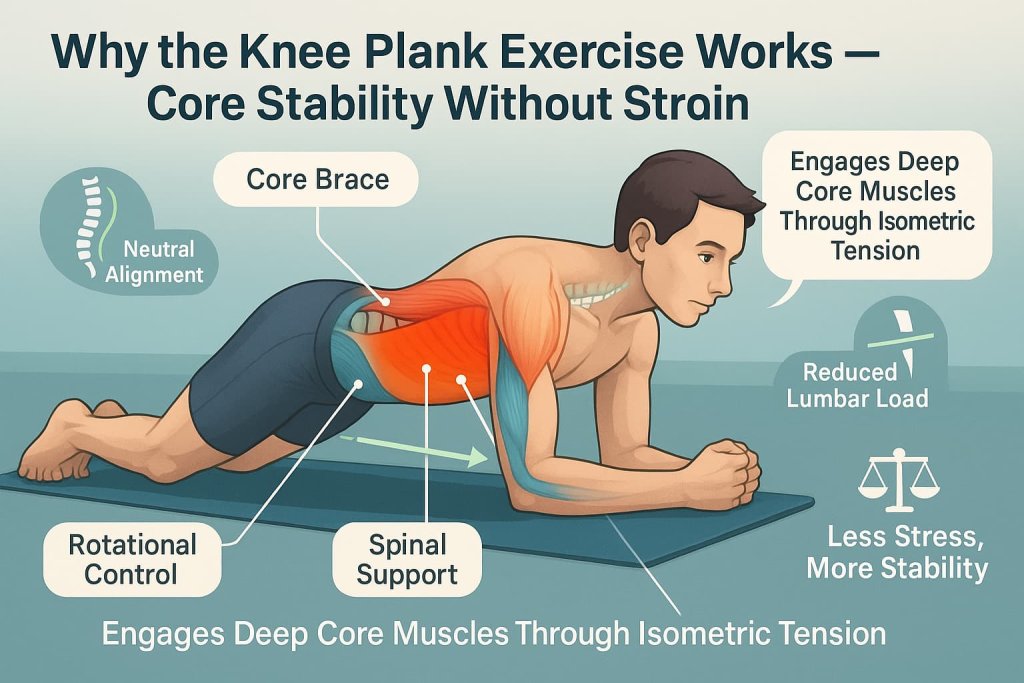
This makes it ideal for:
- Beginners building foundational strength.
- Seniors developing safe core endurance.
- People recovering from back discomfort or postural weakness.
Scientific Insight:
A 2025 study in Applied Sciences found that plank-type core training improves trunk endurance and postural control. Physical therapists frequently use the knee plank as an entry-level core stabilization exercise to reduce lumbar stress while training deep abdominal activation.
Muscles Worked in the Knee Plank Exercise
| Primary Muscles | Supporting Muscles |
|---|---|
| Transverse Abdominis | Rectus Abdominis |
| Internal/External Obliques | Shoulders & Triceps |
| Gluteus Maximus | Erector Spinae |
| Multifidus (deep spinal stabilizer) | Core Stabilizers |
Why it matters: these muscles work together to stabilize your spine, improve posture, and protect against back pain — without excessive load on the lumbar region.
How to Do the Knee Plank Exercise
Step-by-Step Instructions
- Start on all fours with your hands (or forearms) under your shoulders and knees under hips.
- Walk your hands or forearms slightly forward until your body forms a straight line from head to knees.
- Engage your core and glutes — imagine gently tucking your ribs and pelvis toward each other.
- Keep your neck neutral by gazing slightly ahead on the floor.
- Hold for 10–30 seconds, breathing steadily.
- Rest and repeat 2–4 times.
Trainer Tip
Don’t rush to hold the plank for long durations. Focus on quality over time — tight core, level hips, and steady breathing.
Use a yoga mat or folded towel under your knees for comfort.
Once you can maintain form for 45–60 seconds, you’re ready to progress toward a full forearm or high plank.
Variations & Progressions
1. Wall Plank (Easiest Regression)
Why it works:
The wall plank activates your core muscles in a gentle, upright position, reducing up to 60–70% of the load compared to a floor plank. It’s ideal for absolute beginners, seniors, or anyone with shoulder or lower-back limitations.
Muscles worked:
Core stabilizers (transverse abdominis, obliques), shoulders, chest, and glutes (light activation).
How to do it:
- Stand facing a wall about arm’s length away.
- Place your palms flat on the wall at shoulder height and width.
- Step back slightly and keep your body straight from head to heels.
- Engage your abs and glutes while maintaining a neutral spine.
- Hold for 20–30 seconds, breathing steadily.
Trainer Tip:
Keep your shoulders relaxed and elbows soft. As you gain strength, step further back to increase the challenge gradually.
2. Incline Knee Plank (Beginner Regression)
Why it works:
By placing your hands on a raised surface, the incline knee plank decreases intensity while maintaining full-core engagement. It builds strength and teaches correct alignment before progressing to the floor.
Muscles worked:
Core stabilizers (transverse abdominis, rectus abdominis), glutes, shoulders, and triceps.
How to do it:
- Place your hands on a stable elevated surface (bench, step, or low table).
- Walk your knees back so your body forms a straight line from head to knees.
- Engage your core and glutes, avoiding hip sag or arching your back.
- Hold for 20–30 seconds with controlled breathing.
Trainer Tip:
Adjust bench height to control difficulty — the higher the surface, the easier the exercise. Lower it gradually over time.
3. Standard Knee Plank (Main Version)
Why it works:
The standard knee plank strengthens the entire core safely by shortening the lever arm, allowing you to focus on stability and alignment. It’s the foundational version for learning bracing and posture control.
Muscles worked:
Transverse abdominis, obliques, gluteus maximus, erector spinae, and shoulders.
How to do it:
- Start on all fours with your hands or forearms under shoulders.
- Walk your hands (or forearms) forward slightly until your body forms a straight line from head to knees.
- Engage your core, squeeze your glutes, and breathe deeply.
- Hold for 20–40 seconds, maintaining neutral alignment.
Trainer Tip:
Place a folded towel under your knees for support. Avoid letting your lower back sag — imagine pulling your belly button gently toward your spine.
4. Full Plank (Progression)
Why it works:
This classic plank variation challenges your entire body by increasing the lever length and requiring greater shoulder and core stability. It builds endurance and trunk strength once foundational control is developed.
Muscles worked:
Rectus abdominis, transverse abdominis, obliques, glutes, shoulders, and triceps.
How to do it:
- Begin in a push-up position or forearm plank.
- Align your head, shoulders, hips, and heels in a straight line.
- Brace your core, squeeze your glutes, and maintain steady breathing.
- Hold for 20–45 seconds with perfect form.
Trainer Tip:
Imagine pulling your elbows or hands toward your toes to activate deep core tension. Keep your gaze slightly ahead, not down at your feet.
5. Alternating Leg Lifts (Advanced Progression)
Why it works:
Lifting one leg at a time adds instability, forcing your core and glutes to work harder to resist rotation and maintain balance. It improves pelvic stability and posterior-chain strength.
Muscles worked:
Core stabilizers, glutes, hamstrings, shoulders, and obliques.
How to do it:
- Start in a knee or full plank position.
- Engage your abs and glutes.
- Lift one leg off the floor, keeping it straight and in line with your body.
- Hold for 3–5 seconds, lower, and switch sides.
- Perform 8–10 alternating reps.
Trainer Tip:
Avoid rocking your hips — keep them square to the floor. Focus on controlled lifts, not height.
6. Shoulder Taps (Anti-Rotation Progression)
Why it works:
Shoulder taps challenge your anti-rotation strength by forcing you to stabilize your trunk while moving one arm. It enhances coordination, shoulder control, and cross-body core engagement.
Muscles worked:
Obliques, transverse abdominis, shoulders, triceps, and glutes.
How to do it:
- Start in a knee or high plank position.
- Engage your core and glutes to keep hips level.
- Lift one hand to tap the opposite shoulder, then return it to the floor.
- Alternate sides for 10–12 slow, controlled reps.
Trainer Tip:
Widen your base (knees or feet) to prevent hip rotation. Move slowly and keep breathing — speed isn’t the goal, stability is.
Common Mistakes to Avoid
- Sagging hips: Places pressure on your lower back.
- Hips too high: Reduces core engagement.
- Holding your breath: Leads to fatigue and poor form.
- Elbows too far forward: Shifts load to shoulders instead of core.
- Uneven pressure on knees: Use padding for support and symmetry.
Safety & Precautions
- Always warm up before starting (e.g., cat-cow, hip circles, or bird-dog).
- Stop immediately if you feel sharp pain in your lower back or knees.
- Keep a soft surface beneath your knees to avoid discomfort.
- Consult a doctor or physical therapist if you have existing spinal or knee conditions.
How to Include the Knee Plank in Your Workout Routine
Why it works:
Adding the knee plank to your weekly routine builds core stability and posture control while keeping strain off the lower back.
Muscles worked:
Core stabilizers, glutes, obliques, and spinal extensors.
How to do it:
- Do 2–4 sets of knee planks, 20–40 seconds each, resting 30–60 seconds.
- Train 2–4 times per week, after your warm-up or within a core circuit.
- Gradually increase hold time or progress to harder variations as strength improves.
Trainer Tip:
Pair the knee plank with bird-dogs or glute bridges for a balanced, spine-friendly core routine.
FAQs About the Knee Plank Exercise
Q1. What is the difference between the knee plank and the full plank?
The knee plank keeps your knees on the floor, reducing leverage and pressure on your spine. The full plank supports your body on toes, increasing difficulty and core load.
Q2. How long should I hold the knee plank?
Start with 10–20 seconds. Gradually increase to 45–60 seconds as strength improves.
Q3. Does the knee plank help with lower back pain?
Yes — it builds trunk stability and improves posture. However, it’s not a medical treatment. Consult your healthcare provider for pain concerns.
Q4. How often should I do the knee plank?
2–4 times weekly is ideal when paired with mobility and strength training.
Q5. What surfaces are best for knee planks?
A yoga mat or exercise pad provides stability and knee cushioning.
Q6. When can I progress to a full plank?
When you can hold the knee plank for 45–60 seconds with perfect form, breathing control, and no hip drop.
Conclusion
The knee plank exercise is a safe, efficient way to strengthen your core and support spinal stability — especially for beginners, seniors, or anyone avoiding excessive strain.
By focusing on alignment, controlled breathing, and gradual progression, you’ll build a strong foundation for better posture and movement quality.
Start today — master the knee plank, then level up to a full plank for even greater strength gains.