
Nerve flossing exercises (also called nerve glides or neural mobilization) are gentle movements that may help sensitive nerves move more comfortably and reduce tension-like symptoms such as tingling, pulling, or radiating discomfort. Understanding how to do them safely matters because nerves can become more irritated if you push too hard or hold end-range positions too long.
Clinical and research sources often describe two main styles: sliders (glides) and tensioners. Sliders are usually the better starting point because they are typically gentler and more symptom-friendly, as explained in research indexed by the National Center for Biotechnology Information (NCBI).
What Are Nerve Flossing Exercises?
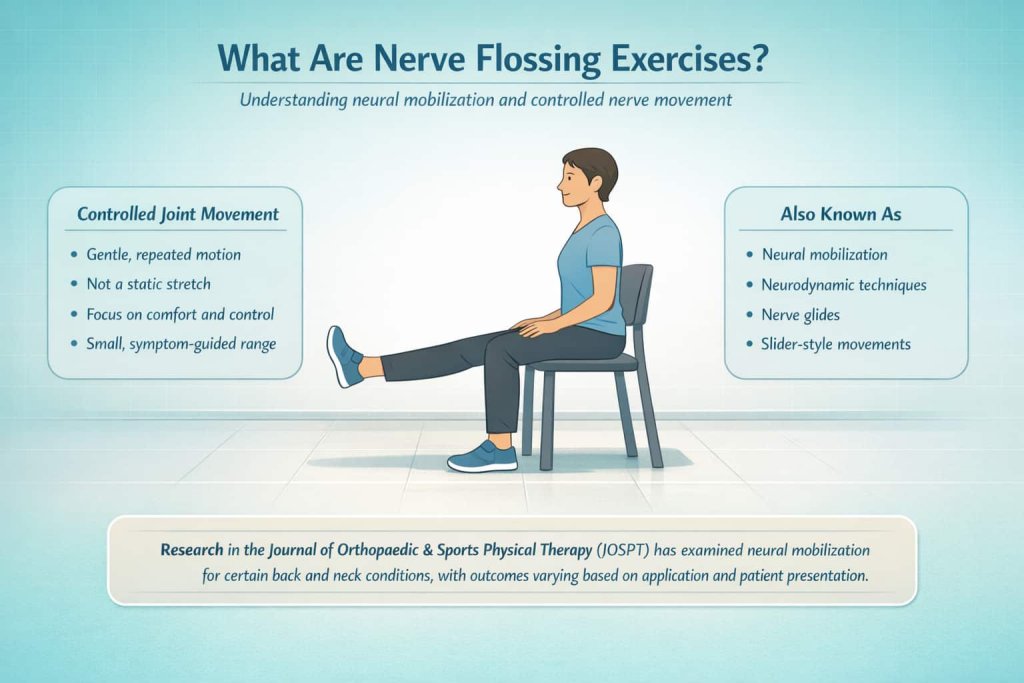
Nerve flossing exercises are controlled joint movements that aim to improve how a nerve slides and tolerates motion within surrounding tissues. In research and clinical practice, this is commonly called neural mobilization or neurodynamic techniques. A systematic review published in the Journal of Orthopaedic & Sports Physical Therapy (JOSPT) reported benefits for some back and neck pain presentations, while also noting that results can vary depending on the condition and how the technique is applied.
Safety Rules Before You Start Nerve Flossing Exercises
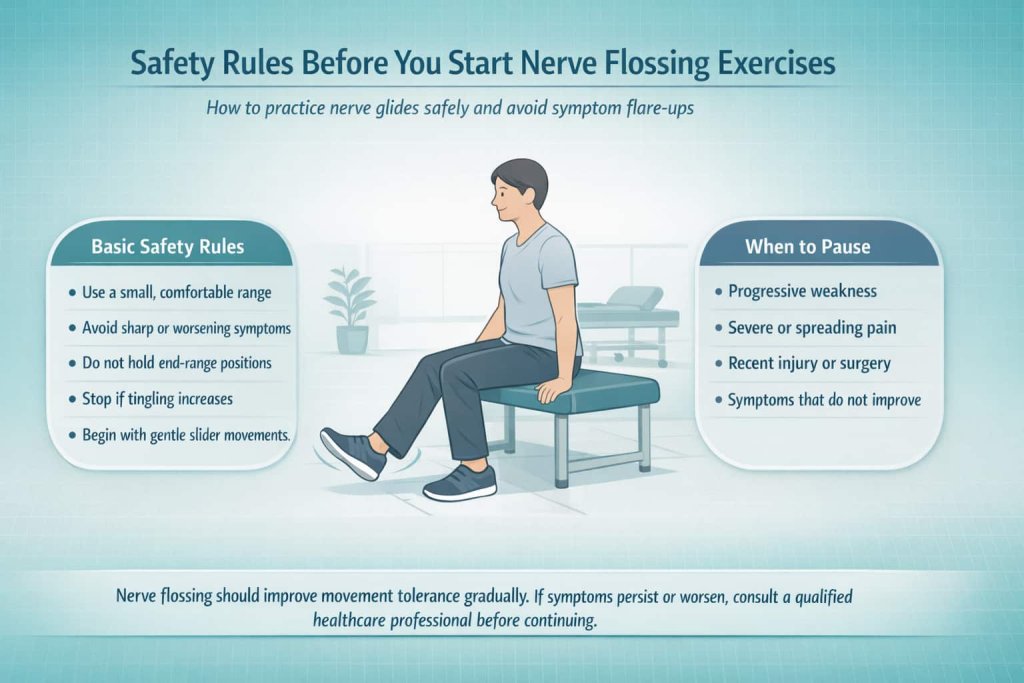
Nerve flossing exercises should feel gentle and controlled, not intense. The goal is to improve movement tolerance — not to force a deep stretch.
Follow these basic safety rules:
- Use a small, comfortable range of motion
- Avoid sharp, burning, or worsening symptoms
- Do not hold end-range positions
- Stop if tingling or numbness increases
- Start with gentle slider movements
If you have progressive weakness, severe pain, recent injury, or symptoms that do not improve, consult a qualified healthcare professional before continuing.
7 Best Nerve Flossing Exercises
Below are seven commonly used options for sciatic, neck-related, and arm nerve symptoms.
1) Seated Sciatic Nerve Slider
How to do it:
- Sit tall near the edge of a chair.
- Extend one knee until you feel mild tension.
- As you straighten the knee, gently lift your toes toward you.
- Return to the starting position and relax.
- Repeat smoothly without holding the end range.
Why it works: This is a classic slider pattern, meaning one end of the nerve pathway lengthens while the other eases tension. That approach is often better tolerated than prolonged stretching and may help improve movement tolerance.
Trainer Tip: Keep the movement easy and controlled. If tingling increases or lingers, reduce the range of motion.
2) Supine Sciatic Slider (Straight-Leg Raise Glide)
How to do it:
- Lie on your back and bring one thigh toward your chest.
- Support your leg behind the thigh (not behind the knee).
- Slowly straighten the knee within a comfortable range.
- Add a gentle ankle pump (toes up and down).
- Return to the starting position and repeat.
Why it works: This combines hip, knee, and ankle motion in a lower-load position, which may feel more comfortable than seated versions for some people.
Trainer Tip: Do not force knee extension if your hamstrings feel tight. Stay within a range you can control smoothly.
3) Gentle Slump-Style Sciatic Slider
How to do it:
- Sit upright with neutral posture.
- Slowly straighten one knee.
- As the leg straightens, slightly look up.
- Return to the starting position smoothly.
Why it works: Coordinating neck and leg movement can create a sliding effect along the nerve pathway, helping promote tolerance to motion.
Trainer Tip: If neck movement aggravates symptoms, keep your head neutral and perform only the leg motion.
4) Median Nerve Glide (Arm and Wrist)
How to do it:
- Stand or sit tall with shoulders relaxed.
- Extend one arm slightly to the side.
- Gently extend your wrist and fingers.
- Add a small head tilt away if tolerated.
- Move slowly without holding the end range.
Why it works: This targets the median nerve pathway often involved in wrist and hand symptoms. The American Academy of Orthopaedic Surgeons (AAOS) includes median nerve gliding in conservative carpal tunnel exercise programs.
Trainer Tip: Keep your shoulders down and relaxed to avoid increasing tension through the neck and upper trapezius.
5) Ulnar Nerve Glide
How to do it:
- Raise your arm to the side with the elbow bent.
- Bring your hand gently toward your face.
- Move between two comfortable positions.
- Keep the shoulder relaxed throughout.
Why it works: Often used for symptoms that travel toward the ring and small finger along the ulnar nerve pathway.
Trainer Tip: Mild tension is acceptable, but numbness or tingling should not intensify during the movement.
6) Radial Nerve Glide
How to do it:
- Stand with your arm by your side.
- Make a gentle fist with your thumb tucked in.
- Slightly rotate your arm inward.
- Gently flex your wrist.
- Return smoothly to the starting position.
Why it works: Commonly used for thumb-side forearm symptoms. The American Academy of Orthopaedic Surgeons (AAOS) also provides radial tunnel exercise guidance.
Trainer Tip: If symptoms spike, reduce wrist flexion or decrease the range of motion.
7) Neck-to-Arm Nerve Slider
How to do it:
- Sit tall with relaxed shoulders.
- Extend your arm slightly outward.
- Gently extend your wrist.
- Slowly tilt your head away and return to neutral.
Why it works: Useful for neck-related arm symptoms when performed gently. Cervical radiculopathy patient guidance materials from the National Health Service (NHS) emphasize symptom-guided, non-aggravating exercise.
Trainer Tip: Stop if symptoms increase or travel farther down the arm.
How Nerve Flossing Is Supposed to Work
Think of a nerve like a structure that needs to move smoothly as you bend your neck, shoulder, elbow, hip, knee, and ankle. When a nerve is irritated, even normal movement can feel tight, tingly, or sharp.
Nerve flossing is generally programmed to:
- Encourage smoother nerve motion (especially with sliders)
- Build tolerance to movement gradually
- Reduce sensitivity by using small, repeatable ranges instead of long holds
Research comparing slider and tensioner techniques, available through the National Library of Medicine, explains that tensioners increase nerve strain more, while sliders aim for movement with less overall strain.
Quick Safety Rules Before You Start
Use these rules for every nerve flossing exercise in this article:
- Choose gentle range, not a deep stretch
- Avoid sharp, zapping, burning, or worsening symptoms
- Symptoms should settle quickly after you stop
- Start with sliders before progressing
- If you have recent injury, surgery, or significant weakness, seek medical guidance first
For wrist and hand symptoms, the American Academy of Orthopaedic Surgeons (AAOS) notes that some patients may benefit from nerve gliding as part of conservative care.
Best Sets and Reps
Start conservatively:
- 1 set of 5–10 slow reps
- Build to 2–3 sets if tolerated
- Perform 1–2 times per day
AAOS conservative programs typically recommend small, repeatable sets rather than aggressive stretching.
Common Mistakes
- Holding end range too long
- Pushing into sharp pain
- Moving too fast
- Shrugging shoulders during arm glides
- Using tensioners before sliders are tolerated
Who Should Be Cautious?
Seek professional guidance if you have:
- Progressive weakness
- Worsening numbness
- Recent surgery or trauma
- Severe or rapidly changing symptoms
If unsure, a licensed physical therapist can help determine the appropriate glide type and dosage.
FAQs
Are nerve flossing exercises the same as stretching?
No. They use repeated movement instead of prolonged end-range holds.
Should nerve flossing hurt?
No. Mild tension is acceptable, but sharp or worsening symptoms are not.
Can nerve flossing help carpal tunnel?
Some patients may benefit when included in a broader conservative plan, according to AAOS guidance.
How long before I notice changes?
Some feel improvement quickly; others require consistent, gradual practice.
Should I use sliders or tensioners?
Most people start with sliders and progress cautiously.
How often should I do them?
Begin with once daily and adjust based on tolerance.
Conclusion
Nerve flossing exercises can support movement tolerance for sciatic, neck, and arm-related symptoms when performed gently and progressively. Focus on sliders first, keep the range comfortable, and stop if symptoms worsen. If symptoms persist or change, consult a qualified healthcare professional.
This content is for informational purposes only and not medical advice.
References
- NCBI PubMed Central — Neural Mobilization Systematic Review of Randomized Trials (Ellis & Hing, 2008)
- American Academy of Orthopaedic Surgeons (AAOS) — Carpal Tunnel Therapeutic Exercise Program (PDF)
- American Academy of Orthopaedic Surgeons (AAOS) — Carpal Tunnel Syndrome Clinical Practice Guideline (2024 PDF)
- Mayo Clinic — Sciatica: Symptoms, causes, and when to seek care
- NHS inform — Cervical Radiculopathy: symptoms and guidance