
To get blowout hair at home, prepare and protect your hair, shape manageable sections with a brush and blow-dryer, and let each section cool before finishing. A round brush helps create root lift, smooth lengths, and curved ends without automatically needing a flat iron.
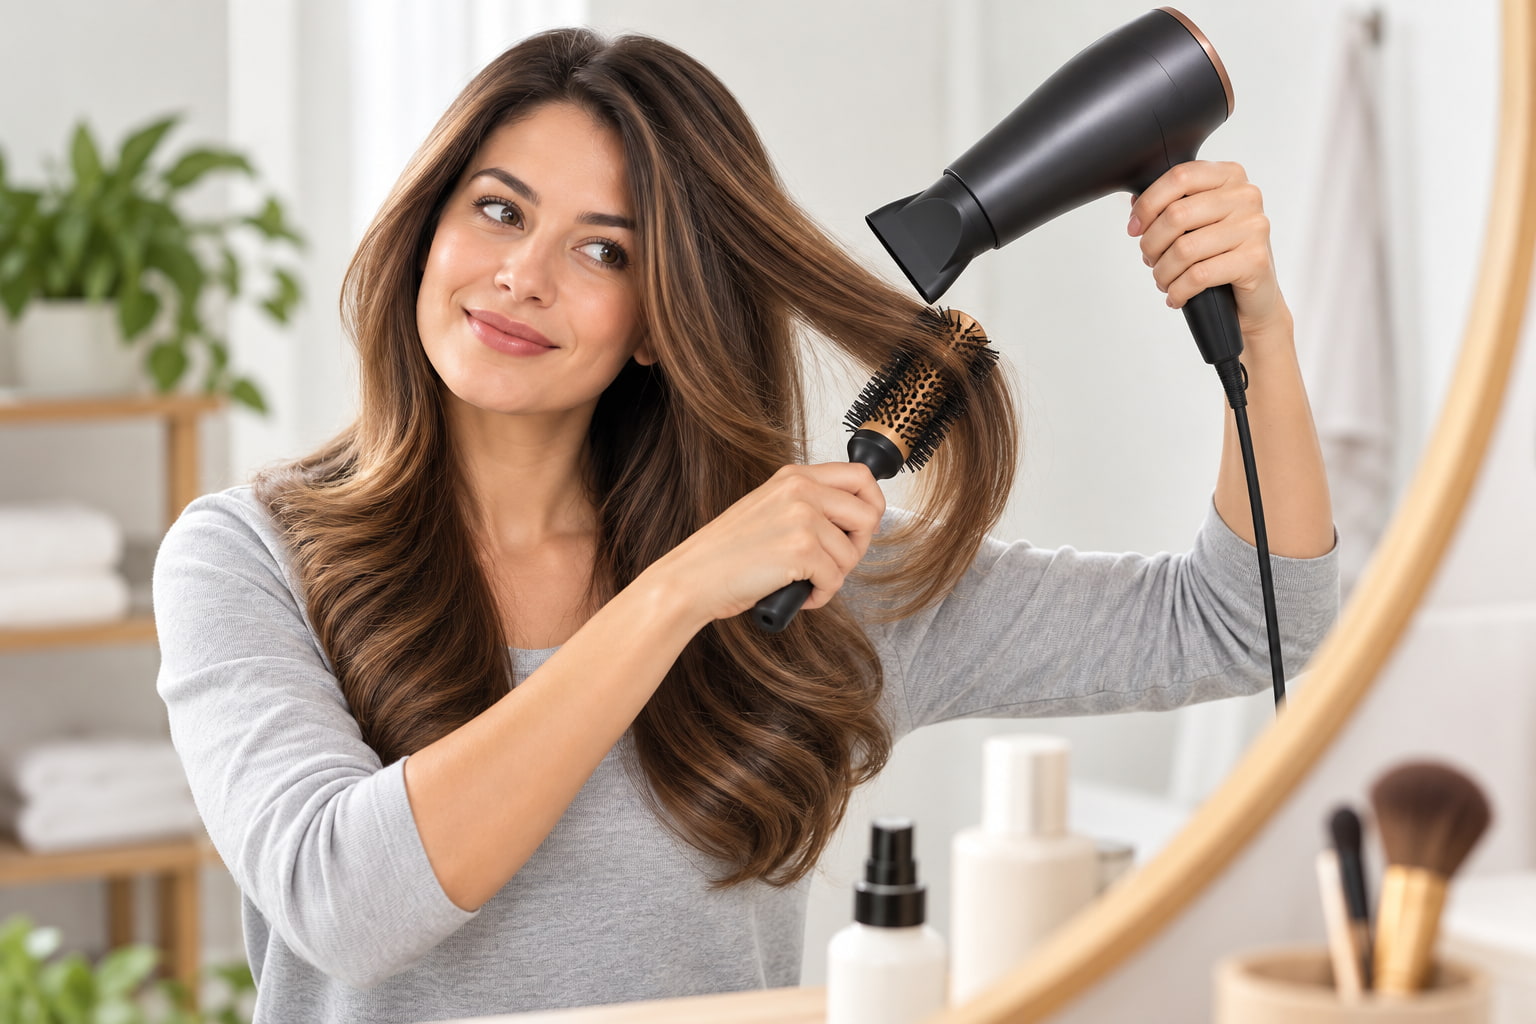
The goal is controlled styling—not maximum heat. The American Academy of Dermatology’s hair-care guidance recommends low or medium heat, a heat-protection product, and limiting heat styling.
Start with a simple routine. Once you can handle one section comfortably, work your way around your head rather than trying to perfect everything at once.
What Is a Hair Blowout?
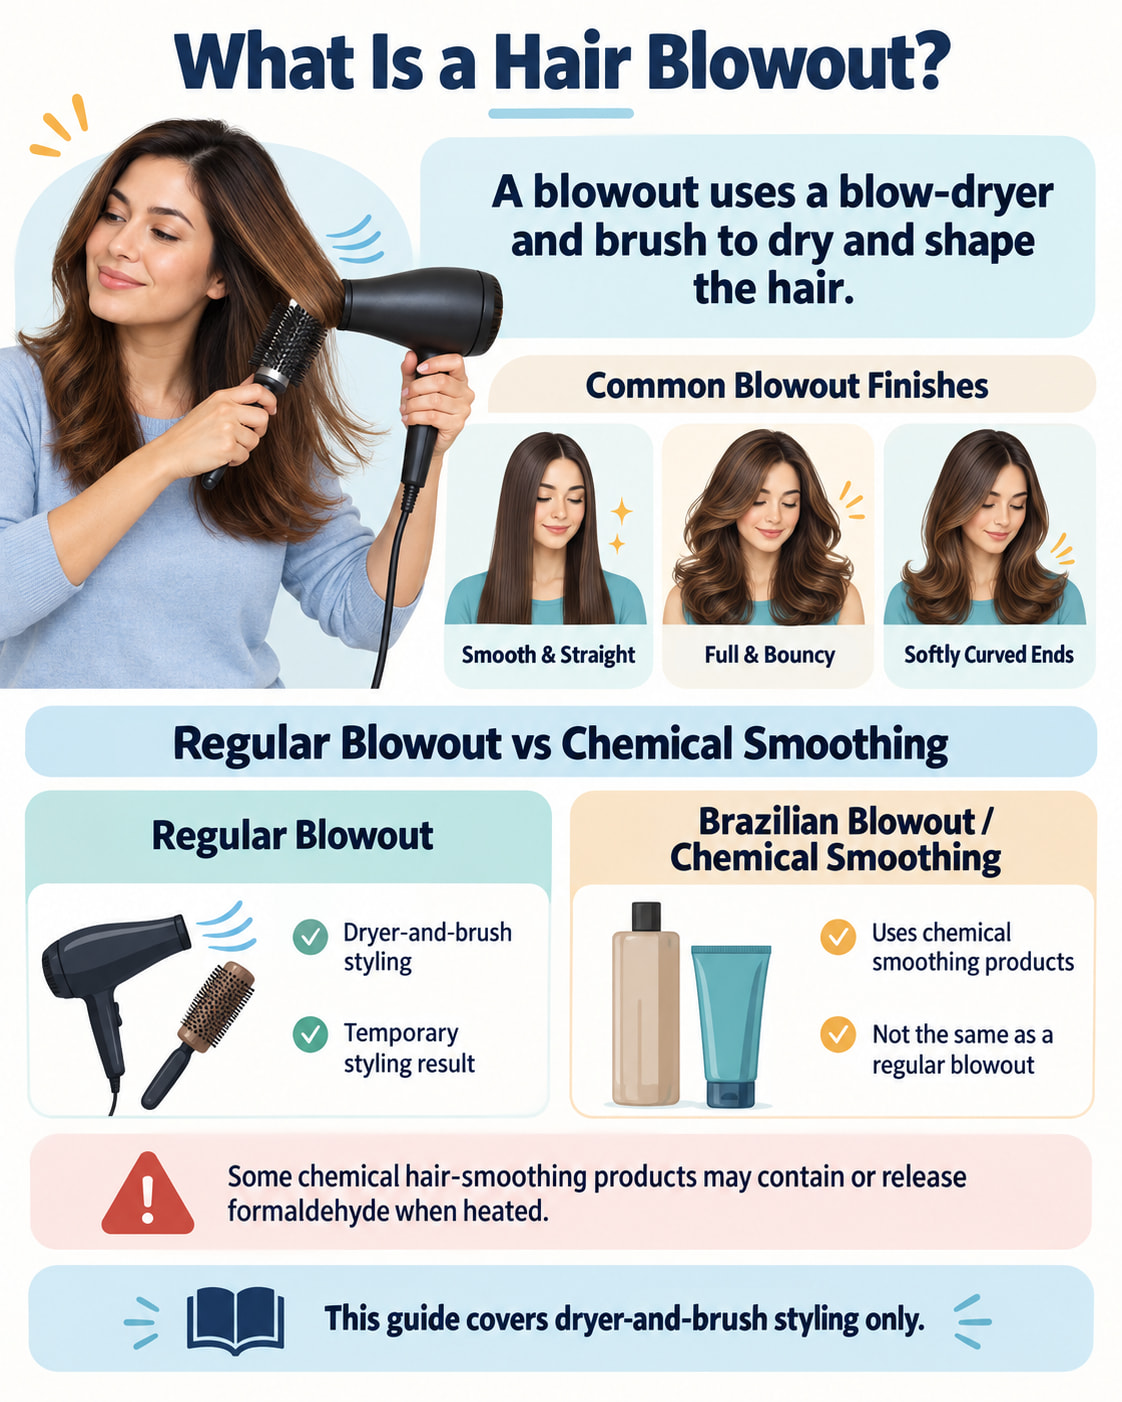
A hair blowout is a styling method that uses a blow-dryer and brush to dry hair while giving it shape. Depending on the technique, the finish can be straight and smooth, full and bouncy, or softly curved at the ends.
A regular blowout is not the same as a Brazilian Blowout or another chemical smoothing service. This guide covers dryer-and-brush styling only.
That distinction matters because some chemical smoothing products contain or release formaldehyde when heated. The FDA’s hair-smoothing safety guidance advises consumers against applying those treatments themselves at home.
What Do You Need for a Blowout at Home?
For a basic setup, gather a dryer with adjustable settings and its compatible concentrator nozzle, a round brush, sectioning clips, a wide-tooth comb, a towel or T-shirt, and heat protectant. The nozzle helps direct airflow toward the section you are styling.
Choose a brush you can comfortably maneuver. Smaller barrels generally create more bend and work well with shorter lengths. Larger barrels suit longer hair and a broader, smoother shape. You do not need several brush sizes to practice the technique.
An optional finishing cream or light-hold spray can come later. Begin with the essentials rather than adding every styling product you own.
How to Get Blowout Hair at Home
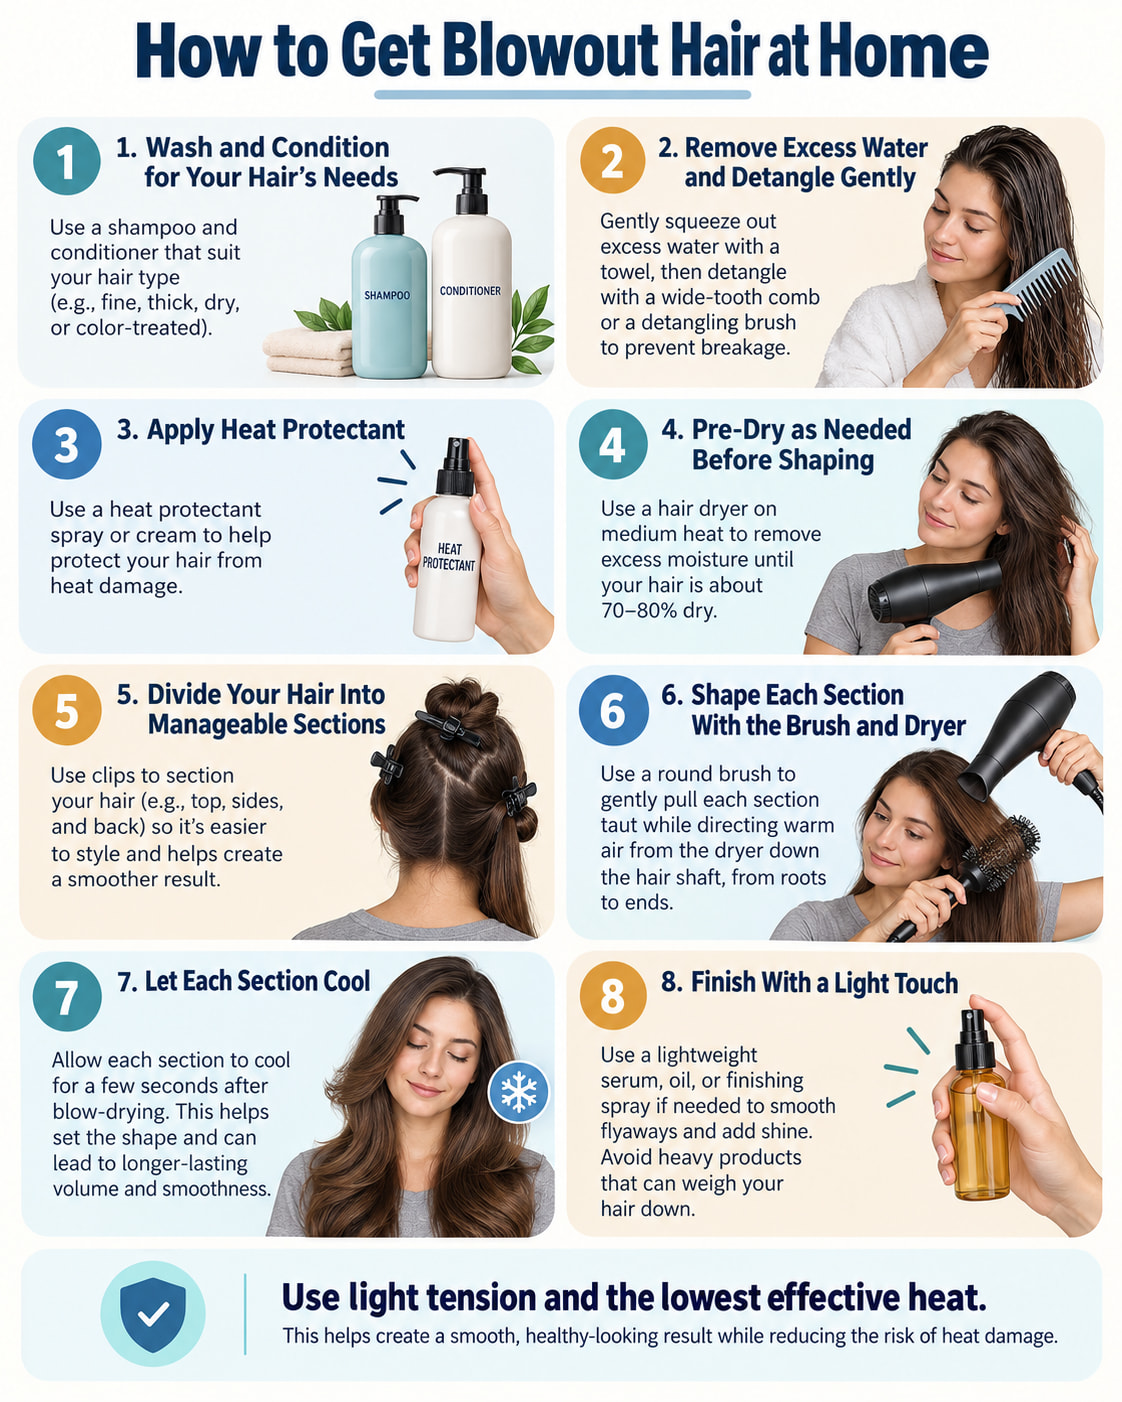
1. Wash and Condition for Your Hair’s Needs
Apply shampoo mainly to your scalp, then rinse thoroughly. Follow with conditioner.
For fine or straight hair, concentrate conditioner toward the ends. For dry or curly hair, distribute it through the lengths rather than conditioning only the tips.
2. Remove Excess Water and Detangle Gently
Gently squeeze or blot away water with a towel or T-shirt instead of rubbing your hair vigorously. For straight hair, allow some drying before gently working through tangles with a wide-tooth comb.
Curly and coily hair need a different approach. Detangle while the hair is wet and conditioned, working through small sections. The AAD’s curly-hair recommendations advise against dry brushing that can contribute to breakage and frizz.
Start at the ends and gradually work upward. Do not use the round brush to force your way through unresolved knots.
3. Apply Heat Protectant
Use a product labeled for heat protection and follow its directions for application and amount. Check whether it is intended for damp hair, dry hair, or both.
Distribute it throughout the areas you plan to style, rather than applying it only to the outer layer. Heat protectant belongs alongside lower heat and careful handling—not instead of them.
4. Pre-Dry as Needed Before Shaping
For a conventional dryer-and-brush blowout, remove excess moisture before beginning detailed brush work. Use your fingers and a low or medium setting to pre-dry as needed rather than round-brushing dripping-wet hair.
Do not worry about measuring an exact percentage of dryness. For curly or coily hair, prioritize keeping sections detangled and manageable rather than letting them become dry tangles that you must pull through later.
5. Divide Your Hair Into Manageable Sections
Try separating your hair into a top section, two side sections, and a back section. Clip away everything except the area you are working on.
Take a smaller subsection when the brush cannot comfortably control all the hair. Dry it thoroughly before moving on. Small sections make it easier to notice damp areas instead of repeatedly going over the entire head.
You do not have to copy a stylist’s exact sectioning pattern. Choose an order you can follow without losing track of which areas are finished.
6. Shape Each Section With the Brush and Dryer
For a basic smooth blowout:
- Place the brush underneath the section near the roots. Lift the hair gently.
- Position the dryer above the section. Aim the nozzle along the hair toward the ends.
- Move the brush and dryer together. Guide the brush through while the airflow follows.
- Shape the ends. Guide them around the brush for a bend, or pull through for a straighter finish.
At the crown, lift the section away from your scalp as you dry for more height. For a swept-back finish, guide the hair back rather than straight downward.
Use light tension—not painful pulling. Keep the dryer moving and do not press its nozzle against your hair or scalp. Stop when the section is dry instead of continuing to heat it to chase every flyaway.
Practice tip: With the dryer turned off, rehearse the brush-and-dryer movement on one easy-to-reach section before adding airflow.
7. Let Each Section Cool
Switch to the cool setting while supporting the section in its intended shape, then gently release the brush. For extra bend, loosely coil the finished section and secure it with a clip while it cools.
Avoid immediately pulling apart sections you have just shaped. Finish the remaining areas first, then arrange the overall style.
8. Finish With a Light Touch
After your hair is dry, use your fingers to arrange it. Add a small amount of finishing cream or serum to the lengths and ends only where needed. A light finishing spray is another option.
Start with less product than you think you need. Check the result before adding more.
How to Adjust a Blowout for Your Hair Type and Length
Use these adjustments rather than changing the entire routine.
| Hair type or length | Adjustment to try |
|---|---|
| Fine hair | Keep finishing products lightweight and focus on gentle lift at the roots. |
| Thick or dense hair | Work in smaller sections and check that the inner hair is dry before moving on. |
| Curly or coily hair | Detangle while conditioned and work in sections. Do not force a brush through dry knots. |
| Short hair or bangs | Choose a smaller brush that can catch and shape the shorter pieces. |
| Long hair | Use a brush large enough to handle the length comfortably, while keeping each working section manageable. |
For example, a shorter fringe may need a smaller brush even when the rest of your hair is long. Brush choice can vary within the same hairstyle.
Common Blowout Mistakes and How to Fix Them
Use the result as feedback. A disappointing section does not automatically mean you need a hotter dryer.
| Problem | What to check | What to try |
|---|---|---|
| Roots look flat | Was the hair held close to the scalp throughout drying? | Lift the root area while shaping rather than concentrating only on the ends. |
| Some sections become frizzy afterward | Were they completely dry before you moved on? | Make the working section smaller and check for remaining damp areas. |
| The finish looks uneven | Were several sections drying together without clear separation? | Clip unfinished hair away and follow one consistent order. |
| Hair feels coated or heavy | How much finishing product did you use? | Use less next time and apply only where needed. |
What Should You Do if the Brush Gets Stuck?
Turn off the dryer and stop rotating the brush. Support the section and gently reverse the movement that wrapped it around the barrel. Do not keep pulling to force it free; avoiding tugging is part of the AAD’s damage-prevention advice.
For your next attempt, practice with a smaller amount of hair and a simple curved-end finish rather than winding the entire section tightly around the brush.
How Long Does a Blowout Last?
A blowout may hold its shape for several days, but there is no guaranteed duration. Styling guidance reviewed by hairstylists notes that longevity varies with factors such as activity and weather, and that curls or waves may relax sooner than the overall finish.
How to Maintain Blowout Hair Between Washes
Use a shower cap when bathing without washing your hair. At night, keep your hair loosely contained rather than pulled tightly; a loose arrangement can reduce friction, although it may also change the finished shape.
Wash when your scalp and hair need cleansing. Preserving a hairstyle should not take priority over removing accumulated oil or dirt.
For a refresh, first try rearranging the hair without heat. Avoid making a complete second blowout your automatic daily routine.
Does a Blowout Damage Your Hair?
A blowout can contribute to damage, especially when heat exposure and pulling are excessive. A smoother appearance does not mean the styling process was harmless.
A 2011 laboratory study found greater surface damage under hotter drying conditions. However, drying distance and duration also differed between groups. The findings do not establish one universally safe temperature or prove that every blow-drying routine is better or worse than air-drying.
Use the lowest effective heat, avoid unnecessary repeat passes, and give your hair breaks from heated styling. If gentler care does not improve ongoing problems, the AAD recommends seeing a dermatologist, particularly when thinning or hair loss is a concern.
Frequently Asked Questions
Can You Do a Blowout Without a Round Brush?
Yes. A paddle brush can help create a straighter finish. A round brush is more useful when your goal includes curved ends or a rounded, voluminous shape.
Can You Use a Blow-Dryer Brush Instead of a Separate Dryer?
Yes, but identify the tool first. A hot-air brush combines airflow and brushing, while some heated brushes use a hot surface and are intended only for already-dry hair. Follow your model’s instructions; these tools are not interchangeable.
Should You Start a Blowout on Wet or Dry Hair?
With a conventional dryer and brush, remove excess water first and pre-dry as needed before shaping. Do not begin detailed brush work on dripping-wet hair. For an electric styling brush, follow its specific wet-, damp-, or dry-hair requirements.
How Often Should You Give Yourself a Blowout?
There is no frequency that guarantees damage-free results. The AAD advises using heated styling tools less often, aiming for once a week or less in its damage-prevention guidance. Treat this as a reason to reduce exposure—not a guarantee that weekly styling is harmless.
Do You Need a Flat Iron After a Blowout?
No. A dryer and round brush can create a finished style on their own. Make the blowout your endpoint when you are happy with it rather than automatically adding another heated tool.
The Bottom Line
Build your at-home blowout around a routine you can control: careful preparation, manageable sections, deliberate brush movements, and a light finish.
For your next attempt, aim for consistent results rather than perfection. Practice one section, adjust what feels awkward, and continue without trying to solve every styling problem by increasing the heat.
This content is for informational purposes only and not medical advice.
References
- American Academy of Dermatology: Tips for healthy hair.
- American Academy of Dermatology: How to stop damaging your hair.
- American Academy of Dermatology: 6 curly hair care tips from dermatologists.
- U.S. Food and Drug Administration: Formaldehyde in Hair Smoothing Products: What You Should Know.
- Lee and colleagues, Annals of Dermatology: Hair shaft damage from heat and drying time of hair dryer.
- Sam Villa: How to blow dry hair properly and How to manage thick, frizzy hair.
- Dyson: Retro blowout styling tutorial.