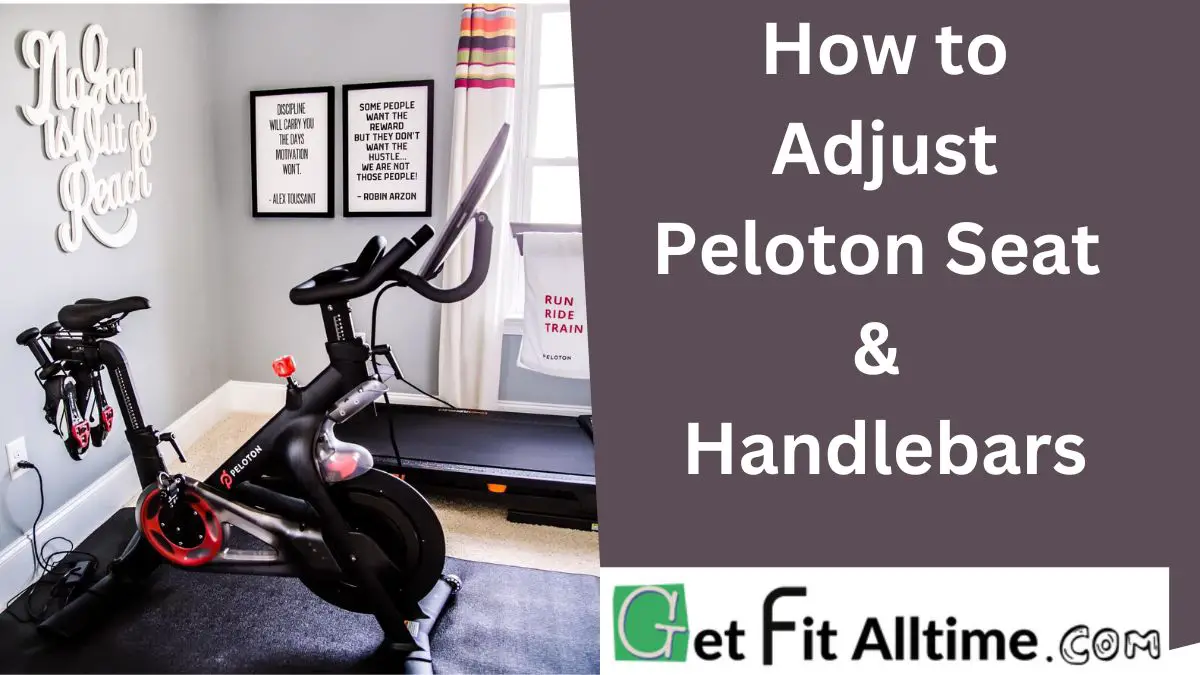
Peloton bike seat and handlebars setting are important in having a safe and comfortable ride. And while the setting may seem easy once you have the know-how, it can be stressful, especially for beginners. After all, there is no specific seat height and depth for a specific body height; everyone fits in a unique combination.
So, how do you adjust the Peloton bike and bike plus seat height and depth for your specific height and inseam?
How to Adjust Peloton Bike Seat
Generally, there is no predefined Peloton bike seat position for any user. However, there is a way to ensure that you find the correct fitting customized just for you.
The Peloton bike seat is adjustable vertically and horizontally, offering both height and depth adjustment options.
If you are a beginner and can’t tell where to begin, you can start with the saddle height at your hip bone. Then, set the saddle depth in the middle of the seat clamp, then try out a ride from this position.
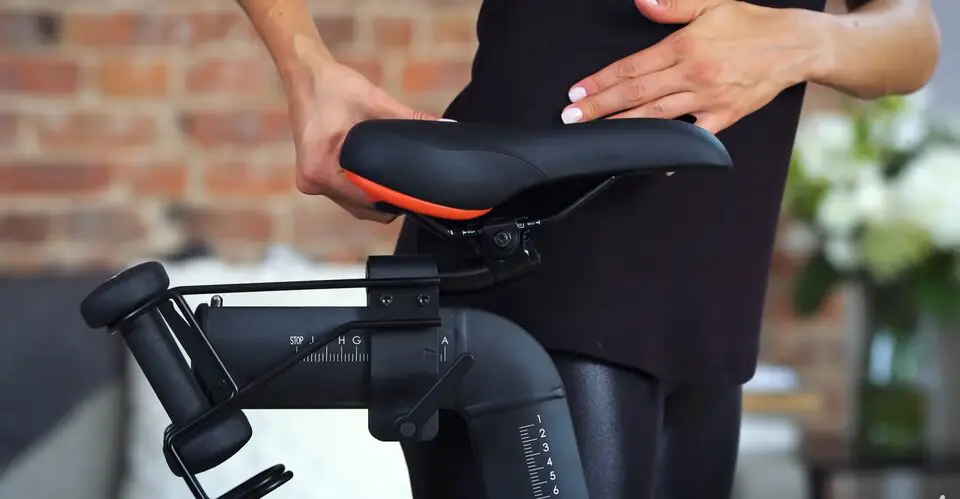
In most cases, users are comfortable with this seat position. However, minimal adjustments could make it even more comfortable.
To reduce knee injuries and improve performance, the saddle needs to be adjusted properly.
So what happens when the saddle height is set too low:
- You have reduced knee extension
- Which can increase the compression and stress on the knee.
- This can result in tendonitis and pain in the front of the knee
- It also reduces your pedaling power
- and your legs will tire faster, especially your quadriceps.
When your saddle height is set too high:
- You have over extension of the knee which
- can result in pain in the back of the knee,
- Chafing and saddle sores from hip rocking
- and reduced pedal power from overstretched muscles
It’s crucial to adjust your peloton bike seat height and position properly to prevent injuries and increase cycling efficiency.So, let’s get into the details of adjusting the seat height, then the seat depth for a comfy Peloton sitting position;
How to Set Your Peloton Seat Height
There are several ways to determine your proper bike seat height, and fortunately, we have tried out more than a couple and witnessed positive results;
1. Heel to Pedal Method

First off, sit on your bike and start cycling. The knee should only be slightly bent when your foot is at the lowest position, commonly known as the six o’clock position.
However, if the knee is compressed and bent at a significant angle, this means that the saddle height is too low. Over time, this position will cause knee pain and injury, which you can avoid with a seat adjustment.
Therefore, the solution, in this case, is to increase the height of the saddle. In Peloton, you can do this using a seat height adjustment knob, which sits at the front of the rear bike frame.
So, rotate the height adjustment knob counterclockwise to loosen the seat clamp. Then, rock the seat clamp side by side, and pull it smoothly to attain a higher height. Afterward, rotate the adjustment knob clockwise to lock the seat clamp in place.
Next, climb onto the bike and check on the new height.

On the other hand, you can find that you rock side by side to get to the six o’clock pedaling position. Or, you can find yourself straining to attain this position, hence stretching your ankle.
In this case, your seat height is too high, and you should lower it.
The process of lowering the seat height follows that of increasing the height, only that after loosening the adjustment knob, you will push the seat clamp lower into the frame.
In below video you will get better idea about Heel to Pedal Method
2. The Lemond Method
The Lemond method is named after a US cycling legend who reigned in the 80s and early 90s. It involves using your inseam to determine your bike saddle height. Actually, the inseam is the best way to assess your saddle height. The difference in inseams is the reason people of the same height do not rely on the same bike seat height.
I prefer getting a friend or partner when going through this process. You will also need a textbook, a measuring tape, and a marker pen or a pencil.
Next, put the book between your legs to the edge of your inseam. Then, have your friend measure the distance from the bottom of your feet to the top of your book to get your inseam. Mark the point on the tape and use the measurement to determine the seat height.
Honestly, this method is quite mathematical because after getting the inseam, you have to multiply it by 0.883. The answer should be the saddle height between the center of the bike clamp and the bike saddle top.
In below video you will get better idea about The Lemond Method
How to Adjust Fore/ Aft Peloton Bike Seat Distance
The fore and aft adjustment determine how far the bike seat is from the handlebars, often referred to as the seat depth in Peloton. It is essential in preventing lower back strain and injury while enhancing comfort.
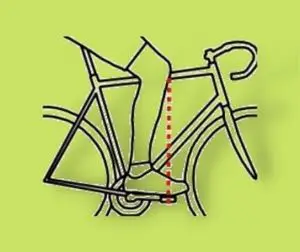
Generally, it would help if you got onto the bike, then pedal to the three o’clock position. This works best when you have a partner who checks on the angle between your knee and the ball of your foot. The angle should be 180 degrees, which means that the knee should be at the same level as the ball of your foot, where your cleats clip into the pedals.
However, if you don’t have a partner with you, you can tie a string onto your knee with a little load at the other end. At the three o’clock position, the string should hand directly onto the ball of your foot.
If your knee is slightly behind the ball of your foot, you should adjust the fore/ aft closer to the handlebars. On the other hand, if the ball of the foot is slightly behind the knee, adjust the bike seat farther from the handlebars.
In Below video you will get better idia about Fore/ Aft Bike Seat Distance
On the Peloton bike, the depth adjustment knob is at the side of the horizontal seat clamp. Rotate the adjustment knob counterclockwise to loosen the bike seat, then move the seat smoothly to the front. Ensure that you move the seat only slightly at a go for a more effective adjustment.
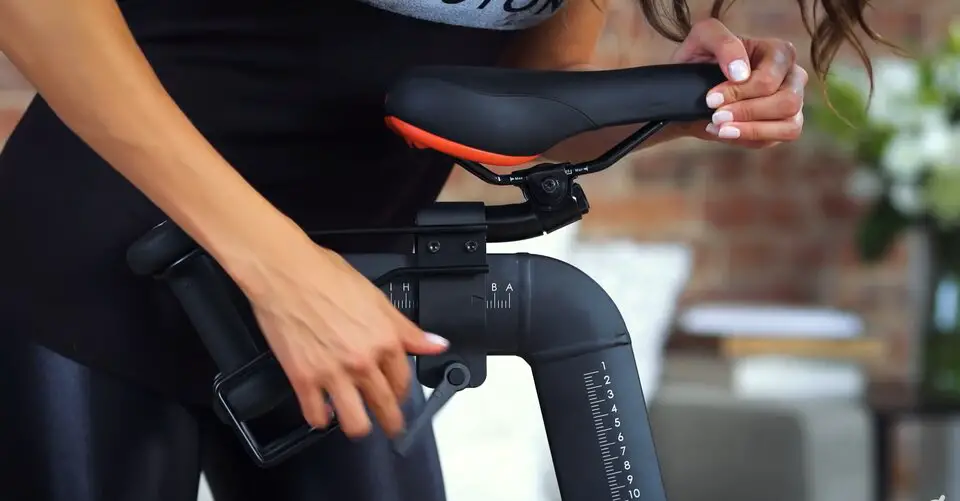
Then, rotate the adjustment knob clockwise to lock the bike seat in position. If the adjustment knob hangs on the wrong end, for instance, interfering with the bike weights, pull it outwards and rotate it downwards to the appropriate position.
Peloton Seat Height Chart
Unfortunately, there is no seat height chart for the Peloton bike. And it is understandable; every person has their own seat height on Peloton, regardless of similarities in body heights.
The reason behind the vast differences is that the bike seat height depends on the rider’s height and inseam. For example, people that are 5 ft 7 inches may have comfortable seat heights between 24 and 28, depending on their leg height.
Therefore, each person must come up with their seat height.
But, I calculated this if you want to determine your proper bike seat height via The Lemond Method. The ideal approach would be to measure your inseam (the space inside your leg) and then roughly match that size to the suggested saddle height, which is determined by measuring from the centre of your crank to the top of the saddle.
Here’s the table:
| Inseam Measurement (cm) | Saddle Height (cm) |
|---|---|
| 69 | 60.9 |
| 70 | 61.8 |
| 71 | 62.7 |
| 72 | 63.6 |
| 73 | 64.5 |
| 74 | 65.3 |
| 75 | 66.2 |
| 76 | 67.1 |
| 77 | 68 |
| 78 | 68.9 |
| 79 | 69.8 |
| 80 | 70.6 |
| 81 | 71.5 |
| 82 | 72.4 |
| 83 | 73.3 |
| 84 | 74.2 |
| 85 | 75.1 |
| 86 | 75.9 |
How to Adjust Peloton Bike Handlebars
Primarily, the Peloton bike handlebars are only adjustable in height. If you want a difference in the fore/ aft position, you would have to rely on the seat depth.
So, how high should Peloton handlebars be?
Once you adjust the Peloton bike seat height and fore/ aft positions, the handlebars should be easier to adjust. Basically, they should be at the same height as the bike seat.
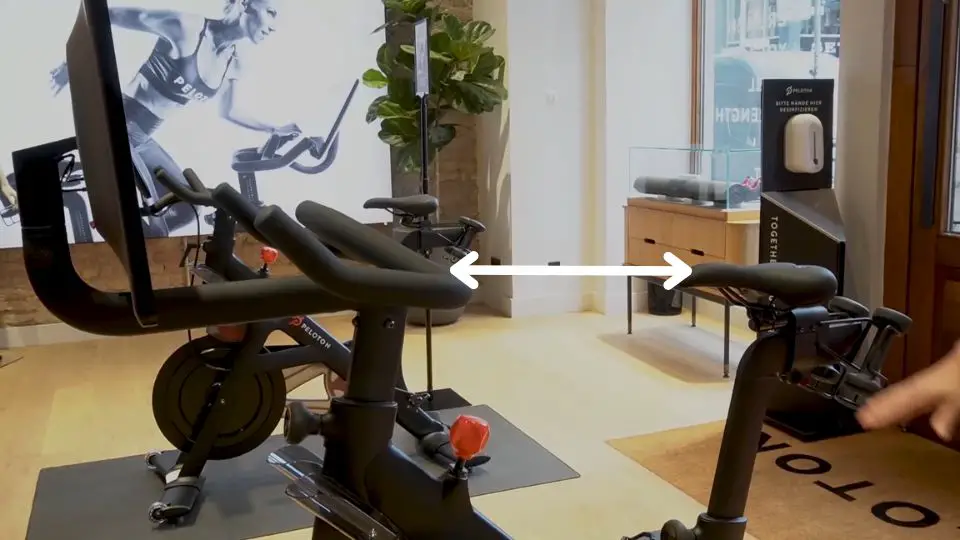

So, if the handlebars are either higher or lower than the bike seat, adjust the position using the height adjustment knob on the front bike frame. Rotate it counterclockwise to loosen the handlebars, then raise or lower the handlebars to ensure they are level with the bike seat height. Finally, rotate the knob clockwise to lock the handlebars securely in place.
Once the saddle fore/aft is set, ideally you want an elbow to fingertips distance from the saddle nose to the handlebars. Unfortunately, the handlebars on the Peloton bike do not adjust front to back. Do not slide your saddle forward to compensate for a poor reach. It is paramount that hip, knee, and ankle alignment is maintained. Your only option is to add inches to the handlebars by attaching pool noodles, weightlifting bar pad or handlebar extenders.
Have a Problem with the Handlebars Depth?
The Peloton bike seat depth adjustment is not enough for some users who wish they could adjust the handlebars fore/ aft position as well. While Peloton does not provide for this adjustment, you still have an option.
At approximately 79 bucks, you can get a Peloton handlebars extender that allows you to add depth adjustment to the Peloton bike handlebars.
VERTICALLY CHALLENGED RIDERS
Potential purchasers of the Peloton spin bike often wonder if the bike will fit them because they’re vertically challenged and/or their partner/spouse is extremely tall. Two or more riders which are both 5ft have different arm lengths, leg and torso lengths, so settings that work for one person who’s 5ft likely won’t work for another person who’s also 5 ft tall.
The good news is that the bike is extremely adjustable. Some methods are not so documented, and others improvised.
My first piece of advice is if you have a short and tall rider on the same bike, set the handle bars and keep them the same for both riders. I’m 6ft and my wife is 5ft and we keep our handle bars set at M setting as adjusting the handlebars every ride gets old quickly. We only change the seat height and depth when we ride. We keep a quick adjustment chart next to the bike, which we’ve pretty much memorized.
While most people can get comfortable with the Peloton 101 Videos or using Christine’s Peloton bike setup and adjustment video – HERE. Sometimes the saddle (Seat) is a little too far back for some vertically challenged riders.
The first fine-adjustment you can make aside from the lever-adjusted height and depth, is the ability to slide the saddle closer or further away on the rails on the bottom of the seat. Most riders never look here.

The other creative option, for riders having a tough time reaching the handlebars is to cut a few pieces of pool noodles and wrap around the handle bars like these creative riders. Other riders have purchased handlebar extenders on Amazon.

Body Positioning on the Peloton Bike

As a whole, there are different body positioning postures on Peloton due to the difference riding positions. You are sometimes expected to stand, sit straight up or sit with your back slightly bent.
However, you should ensure that for regular rides, you are able to sit straight, with your back relatively straightened. Also, ensure that your core is tightened to get the strength you need in cycling, bend your elbows slightly, and ensure that your shoulders do not bear the weight.
Your knees should be slightly bent in the six o’clock position for proper seat height, while they should be at a level position with the balls of your feet at three o’clock positions.
Do not tuck your spine. Your back should be flat, spine long, and tailbone angled off the back edge of the saddle. You should not be tucked under or rounding your spine-this places pressure on your pelvis and lower back. Do not sit upright either. Hips are tipped back, sit bones are resting on the meaty portion of the saddle. Lift your chest, shoulders back-this will keep you lifted. Make sure you are using enough resistance. You may need to change the angle of the nose. For women, I highly recommend investing in a saddle with a central cut out specifically contoured and designed for women. Eliminates all those pressure areas. Head to your local bike shop and get your sit bones measured and fitted for a comfortable saddle.
Keep your chest lifted, shoulders down and relaxed, and a soft bend in your elbows. Great video here by Christine D’Ercole
RIDING OUT OF THE SADDLE
Riding out of the saddle takes core strength, time, practice, and correct positioning make all difference. The biggest mistake riders make is they don’t add enough resistance when out of the saddle and it feels awkward. The key is to use plenty of resistance and to keep your hips back and low. Use that resistance-you need something and plenty to push and pull against. For some people it’s 5 more points and for others it’s 20 to 30 more points of resistance that needs to be added to ride comfortably out of the saddle.
The following tips are important to follow with your posture:
- Have your hips hinged back and over your heels.
- Hips over your heels;
- Heart over your knees.
- Get low-your hips should be hovering just slightly above the saddle. You should gently nudge it at times even.
- Your tailbone is long, back flat, core pulled in towards your spine, and your chest lifted.
Spinning motion:
- Pull up into one knee while pressing down into the opposite heel. We often just focus on mashing down the pedals, but pulling up into the quad and knee is really helpful in standing work.
- Don’t pull on the handlebars. They are for balance help only. Keep your weight in your legs and over your heels.
- Don’t look like an upright, ‘pogo stick’ – without enough resistance will cause sporadic cadence and sore knees.
- Embrace the resistance. More is best and often needed. It takes time and CORE strength. Engage your core- Pull your belly button into your spine. Add some core classes to your routine.
Take some Adv beginner classes from Denis and Matt. They are fantastic at coaching correct form and technique!
Bike Fitting Services
Some bike fitting services help you customize your bike and body posture for the best riding form. For example, Team Matt Wilpers Bike Fitters feature Peloton’s coach Matt Wilpers and other amazing fitters who are excellent at helping you with the bike set-up.
Essentially, the services here are virtual, usually via zoom, where you have a face-to-face instructor session. You will be guided through every bike form you have a challenge with, then get a detailed email after the sessions.
Final Thoughts
So, it is really tasking to determine your Peloton seat and handlebars adjustment, especially for beginners. However, you will have the consolation of avoiding challenges such as knee pains and lower back injuries, and let’s not forget that you set yourself up for optimal comfort.
Related:
- Peloton Bike Handlebars Wobble: How to Fix & Tighten
- How to Replace a Peloton Bike Crank Arm?
- How to Use Peloton Bike Without Subscription
- How to Adjust Peloton Pedals?
- Adjust/Change Resistance on Peloton Bike & Bike plus (Auto & Manually)
- Do You Need Special Cycling Shoes for Peloton Bike?
- 7 Best Peloton Compatible Shoes of 2023: For Men’s & Women’s

