
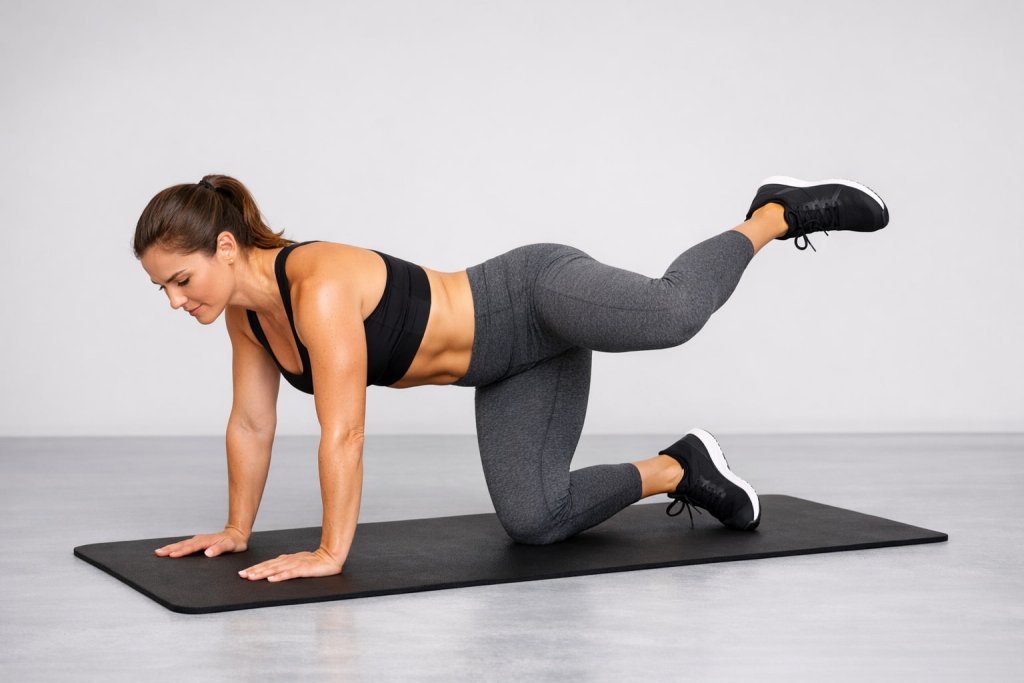
The fire hydrant exercise is a simple hands-and-knees move that trains your glutes (especially the outer glutes) by lifting one bent knee out to the side while keeping your hips and torso stable. It’s popular because it builds hip control with little to no equipment and fits into almost any lower-body routine.
Understanding proper form matters because the “feel” of fire hydrants comes from pelvis control and core bracing, not how high you can lift your knee. When you do it correctly, you’ll typically feel your glutes working more than your low back or hips.
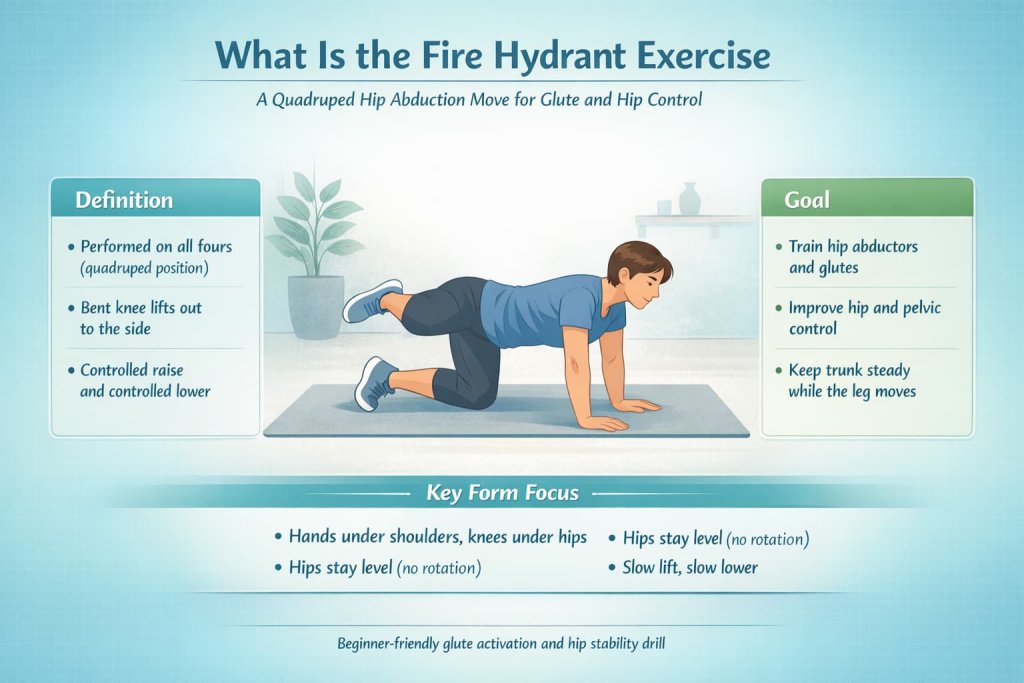
What Is the Fire Hydrant Exercise
The fire hydrant (often called quadruped hip abduction) is performed on all fours. You keep your knee bent and lift your leg out to the side, then lower with control. The goal is to train the hip abductors and glute muscles while keeping your trunk steady.
How to Do the Fire Hydrant Exercise Properly
How to do it:
- Start on all fours: hands under shoulders, knees under hips.
- Brace your core like you’re gently “zipping up” your ribs toward your pelvis.
- Keep your back neutral (don’t arch your lower back).
- Keeping your knee bent, lift one leg out to the side.
- Stop when your hips start to rotate or your low back wants to twist.
- Pause briefly, then lower slowly to the start position.
- Repeat, then switch sides.
Why it works: When you keep your hips square and move slowly, your glutes and hip abductors do the work instead of momentum or spinal movement.
Trainer Tip: Think “hips stay level, knee lifts—torso stays quiet.” If your body rocks side-to-side, reduce range of motion.
Fire Hydrant Exercise Variations
Add these fire hydrant exercise variations to target your outer glutes from different angles and keep your workouts from getting repetitive. Each option is easy to scale, so you can progress safely as your hip strength and control improve.
1. Banded Fire Hydrant
Why it works:
The band increases resistance throughout the lift, so your outer glutes have to work harder to move the knee out and control the return. It also helps you feel continuous tension, which can improve glute activation without needing heavier loads.
Muscles worked:
Gluteus medius and minimus (outer glutes), gluteus maximus (support), deep hip rotators, and core stabilizers.
How to do it:
- Place a small loop band just above your knees (or at mid-thigh).
- Get on all fours: hands under shoulders, knees under hips.
- Brace your core and keep your back neutral.
- Keep one knee bent at about 90 degrees.
- Lift the knee out to the side slowly until your hips start to rotate.
- Pause 1 second at the top, then lower with control.
- Complete reps, then switch sides.
Trainer Tip:
Don’t chase height. The band will tempt you to twist your hips—stay square and lift only as far as you can control.
2. Straight-Leg Hydrant (Harder)
Why it works:
Straightening the leg increases leverage, which makes the glute med work harder to lift and stabilize the hip. It also demands more control to avoid rotating your pelvis or arching your lower back.
Muscles worked:
Gluteus medius and minimus, gluteus maximus (support), deep hip stabilizers, core, and often more lateral hip control demand overall.
How to do it:
- Start on all fours with a neutral spine and braced core.
- Extend one leg straight behind you (toe lightly pointed down or neutral).
- Keeping hips level, lift the straight leg out to the side.
- Stop before your pelvis rotates or your low back arches.
- Pause briefly, then lower slowly to the start.
- Repeat, then switch sides.
Trainer Tip:
Imagine balancing a glass of water on your low back. If it would spill, reduce range or bend the knee again.
3. Fire Hydrant Pulses
Why it works:
Pulses keep constant tension on the outer glutes and can increase the “burn” with lighter resistance. They’re best used after strict reps, not as a replacement for controlled full-range reps.
Muscles worked:
Gluteus medius and minimus primarily, plus glute max support, deep hip rotators, and core bracing muscles.
How to do it:
- Get into the standard fire hydrant position on all fours.
- Lift your bent knee out to your strongest controlled top position.
- Pulse up and down in a small range (2–4 inches).
- Keep hips square and torso still throughout.
- Do the pulses slowly and controlled, then switch sides.
Trainer Tip:
If your body starts rocking, the pulses are too big or too fast. Make the movement smaller and tighten your core.
Fire Hydrant Exercise Muscles Worked
The fire hydrant mainly targets the muscles that help move your leg out to the side and stabilize your pelvis:
- Gluteus medius and gluteus minimus (outer glutes): key for pelvic stability and hip control
- Gluteus maximus: helps with overall hip power and shape
- Deep hip rotators and core: help you stay “square” and resist twisting
The Cleveland Clinic explains how the gluteus medius plays a big role in stabilizing the pelvis during movement, which is a major reason hip-abduction drills like fire hydrants can be useful.
Fire Hydrant Exercise Benefits
Fire hydrants can help you build:
- Better glute activation (especially outer glutes)
- Improved hip control and pelvic stability (useful for walking, running, and single-leg work)
- A stronger mind-muscle connection before squats, lunges, and deadlifts
They’re also easy to scale up or down, making them a beginner-friendly choice.
Common Fire Hydrant Mistakes That Reduce Glute Activation
If you’re not feeling your glutes, one of these is usually why:
- Rotating your hips open to lift higher (most common)
- Arching your lower back instead of keeping ribs stacked
- Rushing the reps and swinging the leg
- Shifting your weight to one side and collapsing into the supporting shoulder
- Letting the knee drift forward instead of moving out to the side
Fix: lower the lift height, slow down, and prioritize staying square.
How to Tell If You’re Doing It Right
You’re likely doing fire hydrants correctly if:
- You feel the work in the side glute of the lifting leg (not your low back)
- Your hips stay mostly level (no big twist)
- Your movement is smooth and controlled
- You can pause at the top without losing position
A quick self-check is to place one hand on your hip bone and see if it rotates as you lift. If it does, scale the range down.
Fire Hydrant Alternatives for Stronger Outer Glutes
If fire hydrants bother your wrists/knees or you want variety, try:
- Side-lying hip abduction
- Clamshells
- Lateral band walks
- Standing hip abduction (band or cable)
These also train the hip abductors and can be easier to load progressively over time.
Beginner-Friendly Sets, Reps, and Weekly Schedule
Here’s a simple, effective starting point:
| Goal | Sets | Reps | Tempo | Rest |
|---|---|---|---|---|
| Glute activation (warm-up) | 1–2 | 8–12/side | Slow, controlled | 30–45 sec |
| Strength/endurance | 2–4 | 10–15/side | 2 seconds up, 2 seconds down | 45–75 sec |
Safety Tips and Who Should Be Careful
Fire hydrants are generally low-impact, but be cautious if you have:
- Wrist pain (try fists, push-up handles, or forearms)
- Knee discomfort (use a pad or fold a mat)
- Hip pinching or sharp pain (reduce range and check alignment)
- Ongoing low-back pain that worsens with the movement
Stop if you feel sharp pain, numbness, or symptoms that linger after the workout, and consider guidance from a qualified clinician if symptoms persist.
People Also Ask About the Fire Hydrant Exercise
Do fire hydrants grow glutes?
They can support glute development, especially for the outer glutes, but results depend on progressive overload, overall training plan, nutrition, and consistency.
Should you feel fire hydrants in your hip flexors?
A little hip involvement is normal, but strong hip-flexor “burn” often means you’re lifting too far forward or losing pelvic position.
Are fire hydrants better than donkey kicks?
They target the glutes differently. Fire hydrants emphasize hip abduction/outer glutes, while donkey kicks emphasize hip extension.
FAQ
1) Where should I feel the fire hydrant exercise?
Mostly in the side glute (outer butt) of the working leg, plus some core bracing.
2) How high should I lift my knee?
Only as high as you can lift without rotating your hips or arching your back.
3) Are bands necessary?
No. Bands help increase tension, but bodyweight is enough to learn control and form.
4) Can I do fire hydrants every day?
You can do light activation sets often, but for strength-focused work, give your muscles recovery time—especially if you’re also training legs.
5) What if my wrists hurt?
Use push-up handles, do the move on your forearms, or switch to side-lying abductions.
6) How long until I see results?
Many people feel better activation within a few sessions. Visible changes typically require consistent training and progressive challenge over weeks.
Conclusion
The fire hydrant exercise is a simple, joint-friendly way to train your glutes—especially the outer glutes—while improving hip control. Focus on a stable torso, level hips, and slow reps, then progress with bands, pauses, or harder variations as you get stronger.
References
- ACSM Position Stand – Progression Models in Resistance Training (2009)
- PubMed Central – EMG Analysis of Glute Med and Glute Max During Rehab Exercises (Boren et al., 2011)
- PubMed Central – Glute Max Strengthening Program Including Quadruped “Fire Hydrant” (JPTS, 2018)
- American Heart Association (Circulation) – Resistance Training Recommendations and Rep Ranges (2024)