
The best diastasis recti exercises for beginners are gentle deep-core and breathing-based moves that reduce “doming,” improve pressure control, and rebuild core strength gradually.
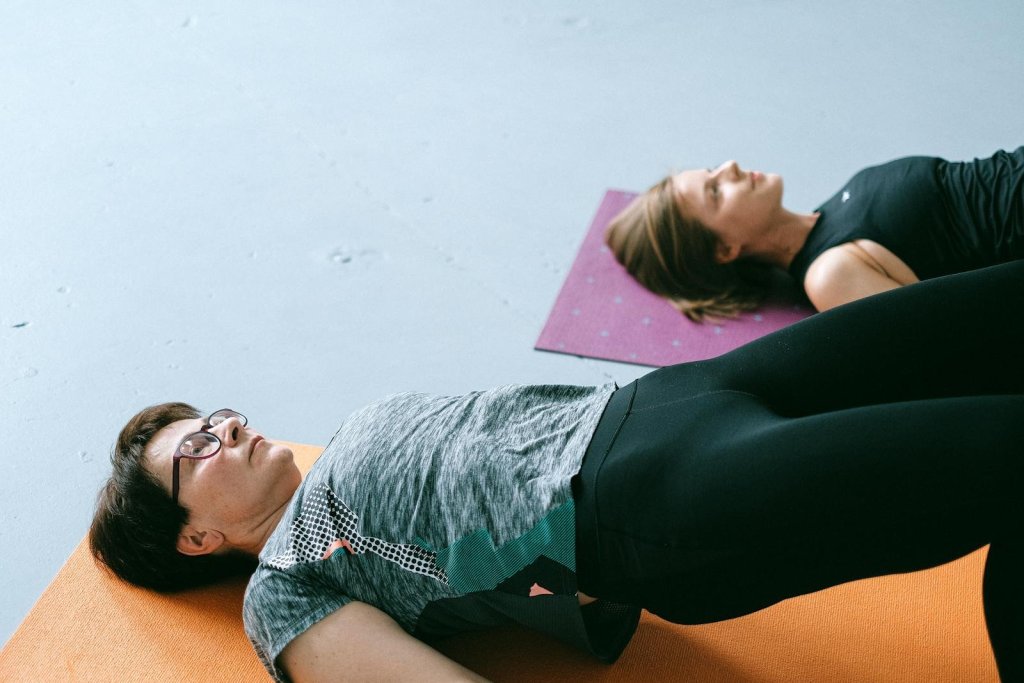
Beginner rehab usually starts with deep abdominal activation (transverse abdominis), steady breathing, and low-load leg or hip movements you can control without bulging, which is a common approach in patient-friendly guidance like the Torbay and South Devon NHS leaflet.
Diastasis recti basics beginners should know
Diastasis recti (sometimes called rectus abdominis diastasis) is a widening of the connective tissue between the “six-pack” muscles. A key sign during exercise is doming or bulging along the midline, especially when rising up, lifting, or straining—something many rehab leaflets teach you to watch for, including St George’s University Hospitals NHS.
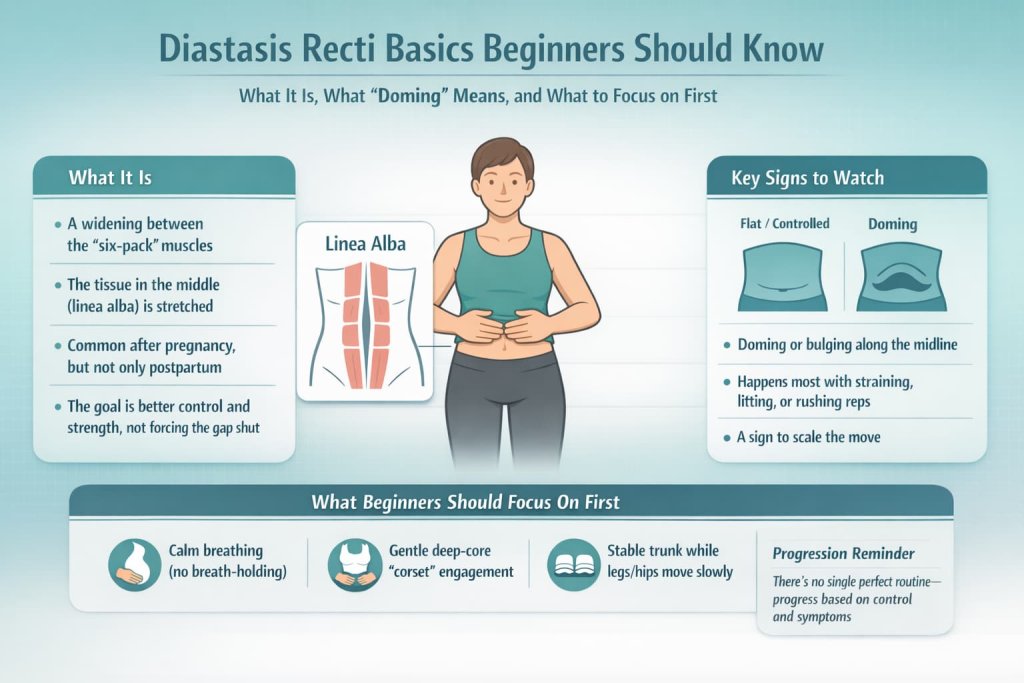
Good beginner training isn’t about “crushing” your abs. It’s about learning to:
- Breathe without bracing too hard
- Engage your deep core without holding your breath
- Move your legs/hips while keeping your trunk stable
A rehab-focused review explains that exercise programs often prioritize pressure management and deep trunk muscle engagement, but there isn’t one single “perfect” routine for everyone, which is why progression and symptom response matter. (PubMed Central)
Quick safety check before you start
Use this simple rule during every rep:
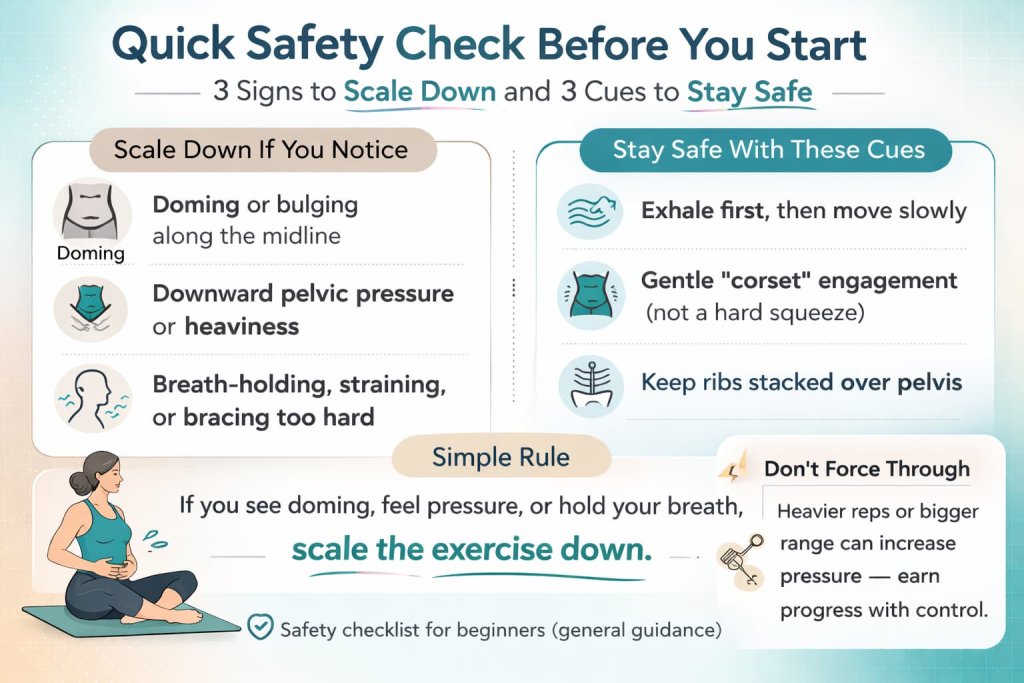
- If you see doming/bulging, feel downward pelvic pressure, or need to hold your breath, the move is currently too hard—scale it down.
- Avoid “forcing through” with heavier reps or bigger range.
If you want a clear example of the “breathe, brace gently, and stop if symptoms worsen” approach, patient guidance like the Oxford University Hospitals NHS leaflet covers these safety ideas in plain language.
The 8 best diastasis recti exercises for beginners
Use these as a progression. Move slowly, keep ribs relaxed (no flaring), and stop any rep that creates doming.
1) 360 Breathing With Rib Relaxation
How to do it:
- Lie on your back with knees bent and feet flat.
- Inhale through your nose and let your ribs expand gently (not just your belly).
- Exhale slowly and feel your ribs soften down.
- Keep your shoulders relaxed and jaw unclenched.
Why it works:
This teaches pressure control and sets up better deep-core engagement without bracing too hard.
Muscles worked:
Diaphragm, deep core stabilizers, pelvic floor (coordination).
Trainer Tip:
If your belly pops up hard on the inhale, make the breath smaller and slower.
2) Pelvic Tilt (Small Range)
How to do it:
- Lie on your back, knees bent.
- Exhale and gently tip your pelvis to flatten your lower back toward the floor.
- Inhale and return to neutral (don’t over-arch).
- Keep the movement small and controlled.
Why it works:
Improves pelvic control and helps you find a stable “neutral” position for other exercises.
Muscles worked:
Deep abs, glutes (light), spinal stabilizers.
Trainer Tip:
Think “zip up” the lower belly on the exhale—no squeezing your glutes hard.
3) Heel Slide
How to do it:
- Start in the same bent-knee position.
- Exhale and set your “corset” gently.
- Slowly slide one heel away until you feel your core wants to bulge.
- Slide back in with control, then switch sides.
Why it works:
This adds leg movement while you practice keeping pressure controlled.
Muscles worked:
Transverse abdominis, hip flexors (light), pelvic floor coordination.
Trainer Tip:
Shorten the slide range until you can keep the abdomen flat.
4) Bent-Knee Fallout
How to do it:
- Keep knees bent, feet flat.
- Exhale and lightly engage deep core.
- Let one knee open a few inches to the side (pelvis stays still).
- Bring it back slowly; repeat on the other side.
Why it works:
Builds hip control without forcing a bigger load through the midline.
Muscles worked:
Deep core stabilizers, hip rotators, glute med/min (light).
Trainer Tip:
If your pelvis rocks, reduce the range or place your hands on your hip bones as “level indicators.”
5) Glute Bridge With Exhale
How to do it:
- Feet flat, knees bent.
- Exhale, set your core gently, then lift hips a few inches.
- Pause 1–2 seconds while breathing.
- Lower slowly and relax fully.
Why it works:
Bridges strengthen glutes and posterior chain, helping your trunk feel more supported in daily life.
Muscles worked:
Glutes, hamstrings, deep core stabilizers.
Trainer Tip:
If you feel your lower back take over, lower the height and keep ribs heavy.
6) Side-Lying Core Set With Breath
How to do it:
- Lie on your side with knees bent.
- Inhale softly into your ribs.
- Exhale and gently draw the lower abdomen in.
- Hold 3–5 seconds while staying relaxed, then release.
Why it works:
Side-lying can reduce pressure and makes it easier for beginners to feel deep core engagement.
Muscles worked:
Transverse abdominis, obliques (light), pelvic floor coordination.
Trainer Tip:
Keep your top hand on your lower belly to confirm it’s a gentle “in,” not a hard crunch.
7) Quadruped Breathing and Brace (Hands-and-Knees)
How to do it:
- Set up on hands and knees: hands under shoulders, knees under hips.
- Inhale gently and feel your ribs expand.
- Exhale and lightly engage deep core (no rounding hard).
- Keep your spine long and neck neutral.
Why it works:
This progresses core control against gravity without needing big movements.
Muscles worked:
Deep core stabilizers, shoulder stabilizers.
Trainer Tip:
If you dome, shift your hips back slightly or reduce the brace intensity.
8) Bird Dog (Short Range)
How to do it:
- From hands-and-knees, exhale and set your core.
- Slide one foot back on the floor (toes stay down) instead of lifting.
- Option: slide the opposite hand forward a few inches (hand stays down).
- Return slowly and switch sides.
Why it works:
Teaches anti-rotation control without a big pressure spike.
Muscles worked:
Deep core, glutes, spinal stabilizers.
Trainer Tip:
Keep hips level like a tray—no shifting side to side.
Beginner-friendly sets, reps, and weekly schedule
- Frequency: 3–5 days per week
- Session length: 5–12 minutes
- Sets: 1–2 sets per exercise
- Reps: 5–8 slow reps per side (heel slides, fallouts, bird dog slides)
- Holds: 3–5 seconds (deep core set, wall dead bug press)
- Progress: control first → reps → range of motion
Simple week idea:
- 3 days: breathing + deep core set + heel slides
- 2 days: add pelvic tilts + fallouts + bridges
- When stable: add quadruped brace + short-range bird dog
Common form mistakes that cause doming
- Holding your breath or straining
- Pushing the belly out while “bracing”
- Ribs flaring up during leg moves
- Moving legs too far too soon
- Going fast or using momentum
- Pelvis rocking, twisting, or shifting
- Turning drills into crunches (head/shoulders lifting)
- Ignoring doming instead of scaling down
What to avoid (at least for now)
Early on, avoid any movement that repeatedly creates doming, breath-holding, or a feeling of pushing pressure downward. Common examples to delay or modify:
- Full sit-ups and aggressive crunching
- Double-leg lowers (too hard early for most beginners)
- Heavy lifting while breath-holding
- Any move that repeatedly creates doming
For a patient-friendly overview of what diastasis recti is and which activities are commonly discouraged early postpartum (including crunch-type moves), see the guidance from Cleveland Clinic.
A simple beginner plan (2–4 weeks)
Use this as a starting structure (adjust based on symptoms and fatigue):
- 3–5 days/week (5–12 minutes): 360 breathing + deep core set + heel slides
- 2–3 days/week: add pelvic tilts + bent-knee fallouts
- 2 days/week: add bridges + quadruped breathing
- When stable: add short-range bird dog and wall dead bug press
Progress by increasing control first (less doming, smoother breathing), then reps, then range of motion.
When to get professional help
Consider a pelvic health physiotherapist if:
- Doming happens even with the easiest drills
- You have pain, heaviness, or “bearing down” sensations
- Symptoms worsen over time
- You’re unsure which movements are safe for your situation
FAQs
Can beginners do diastasis recti exercises at home?
Yes. Most beginner drills are floor- or wall-based and focus on breathing and gentle deep-core activation. Start short and stop any rep that causes doming.
How many times a week should I do diastasis recti exercises?
Many beginners do best with short, frequent practice (3–5 days/week) rather than long sessions.
Should I avoid crunches forever?
Not necessarily. Many people reintroduce harder ab work later, but only after they can control pressure without doming and without breath-holding.
What does “doming” mean?
Doming is a ridge or bulge along the midline of your abdomen during effort. It’s a sign the exercise is currently creating more pressure than your core can manage well.
How long does it take to improve diastasis recti?
It varies. Many people notice better control and function within weeks of consistent practice, but timeline depends on symptoms, load, recovery factors, and progression.
Can exercise reduce the gap?
Exercise may improve function and reduce separation for some people, but results vary—so focusing on symptom improvement, strength, and pressure control is the safest goal.
Conclusion
Beginner diastasis recti training works best when you prioritize breathing, gentle deep-core activation, and slow progressions that avoid doming. Start with the first 3–5 drills, build consistency, and only progress when your core stays flat and your breath stays calm.