
You can learn the splits by warming up first, stretching the muscles needed for your chosen split, building strength through the available range, and practicing supported positions consistently. However, learning how to do the splits safely requires patience. Forcing your legs toward the floor can cause a muscle strain or aggravate the hip, groin, hamstring, or knee.
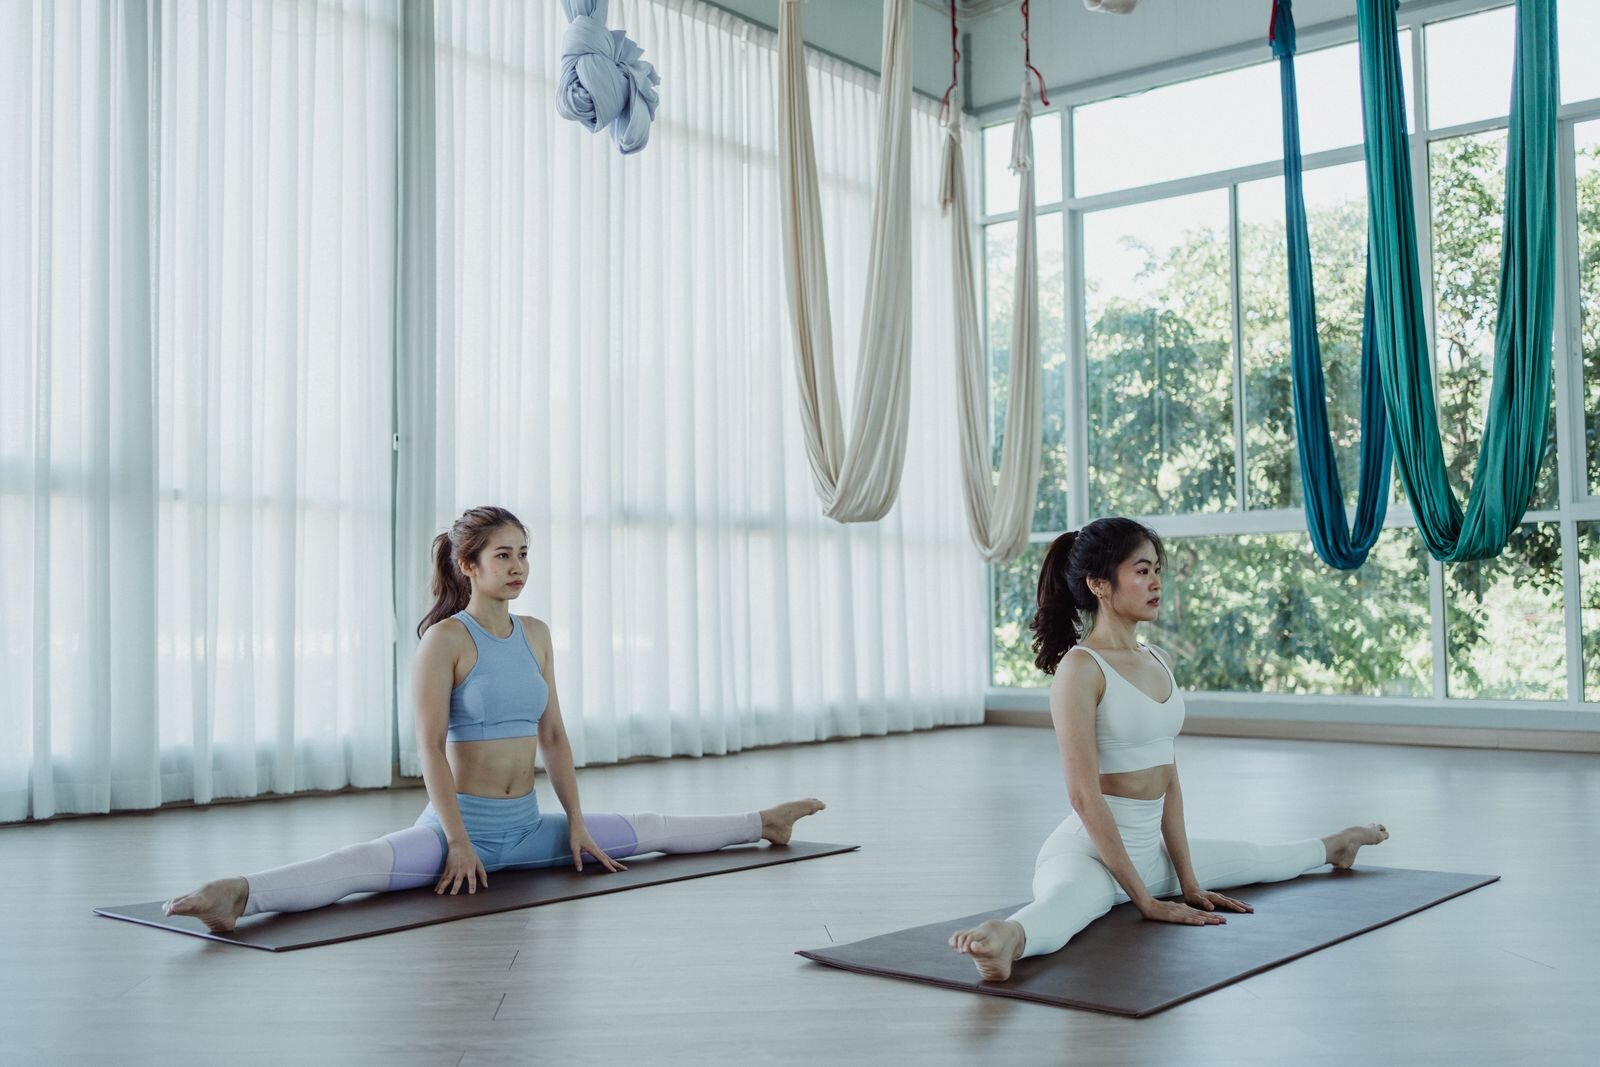
Most beginners can improve their flexibility, even if they currently feel very stiff. A 2026 systematic review of 79 randomized trials found that regular static stretching produced moderate improvements in lower-body flexibility across different ages, sexes, training levels, and starting flexibility levels. The research measured range of motion, though—not whether every participant achieved a floor-level split.
This guide explains how to learn the splits with a realistic routine for both front and middle splits. You will also learn how often to practice, how long stretches should last, and which warning signs mean you should stop.
Can a Beginner Learn to Do the Splits?
Yes. Most healthy beginners can improve the flexibility required for the splits through regular, progressive practice.
Adults can make progress too. The 2026 review found that age did not meaningfully change the overall flexibility response to static stretching. However, the amount of progress and the time required can vary considerably from one person to another.
Your progress may depend on:
- Your current range of motion
- Previous flexibility training
- Hip and pelvic structure
- Past injuries
- Your chosen type of split
- How consistently you practice
- Your strength near the end of your range
- How well you recover between sessions
Improving your flexibility is a realistic goal. Reaching a perfectly flat split is not guaranteed for everyone.
Extreme split positions place significant demands on the hips. Research involving dancers and gymnasts shows that front and side splits can sometimes create painful contact or instability around the hip, especially in people with underlying structural differences or existing symptoms. A hard pinch inside the hip should not be treated as ordinary muscle tightness.
Front Splits vs. Middle Splits
Front and middle splits require different movements. Choose one as your primary goal before starting a routine.
| Split type | Main movement | Areas that commonly need work | Key beginner focus |
|---|---|---|---|
| Front split | One hip flexes while the other extends | Front-leg hamstrings; rear-leg hip flexors and quadriceps | Train both sides and keep the pelvis reasonably forward |
| Middle split | Both legs move outward into hip abduction | Inner thighs, adductors, medial hamstrings, and hip rotators | Control the outward movement without twisting the knees |
| Half split | One leg extends forward from a kneeling position | Hamstrings and calves | Use as a front-split preparation exercise |
| Supported split | A partial front or middle split performed with blocks or a chair | Multiple muscles around the hips and thighs | Stop at a controllable, pain-free depth |
A front split does not automatically prepare you for a middle split. You can eventually train both, but beginners often progress more effectively when one variation is the main focus of each session.
How Long Does It Take to Learn the Splits?
There is no reliable universal timeline for learning the splits.
A 2025 systematic review and meta-analysis examined 189 studies involving 6,654 adults. Both single stretching sessions and repeated stretching programs improved flexibility. The researchers found that the average benefit appeared to plateau at approximately four cumulative minutes per session and ten minutes per week. Stretching harder did not consistently produce greater improvements.
These numbers are general findings from flexibility studies. They are not a formula for achieving a full split, and they do not mean ten minutes of stretching will put everyone on the floor.
Some beginners notice improved comfort or range within a few weeks. Reaching a full split may take months or longer, depending on the person. Instead of setting a rigid deadline, monitor:
- How far your pelvis is from the floor
- Whether you can maintain better alignment
- Whether both sides are becoming more balanced
- Whether you can enter and leave the position smoothly
- Whether the stretch feels more comfortable at the same depth
Use the same warm-up, surface, and supports whenever you measure your progress. Checking every two weeks is usually more useful than testing your maximum depth every day.
How to Learn the Splits Safely
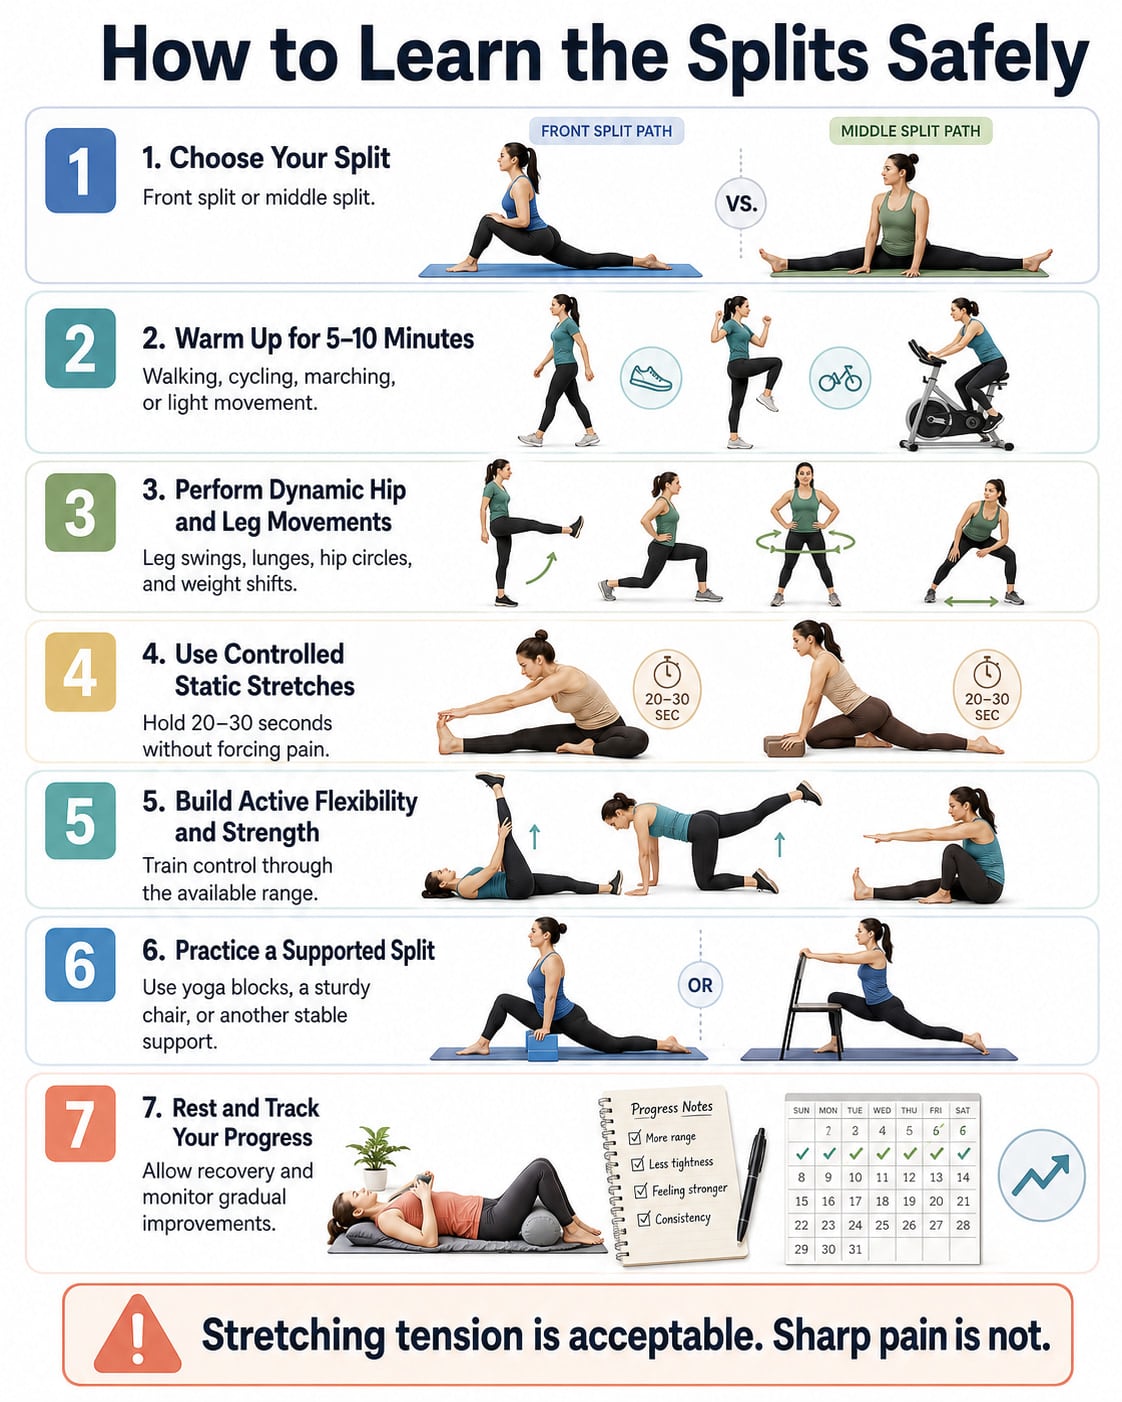
The following seven-step process can be used for either front or middle split training.
Step 1: Choose the Type of Split You Want to Learn
Decide whether you are working primarily toward a front split or middle split.
For front splits, practice with both the right and left leg forward. One side may feel easier, but training only that side can create a larger imbalance.
For middle splits, focus on gradually increasing outward hip movement while keeping your knees and feet comfortably aligned. Do not force your toes to face a specific direction if that position causes hip or knee discomfort.
Step 2: Warm Up for 5–10 Minutes
Do not begin with your deepest static stretch.
The American Academy of Orthopaedic Surgeons’ stretching guidance recommends warming up before stretching, moving slowly, avoiding bouncing, and stopping if stretching becomes painful.
Begin with five to ten minutes of easy movement, such as:
- Brisk walking
- Easy stationary cycling
- Marching in place
- Light jogging
- Low-impact dancing
- Bodyweight squats
The goal is to feel warm and mobile, not tired.
Step 3: Perform Dynamic Hip and Leg Movements
After the general warm-up, use controlled dynamic movements to prepare the hips and legs.
Try:
- Front-to-back leg swings: 8–10 per leg
- Side-to-side leg swings: 8–10 per leg
- Walking or reverse lunges: 6–8 per side
- Hip circles: 6–8 in each direction
- Side-to-side weight shifts: 8 per side
- Bodyweight good mornings: 8–10 repetitions
Move gradually through a comfortable range. A leg swing should not become an uncontrolled kick, and a dynamic warm-up should not involve bouncing at your maximum range.
Step 4: Use Controlled Static Stretches
Static stretches form the main flexibility portion of the session.
For each stretch:
- Move into the position slowly.
- Stop when you feel a noticeable but manageable pull in the muscle.
- Breathe normally.
- Hold for 20–30 seconds.
- Come out of the stretch gradually.
- Repeat once or twice on each side.
The sensation should feel broad and muscular. It should not feel sharp, electric, unstable, or concentrated inside a joint.
The AAOS recommends slow, gentle stretching without bouncing and notes that stretching should not hurt. Recent research also suggests that higher discomfort does not consistently create better flexibility gains, so there is no need to force a painful stretch.
Step 5: Build Active Flexibility and Strength
Passive flexibility is the range you can reach with help from gravity, the floor, or your hands. Active flexibility is the range you can control with your muscles.
Both are useful. Strengthening the legs and hips can help you control your position instead of collapsing into it.
A systematic review of 55 studies found that resistance training with external loads improved range of motion and produced results similar to stretching. Bodyweight-only resistance programs did not show the same significant pooled flexibility effect, but bodyweight exercises can still help beginners learn balance, positioning, and muscular control.
Useful exercises include:
- Split squats
- Glute bridges
- Controlled Romanian deadlifts or hip hinges
- Straight-leg raises
- Side lunges
- Assisted Cossack squat progressions
- Side-lying leg raises
- Isometric contractions in a supported split position
Start with a range you can control. Add light resistance only after your technique is stable.
Step 6: Practice a Supported Split
Use yoga blocks, a sturdy chair, or another stable surface under your hands. Support reduces the amount of bodyweight pressing into the stretch.
How to Practice a Supported Front Split
- Begin in a half-kneeling position.
- Place your hands on blocks on either side of your body.
- Slowly slide or step the front foot forward.
- Gradually move the rear knee backward.
- Keep the front kneecap facing generally upward.
- Keep the rear knee facing generally downward without forcing it.
- Keep the front of the pelvis mostly facing forward.
- Stop at a depth you can hold without sharp pain.
- Hold for 15–30 seconds.
- Press into the blocks and bend the knees slightly to exit.
A yoga block, cushion, or folded blanket can also be placed under the pelvis for additional support.
How to Practice a Supported Middle Split
- Begin standing with your feet wider than your hips.
- Place your hands on blocks, a chair, or the floor.
- Move the feet outward in small increments.
- Keep the knees and toes pointing in the same general direction.
- Maintain light muscular tension rather than dropping your full weight downward.
- Stop if you feel groin pain or pinching inside either hip.
- Hold for 15–30 seconds.
- Bend the knees slightly and bring the feet inward to exit.
Do not ask another person to push your legs farther apart. The extra force can move you beyond a range you can control.
Step 7: Rest and Track Your Progress
A practical starting schedule is three nonconsecutive split sessions per week.
Gentle mobility can be performed more frequently if it feels comfortable, but maximum-depth split holds should not be forced every day. Reduce the session depth or take an additional recovery day if your hamstrings, adductors, hip flexors, or knees remain unusually sore.
The 2025 stretching review found that weekly frequency did not independently determine flexibility improvements once the overall training dose was considered. Consistent, manageable practice is therefore more useful than repeatedly performing painful daily sessions.
Beginner Front Split Stretching Routine
Complete the general warm-up and dynamic movements before starting this routine.
1. Half-Kneeling Hip Flexor Stretch
How to do it:
- Kneel with one knee on a padded surface.
- Place the opposite foot in front of you.
- Keep your torso upright.
- Gently tuck the pelvis without squeezing excessively.
- Move your hips forward slightly.
- Feel the stretch across the front of the hip on the kneeling side.
Dose: Hold for 20–30 seconds. Repeat twice per side.
Avoid arching your lower back to create the appearance of greater hip extension.
2. Half-Split Hamstring Stretch
How to do it:
- Begin in a half-kneeling position.
- Shift your hips backward.
- Extend the front leg with the heel resting on the floor.
- Keep a small bend in the knee if needed.
- Hinge forward from the hips while keeping your back long.
- Stop when you feel a stretch behind the front thigh.
Dose: Hold for 20–30 seconds. Repeat twice per side.
You do not need to reach your toes. Moving from the hip is more important than rounding your back.
3. Supported Quadriceps Stretch
How to do it:
- Stand next to a wall or chair.
- Bend one knee and bring the heel toward your buttocks.
- Hold the ankle or pant leg.
- Keep the knees near each other.
- Gently move the thigh backward without arching your back.
Dose: Hold for 20–30 seconds. Repeat twice per side.
A side-lying version may be more comfortable if standing balance is difficult.
4. Low Lunge-to-Half-Split Flow
How to do it:
- Begin in a low lunge with the rear knee down.
- Move forward into a comfortable hip flexor stretch.
- Shift backward and straighten the front leg into a half split.
- Return to the low lunge.
- Move slowly rather than bouncing between positions.
Dose: Perform 6–8 controlled repetitions per side.
5. Supported Split Squat
How to do it:
- Stand in a staggered stance.
- Hold a chair or wall for balance.
- Bend both knees and lower a comfortable distance.
- Keep the front knee tracking in the same direction as the foot.
- Press through both feet to stand.
Dose: Perform 1–2 sets of 6–10 repetitions per side.
6. Supported Front Split Hold
Use the instructions from Step 6.
Dose: Hold for 15–30 seconds. Perform one or two holds with each leg forward.
Your front-split position is deep enough when you feel a controlled stretch in the front-leg hamstrings and rear-leg hip flexors. It is too deep if you lose control, twist sharply, hold your breath, or feel pain.
Beginner Middle Split Stretching Routine
Complete a five- to ten-minute warm-up before beginning.
1. Standing Side-to-Side Weight Shift
How to do it:
- Stand with your feet wider than shoulder-width apart.
- Bend one knee and shift your hips toward that side.
- Keep the opposite foot planted.
- Return to the center.
- Repeat on the other side.
Dose: Perform 8 controlled repetitions per side.
2. Adductor Rock-Back
How to do it:
- Begin on your hands and knees.
- Extend one leg directly to the side.
- Keep the extended foot flat or rest the heel on the floor.
- Slowly move your hips backward.
- Stop when you feel a stretch along the inner thigh.
- Move forward again.
Dose: Perform 8–10 repetitions per side.
Place padding under the kneeling knee.
3. Butterfly Stretch
How to do it:
- Sit with the soles of your feet together.
- Allow the knees to move outward naturally.
- Hold your ankles or feet.
- Keep your spine long.
- Hinge slightly forward if you need more stretch.
Dose: Hold for 20–30 seconds. Repeat twice.
Do not push the knees down with your hands.
4. Wide-Leg Seated Hinge
How to do it:
- Sit with both legs open to a comfortable width.
- Point the knees and toes generally upward.
- Sit on a folded blanket if your pelvis rolls backward.
- Place your hands in front of you.
- Hinge forward slightly while maintaining a long spine.
Dose: Hold for 20–30 seconds. Repeat twice.
The goal is to feel the inner thighs lengthen—not to force your chest to the floor.
5. Assisted Side Lunge
How to do it:
- Stand with a wide stance.
- Hold a sturdy support.
- Bend one knee and move your hips toward that side.
- Keep the other leg extended.
- Press through the bent leg to return to the center.
Dose: Perform 1–2 sets of 6–8 repetitions per side.
Use a shallow range until you can keep the bent knee aligned with the foot.
6. Supported Middle Split Hold
Use the supported middle-split instructions from Step 6.
Dose: Hold for 15–30 seconds. Perform one or two holds.
Let your feet rotate only as much as needed to keep the hips and knees comfortable. Do not force a perfectly forward-facing foot position.
Four-Week Beginner Splits Starter Plan
This four-week plan is designed to build a safe habit. It does not promise that you will achieve a complete split in four weeks.
| Week | Frequency | Stretching plan | Supported split practice |
|---|---|---|---|
| Week 1 | 3 sessions | One round of each stretch; 20-second holds | One 15-second hold at an easy depth |
| Week 2 | 3 sessions | Two rounds; 20–30-second holds | One or two 15–20-second holds |
| Week 3 | 3–4 sessions | Two rounds plus 1–2 strength exercises | One or two 20–30-second holds |
| Week 4 | 3 sessions | Maintain the same volume and improve control | Move slightly deeper only when completely pain-free |
Progress only one variable at a time:
- Hold a stretch slightly longer
- Add a second round
- Add a few controlled repetitions
- Use slightly less support
- Move a small amount deeper
Do not increase duration, depth, repetitions, and weekly frequency all at once.
How Often Should You Practice the Splits?
Most beginners can start with three sessions per week, ideally with a recovery day between deeper sessions.
A typical session may include:
- 5–10 minutes of general warm-up
- 3–5 minutes of dynamic movement
- 5–10 minutes of static stretching
- 3–5 minutes of active flexibility or strength
- 1–2 supported split holds
A shorter session you can perform consistently is more useful than an exhausting session that leaves you too sore to practice again.
Avoid deep split work when:
- The target muscles are still significantly sore
- You have a recent strain or joint injury
- You feel unusually fatigued
- Your range is decreasing as the session continues
- A previous session caused pain that has not settled
What Should a Safe Split Stretch Feel Like?
| Usually acceptable | Stop the stretch |
|---|---|
| A broad pulling sensation through a muscle | Sharp, stabbing, or tearing pain |
| Tension that remains stable while you breathe | Pain that becomes stronger during the hold |
| Mild temporary discomfort that stops after exiting | Burning, tingling, or an electric sensation |
| Similar muscular tension on both sides of a joint | A hard pinch inside the hip or groin |
| Enough control to leave the position slowly | A pop followed by pain, weakness, or swelling |
You should remain able to breathe normally and exit the position without assistance.
Common Splits Training Mistakes
Stretching Without Warming Up
Cold, stiff muscles are not ready for maximum-range positions. Complete a general and dynamic warm-up first.
Bouncing at the End of the Stretch
Bouncing adds uncontrolled force. Enter and leave every stretch slowly.
Treating Pain as Progress
More pain does not mean more effective stretching. Reduce the depth if you cannot breathe comfortably or maintain control.
Training Only Passive Flexibility
Passive holds may increase available range, but strength exercises help you control that range. Include both.
Forcing the Pelvis Into Perfect Alignment
Keeping the pelvis reasonably forward is useful in a front split, but aggressively twisting it can irritate the hip or knee. Improve alignment gradually.
Letting Someone Push You Down
A partner may apply more force than your muscles and joints can tolerate. Use blocks and control your own depth.
Training Only the Easier Side
For front splits, practice with both legs forward. The tighter side may need additional patience, but not extra force.
Practicing Maximum Depth Every Day
More sessions are not automatically better. Allow recovery when the muscles remain sore or fatigued.
Chasing a 30-Day Deadline
A four-week challenge may improve your routine and range of motion, but it cannot guarantee a complete split. Your goal should be controlled progress without injury.
When to Stop and Seek Professional Advice
Stop split training if you experience:
- Sharp or sudden pain
- A popping or tearing sensation
- Painful pinching inside the hip
- New groin, hamstring, knee, or lower-back pain
- Numbness or tingling
- Loss of strength
- Swelling or bruising
- Difficulty walking or bearing weight
- Pain that becomes worse after every session
The AAOS guidance on hip strains identifies pain, tenderness, swelling, limited movement, and weakness as possible signs of a strain. It also lists inadequate warm-up and attempting too much too quickly as risk factors.
Consult a qualified healthcare professional or physical therapist before deep split training if you have:
- A current hip, hamstring, groin, knee, or back injury
- A history of hip surgery
- Recurrent joint instability
- Significant joint hypermobility
- Persistent hip clicking accompanied by pain
- A known hip impingement or structural condition
- Pain during normal walking or daily activity
Frequently Asked Questions
Can Adults Learn the Splits?
Yes. Adults can improve lower-body flexibility with repeated stretching. Current research suggests that age does not eliminate the ability to gain flexibility, although the amount and speed of progress remain individual.
Which Is Easier: Front Splits or Middle Splits?
Neither variation is universally easier. The answer depends on your hamstring, hip-flexor, adductor, and hip range of motion. Previous sports or activities may also make one position feel more natural.
Should You Stretch Every Day for the Splits?
You can perform gentle mobility frequently, but beginners do not need maximum-depth split sessions every day. Start with approximately three dedicated sessions per week and add frequency only when you recover comfortably.
Is It Normal for Split Stretches to Hurt?
No. A controlled muscular pulling sensation is expected, but sharp pain, joint pinching, burning, tingling, or tearing sensations are warning signs. Reduce the depth or stop.
Should You Bounce to Get Deeper?
No. Bouncing adds force and reduces your control. The AAOS recommends slow, gentle stretching without bouncing.
Why Is One Side More Flexible Than the Other?
Differences between sides are common and may relate to previous activity, strength, injury history, or habitual movement. Train both sides, but do not force the tighter side to match the easier side during one session.
Can You Learn the Splits in 30 Days?
You may improve your flexibility in 30 days, but a complete split is not guaranteed. Research supports gradual range-of-motion improvements, not a universal deadline for reaching the floor.
Conclusion
Learning how to do the splits is a gradual process. Choose either a front or middle split, warm up for five to ten minutes, use controlled 20- to 30-second stretches, strengthen the same movement range, and practice with stable supports.
Start with three manageable sessions per week. Focus on improved control and comfort rather than forcing your pelvis to the floor. Record your starting position, follow the four-week plan, and compare your progress under the same conditions every two weeks.
References
- Moderating Effects of Individual Characteristics and Target Muscle Group on Flexibility Adaptations — Sports Medicine Open
- Optimising the Dose of Static Stretching to Improve Flexibility — PubMed
- Resistance Training Induces Improvements in Range of Motion — PubMed
- Warm Up, Cool Down and Be Flexible — American Academy of Orthopaedic Surgeons
- Hip Strains — American Academy of Orthopaedic Surgeons
- The Hyperflexible Hip: Managing Hip Pain in the Dancer and Gymnast — PubMed Central