
Yes—Isometric exercises can build strength, stability, and muscle control without joint movement. They work by creating tension in a fixed position, making them joint-friendly, time-efficient, and easy to do anywhere.

In this guide, you’ll learn what isometrics are, the benefits, safety rules, how to program them, and exactly how to perform 12 of the best isometric moves step-by-step.
What Are Isometric Exercises?
Isometric training involves contracting a muscle without changing joint angle (no visible movement). You hold a position (e.g., plank, wall sit) or push/pull against an immovable object (e.g., hand-press into a wall). Benefits include:
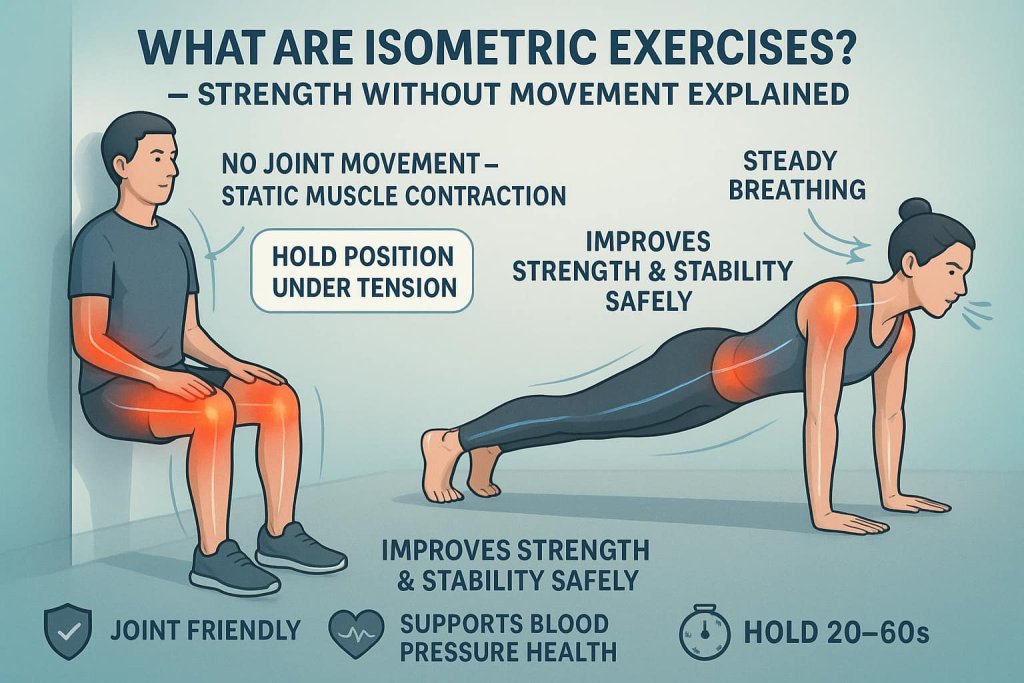
- Strength at specific joint angles and improved posture/control
- Low joint stress (useful around sensitive joints)
- Minimal equipment; easy progressions with time, depth, or leverage
- May help support healthy blood pressure when practiced appropriately with steady breathing
Safety first: isometrics can temporarily raise blood pressure during the hold. Breathe continuously (no breath-holding) and speak with a clinician if you have cardiovascular concerns.
Why Isometric Training Works
Isometric training works by creating high muscle tension without joint movement. This static contraction activates deep stabilizers and strengthens connective tissues while minimizing joint stress. Because the muscle holds tension at a fixed length, it trains both neuromuscular control and postural endurance.
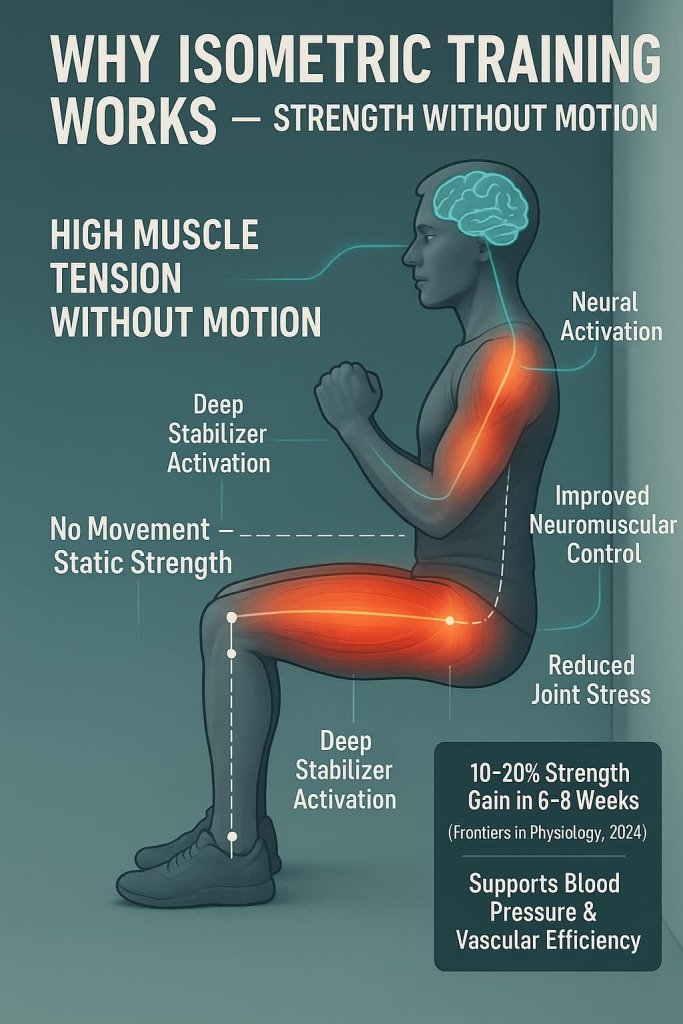
Scientific reviews (Frontiers in Physiology, 2024) show that isometric training can improve muscular strength by 10–20% in just 6–8 weeks and help lower resting blood pressure by improving vascular efficiency.
Trainer Tip: Isometrics are ideal when motion aggravates pain or when you want to enhance stability at a specific joint angle — like the bottom of a squat or plank.
Key Benefits of Isometric Exercises
Isometric training offers unique advantages beyond traditional dynamic strength work:
- Builds static strength — increases tension tolerance and control at targeted joint angles.
- Protects joints — minimal shear stress; excellent for arthritis or post-rehab.
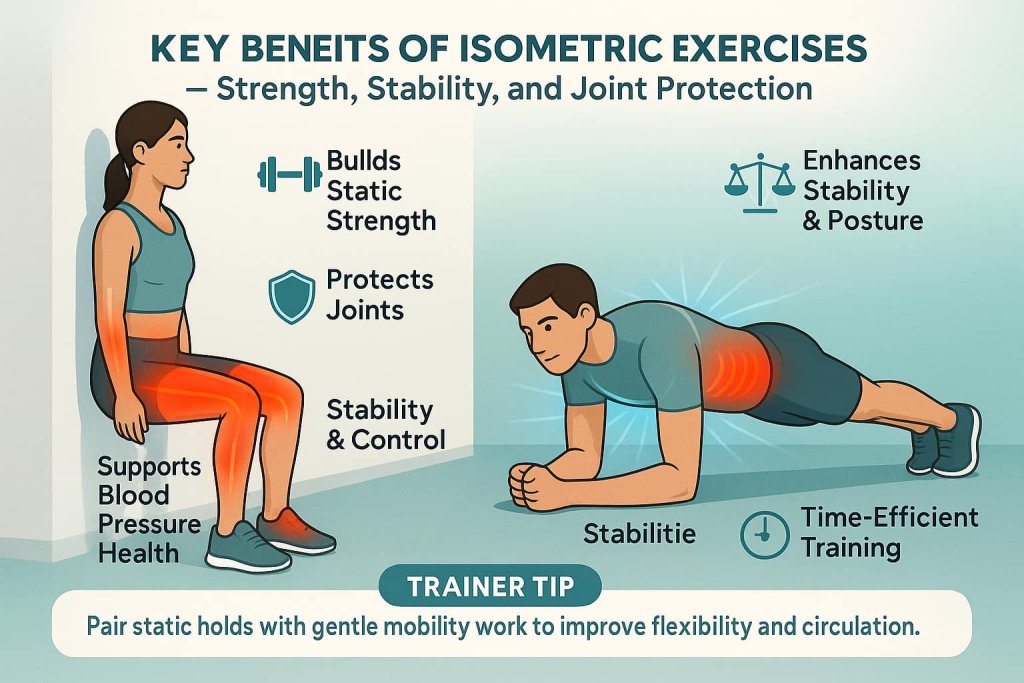
- Enhances stability — reinforces spinal and pelvic alignment during daily tasks.
- Improves posture and balance — strengthens the deep core and hip stabilizers.
- Supports blood-pressure regulation — research shows consistent isometric wall sits can reduce systolic BP by 5–7 mm Hg.
- Time-efficient — short, focused holds deliver results without heavy equipment.
Trainer Tip: Combine isometrics with light mobility work to enhance flexibility and circulation after static holds.
12 Best Isometric Exercises
These 12 isometric exercises target your entire body — building strength, stability, and muscle control without stressing your joints.
Perform each move with steady breathing, focus on posture, and hold the position with controlled tension for best results.
1) Wall Sit
Why it works:
The wall sit strengthens the quadriceps and glutes through sustained isometric tension, enhancing knee stability and muscular endurance. Because your joints remain static, it minimizes strain on the knees and hips while maintaining full muscle activation.
Muscles worked:
Quadriceps (vastus medialis, lateralis, intermedius), gluteus maximus, calves, and core stabilizers.
How to do it:
- Stand with your back flat against a wall and feet about 2 feet forward, hip-width apart.
- Slowly slide down until your thighs are parallel to the ground or as close as comfortable (about a 90° knee bend).
- Press your lower back into the wall, engage your core, and hold for 20–60 seconds.
- Keep breathing steadily; do not hold your breath.
Trainer Tip:
Focus on even pressure through your heels and mid-foot. To progress, hold a light dumbbell or medicine ball at your chest. To regress, stay higher on the wall or shorten hold time.
2) Plank (Forearm or High)
Why it works:
The plank develops anti-extension core stability, teaching your body to resist spinal sagging and maintain neutral alignment. It enhances endurance in your deep core stabilizers, improving posture and reducing lower back strain.
Muscles worked:
Rectus abdominis, transverse abdominis, internal/external obliques, glutes, deltoids, and spinal stabilizers.
How to do it:
- Start on your forearms (or hands) with elbows under shoulders.
- Keep your body in a straight line from head to heels.
- Squeeze glutes, engage the core, and pull your ribs down.
- Hold for 20–60 seconds, breathing calmly throughout.
Trainer Tip:
If your hips drop or shoulders tire, lower to your knees without arching your back. Imagine pulling your elbows toward your toes to intensify the core engagement.
3) Side Plank
Why it works:
This move strengthens the lateral core, hips, and shoulders to resist side bending. It enhances spinal stability and pelvic control — key for balance, gait, and injury prevention.
Muscles worked:
Obliques, quadratus lumborum, glute medius, and shoulder stabilizers (especially the rotator cuff).
How to do it:
- Lie on one side, elbow under shoulder, legs stacked or staggered.
- Lift hips to form a straight line from head to heels.
- Hold 15–45 seconds per side.
- Keep chest open and avoid leaning forward.
Trainer Tip:
Imagine lifting the bottom waist toward the ceiling. For easier options, drop the bottom knee to the floor while maintaining alignment.
4) Static Lunge Hold
Why it works:
By holding the lunge position, you develop single-leg strength, hip control, and balance. The isometric contraction trains your stabilizing muscles to support proper knee tracking and joint alignment.
Muscles worked:
Quadriceps, gluteus maximus, hamstrings, calves, and deep core stabilizers.
How to do it:
- Step one foot forward and one back, creating a long stance.
- Lower into a lunge until both knees are around 90°.
- Keep chest upright, weight centered, and hold 20–45 seconds per side.
- Engage both legs evenly for balance.
Trainer Tip:
Drive through your front heel, not your toes. Keep your front knee above the ankle to avoid joint strain. To increase difficulty, hold dumbbells by your sides.
5) Glute Bridge Hold
Why it works:
The glute bridge targets the posterior chain, improving hip extension strength, pelvic alignment, and spinal stability. Holding the bridge engages both prime movers and deep stabilizers, reducing back discomfort caused by weak glutes.
Muscles worked:
Gluteus maximus, hamstrings, erector spinae, core, and hip stabilizers.
How to do it:
- Lie on your back, knees bent, feet hip-width apart.
- Press through your heels, lift hips until shoulders, hips, and knees form a line.
- Maintain tension for 20–60 seconds without arching your lower back.
- Keep your gaze upward, not back.
Trainer Tip:
Imagine squeezing a coin between your glutes. To progress, elevate your feet or perform a single-leg hold.
6) Isometric Push-Up Hold (Bottom Position)
Why it works:
This hold strengthens the chest, triceps, and shoulder stabilizers in their most challenging range. It builds eccentric control and joint stability while improving scapular mechanics.
Muscles worked:
Pectoralis major, triceps, anterior deltoids, serratus anterior, and core.
How to do it:
- Start in push-up position and lower halfway until elbows are ~90°.
- Keep your body straight and tight; hold for 10–30 seconds.
- Maintain steady breathing before returning to the top.
Trainer Tip:
Think about “pushing the floor away” without moving. If it’s too difficult, do this on your knees until strength improves.
7) Deadlift Lockout Hold (Top Position)
Why it works:
This isometric hold reinforces hip extension, posture, and grip strength, teaching your body to maintain tension under load. It’s highly effective for posterior-chain coordination.
Muscles worked:
Glutes, hamstrings, spinal erectors, lats, and forearms.
How to do it:
- With a barbell or dumbbells, stand tall in the locked-out deadlift position.
- Squeeze glutes, tighten lats, and brace the core.
- Hold for 15–30 seconds before safely lowering the weight.
Trainer Tip:
Keep your neck neutral, shoulders back and down. Don’t hyperextend your lower back at the top — think “tall and tight,” not “lean back.”
8) Anti-Rotation Band Hold (Pallof Hold)
Why it works:
This move builds core stability through anti-rotation control, strengthening your ability to resist twisting forces — essential for spine protection and athletic movement.
Muscles worked:
Obliques, transverse abdominis, glute medius, and deep stabilizers of the trunk and pelvis.
How to do it:
- Anchor a resistance band at chest height.
- Stand side-on to the anchor, hold the band with both hands at chest level.
- Press arms straight forward, resisting the pull of the band.
- Hold 20–40 seconds per side, then return slowly.
Trainer Tip:
Keep knees slightly bent and ribs stacked over hips. Exhale gently as you brace. For extra challenge, step further from the anchor point.
9) Hollow Body Hold
Why it works:
The hollow hold develops anterior core control and spinal stiffness, foundational for gymnastics, lifting, and posture. It trains your core to stabilize your pelvis and spine under sustained tension.
Muscles worked:
Rectus abdominis, transverse abdominis, hip flexors, and deep stabilizers.
How to do it:
- Lie flat, press lower back into the floor.
- Raise legs and shoulders off the ground, arms overhead.
- Maintain a “banana” shape and hold 10–40 seconds.
- Avoid arching your lower back.
Trainer Tip:
If your back lifts off the ground, bend your knees or bring arms down. Focus on controlled breathing through the nose.
10) Reverse Plank Hold
Why it works:
Targets the posterior chain and shoulder extensors, countering forward-rounded posture. It opens tight chest muscles while strengthening glutes and back.
Muscles worked:
Gluteus maximus, hamstrings, erector spinae, posterior deltoids, and triceps.
How to do it:
- Sit with legs extended and hands behind hips, fingers facing forward.
- Press through palms and heels, lift hips until your body forms a straight line.
- Hold for 15–45 seconds, squeezing glutes and keeping chest lifted.
Trainer Tip:
Avoid dropping your head back; keep neck neutral. If wrists feel strained, use forearms or elevate hands on yoga blocks.
11) Isometric Calf Raise Hold
Why it works:
Enhances ankle stiffness and balance, strengthening the muscles that stabilize your feet and improve gait efficiency. It’s great for runners, jumpers, and seniors alike.
Muscles worked:
Gastrocnemius, soleus, intrinsic foot stabilizers.
How to do it:
- Stand tall, lift your heels slowly to balance on the balls of your feet.
- Keep core tight and ankles steady.
- Hold for 20–45 seconds before lowering.
Trainer Tip:
Keep your weight over the first two toes, not the outer edges of your feet. Use a wall or chair for support if needed.
12) Hand-Grip Squeeze (Gripper or Towel)
Why it works:
Improves forearm and grip endurance, crucial for everyday tasks and athletic performance. This simple isometric also engages the nervous system for better tension control across the upper body.
Muscles worked:
Forearm flexors, intrinsic hand muscles, finger flexors.
How to do it:
- Hold a grip trainer, soft ball, or folded towel in one hand.
- Squeeze firmly (around 60–70% effort) and hold for 30–60 seconds.
- Relax, then repeat for 2–4 sets per hand.
Trainer Tip:
Relax your shoulder and neck. Keep tension localized to your hand and forearm. For rehab, use moderate pressure and gradually increase over time.
How to Program Isometric Training
- Frequency: 2–4 days/week
- Hold Duration: 10–45s for strength/control; beginners start at 15–30s
- Sets: 2–4 per exercise (rest 45–90s)
- Progression: Add 5–10s per week, deepen the angle (e.g., lower wall-sit), or move to a longer lever (e.g., knees → toes in plank)
- Breathing: Gentle nasal or pursed-lip breathing; avoid Valsalva (no breath-holding)
Sample 2-Day Isometric Plan (Beginner-Friendly)
Day A (Lower/Core)
- Warm-Up (5 min)
- Wall Sit 3×30s (60s rest)
- Glute Bridge Hold 3×30–45s (60s)
- Plank 3×20–40s (60s)
- Hand-Grip 2×40s/hand (40–60s)
Day B (Upper/Anti-Rotation/Balance)
- Warm-Up (5 min)
- Isometric Push-Up Hold 3×15–25s (60–90s)
- Side Plank 3×20–30s/side (60s)
- Pallof Hold 3×20–30s/side (60s)
- Single-Leg Balance 2×30–45s/side (30–45s)
Progression: Add 5–10 seconds per hold each week, then deepen angles (e.g., lower wall-sit), then add load where appropriate.
Common Mistakes to Avoid
1. Holding your breath:
Raises blood pressure. Breathe steadily throughout every hold.
2. Over-straining:
Isometrics should be controlled, not forced. Work at 60–80% effort.
3. Poor posture:
Keep spine neutral and shoulders relaxed; avoid arching or slouching.
4. Locking joints:
Maintain a soft bend in elbows and knees to protect joints.
5. Skipping warm-up:
Always warm up 5–7 minutes to prepare muscles and joints.
Trainer Tip: Stop if form breaks or pain starts — quality beats time.
Who Should Do Isometric Exercises (and When to Avoid Them)
Recommended for:
- Beginners building foundational strength safely.
- Seniors improving balance and joint stability.
- People recovering from injuries or surgery (with professional guidance).
- Athletes seeking joint-angle strength and control.
- Office workers correcting posture and core weakness.
Use caution or avoid:
- Individuals with uncontrolled hypertension or heart conditions.
- Those recovering from recent surgery without medical clearance.
- Anyone prone to breath-holding under strain (may elevate BP).
Trainer Tip: Always breathe steadily during holds — exhale through effort and avoid “bracing breath.” Seek medical approval before starting if you have cardiovascular concerns.
Safety Tips for Isometric Training
- Breathe continuously — never hold your breath.
- Use moderate effort (50–70%) for steady tension.
- Keep alignment neutral — head, spine, and hips in line.
- Train near support (wall or chair) if balance is an issue.
- Stop immediately if you feel dizzy or sharp pain.
- Consult your doctor before starting if you have high blood pressure or heart concerns.
Trainer Tip: Safe form, smooth breathing, and gradual progress build lasting results.
This content is for informational purposes only and not medical advice.
FAQs
1) How long should I hold an isometric exercise?
Beginners: 15–30 seconds. Intermediates: 30–45 seconds. Build gradually while keeping flawless form and steady breathing.
2) Are isometrics enough to build muscle?
They can help—especially for strength and control at specific angles. For well-rounded development, combine with dynamic (moving) resistance training.
3) Can isometrics help with joint pain?
They’re joint-friendly because there’s no movement at the joint. Many people use them to maintain strength around sensitive areas—within comfort and medical guidance.
4) How many days per week should I do them?
Two to four sessions/week work well. Keep total effort balanced with your other training.
5) What if I can’t hold the positions yet?
Shorten the lever (e.g., knees down in plank), reduce depth (higher wall-sit), or shorten the time. Progress patiently.
6) Do I need equipment?
No. A wall, floor, and a resistance band or towel cover nearly everything.
7) Why am I shaking during holds?
That’s your nervous system recruiting motor units. As you adapt, shaking typically decreases.
Conclusion
Isometric exercises are a simple, powerful way to develop strength, stability, and precise control—without extra equipment or high joint stress. Start with shorter holds, breathe steadily, and progress your time/angles. Combine these 12 moves with dynamic training for the best overall results.
Pick any 4–6 moves above and add them to two workouts this week. Track your hold times and upgrade your positions next week.
Reference
- Isometric training and long-term adaptations: Effects of muscle length, intensity, and intent. Scand J Med Sci Sports (2019).
https://pubmed.ncbi.nlm.nih.gov/30580468/ - An evidence-based guide to the efficacy and safety of isometric resistance training. Clinical Hypertension (2022).
https://www.ncbi.nlm.nih.gov/pmc/articles/PMC10015931/ - Intensity, duration and muscle mass in isometric contraction (overview article). Frontiers in Bioengineering & Biotechnology (2024).
https://www.frontiersin.org/articles/10.3389/fbioe.2024.1444598/full - Physical Activity Guidelines for Americans (2nd ed.). U.S. Department of Health & Human Services.
https://health.gov/our-work/nutrition-physical-activity/physical-activity-guidelines/current-guidelines - Exercise & physical activity for older adults (strength training hub). National Institute on Aging.
https://www.nia.nih.gov/health/exercise-physical-activity