
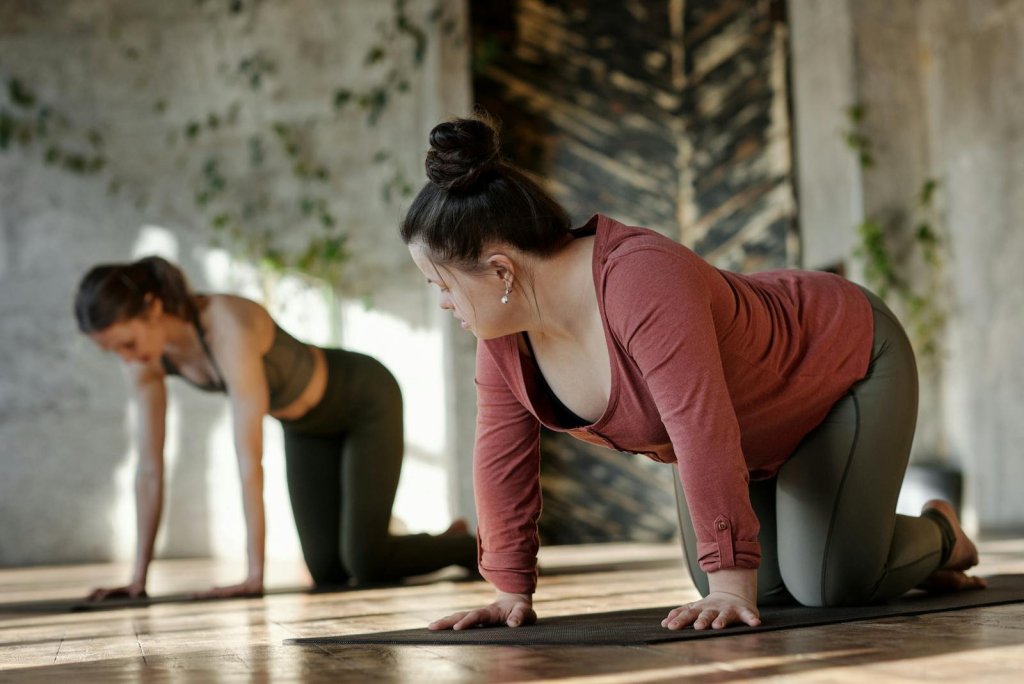
FUPA exercises for women can help you build a stronger lower core, improve pelvic stability, and support a firmer-looking lower belly over time. The key is choosing moves that train deep core control, glutes, and pressure management, instead of relying on endless crunches.
“FUPA” is a common term for soft tissue and fat around the upper pubic/lower belly area, and it can be influenced by genetics, hormones, pregnancy, posture, and overall body-fat levels.
What you should know before starting FUPA exercises for women
FUPA-focused workouts should prioritize:
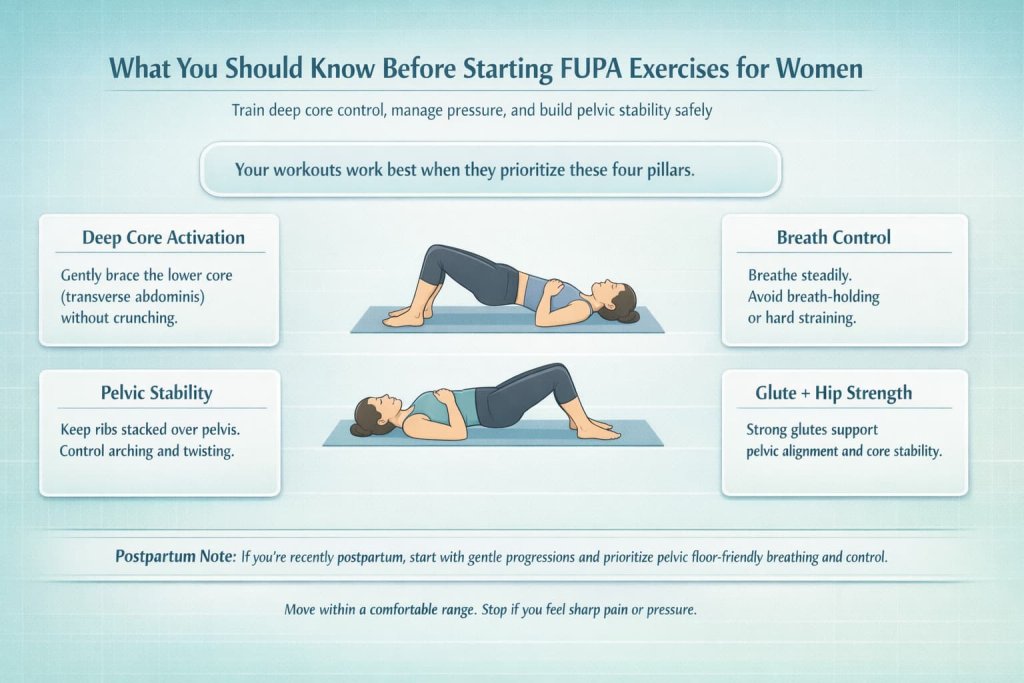
- Deep core activation (transverse abdominis)
- Breath control (no breath-holding or hard straining)
- Pelvic stability (ribs stacked over pelvis)
- Glute and hip strength (better support for your pelvis and spine)
If you’ve had a baby recently, pelvic floor-friendly progressions matter. Guidance from ACOG supports a gradual return to exercise postpartum and highlights the role of pelvic floor work.
Why spot reduction doesn’t work (and what actually changes the lower belly)
Most people can’t “burn fat” from one specific place just by training that area. Core work strengthens muscle and improves posture and control, but overall fat loss is typically driven by consistent movement, strength training, and nutrition habits.
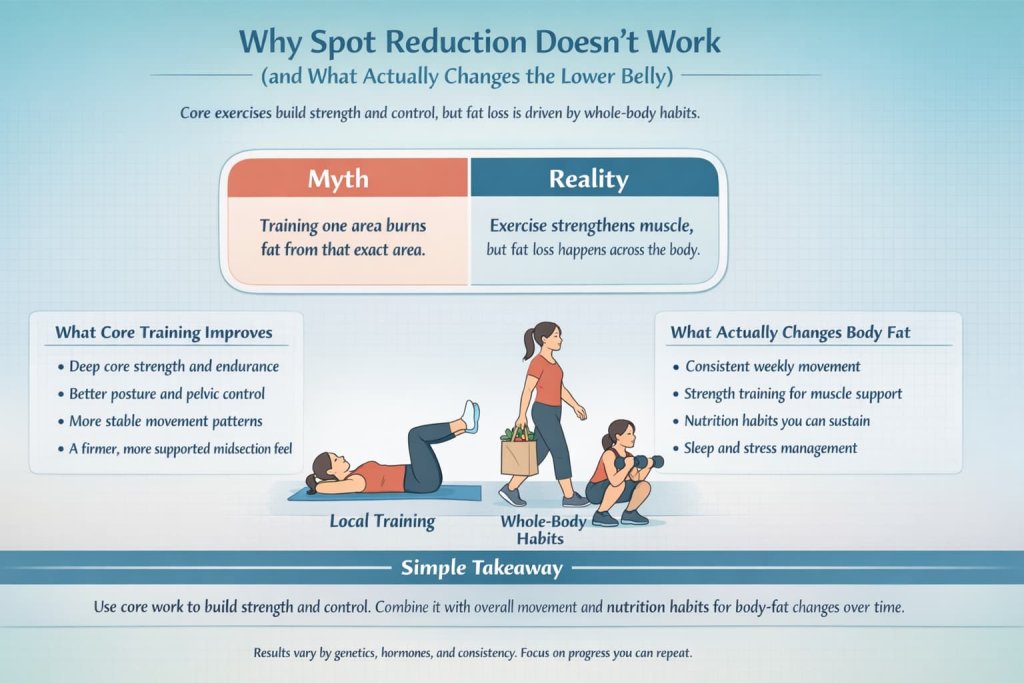
For a helpful evidence-based explainer on belly fat and why a whole-body approach matters, see Harvard Health Publishing.
6 best FUPA exercises for women
Strengthen your lower core at home with these 6 beginner-friendly FUPA exercises designed to improve pelvic stability and deep core control. Follow the simple routine and progress slowly for better form, safer training, and more consistent results over time.
1) Breathing + Posterior Pelvic Tilt (Deep Core “On” Switch)
How to do it:
- Lie on your back with knees bent, feet flat
- Exhale slowly and gently “tuck” your pelvis so your low back feels heavier on the floor
- Inhale through your nose while keeping ribs down (no big rib flare)
- Exhale again and keep the tuck (don’t squeeze your butt hard)
- Do 5–8 slow breaths
Why it works: This teaches you how to position your pelvis and switch on deep core support without crunching or straining, which makes it ideal for beginners and many postpartum-friendly progressions.
Muscles worked: Transverse abdominis, pelvic floor (light), deep core stabilizers, glutes (light).
Trainer Tip: Think “zip up” from pubic bone to belly button on the exhale—gentle, not forced.
2) Heel Slides (Low-Pressure Lower-Core Builder)
How to do it:
- Start in the same position as above
- Exhale and set your pelvis (small tuck, ribs down)
- Slowly slide one heel away until your leg is almost straight
- Keep your low back from arching as the leg moves
- Slide back in with control, then switch sides
Why it works: Heel slides build lower-core control while one leg moves, helping you train stability and “lower belly” engagement without high abdominal pressure.
Muscles worked: Transverse abdominis, hip flexors (light), deep core stabilizers.
Trainer Tip: If your back arches or your belly domes, shorten the slide range and slow down.
3) Dead Bug (Modified) (Anti-Arch Core Strength)
How to do it:
- Lie on your back and bring knees up to tabletop (90/90) if comfortable
- Exhale and keep ribs down (no flaring)
- Slowly lower one heel to tap the floor (or extend the leg partway)
- Return to start and repeat on the other side
- Progress by adding an opposite arm reach only if you can stay stable
Why it works: This move trains your trunk to resist arching as your limbs move, which is the foundation of real-life core strength and better pelvic control.
Muscles worked: Transverse abdominis, obliques, deep stabilizers.
Trainer Tip: Move slower than you think you need to—the goal is control, not speed.
4) Glute Bridge (Lower-Core Support Through Strong Glutes)
How to do it:
- Lie on your back, knees bent, feet flat hip-width
- Exhale, lightly tuck your pelvis, and brace your core
- Push through your heels and lift hips until your body forms a straight line
- Pause 1–2 seconds without over-arching your back
- Lower slowly and repeat
Why it works: Strong glutes help support pelvic position and reduce low-back compensation, which often makes lower-core work feel more stable and effective.
Muscles worked: Glute max, hamstrings, transverse abdominis (brace).
Trainer Tip: Stop the lift when your ribs want to pop up—don’t chase height.
5) Bird Dog (Beginner-Friendly Core and Pelvic Stability)
How to do it:
- Start on hands and knees (hands under shoulders, knees under hips)
- Exhale and brace like you’re preparing for a gentle cough
- Reach one leg straight back (don’t rotate your hips)
- Option: add the opposite arm reach if your torso stays still
- Hold 2–3 seconds, return, switch sides
Why it works: Bird dog builds core stability while your hips and shoulders move, improving posture and teaching your pelvis to stay steady during everyday movement.
Muscles worked: Deep core, spinal stabilizers, glutes, shoulders.
Trainer Tip: Keep your beltline level—imagine balancing a glass of water on your low back.
6) Side Plank (Modified) (Lower Belly and Oblique Control)
How to do it:
- Start on your side with forearm on the floor
- Bend knees for a modified version (easier to control)
- Exhale, lift hips, and keep ribs stacked over pelvis
- Hold 10–20 seconds while breathing normally
- Lower with control, switch sides
Why it works: Side planks strengthen the obliques and improve pelvic stability, which helps your core feel more supported and reduces “hip drop” or twisting habits.
Muscles worked: Obliques, transverse abdominis, glute med/min, shoulder stabilizers.
Trainer Tip: If your shoulder feels cranky, set your elbow slightly forward and use shorter, cleaner holds.
A simple at-home routine using these 6 moves
Do this 3–4 days per week:
- Breathing + posterior pelvic tilt: 5–8 slow breaths
- Heel slides: 6–10 reps per side
- Dead bug (modified): 6–10 reps per side
- Glute bridge: 8–12 reps
- Bird dog: 6–10 reps per side
- Side plank (modified): 1–2 holds per side (10–20 seconds)
Rest 30–60 seconds between moves as needed.
How to progress these FUPA exercises safely
Progress one variable at a time:
- Add reps first (example: 6 → 10)
- Then add time (side plank holds)
- Then add range of motion (longer heel slide, longer dead bug extension)
- Only then add load (bands, light weights) if your form stays clean
If you’re rebuilding postpartum or feel pelvic pressure, keep intensity moderate and aim for smooth breathing and control.
Common Mistakes That Make Lower-Core Work Less Effective
Small form leaks can shift the work out of your lower core and into your hips or low back. Fix these first for better results.
- Rib flare + low-back arching: Keep ribs stacked over pelvis; use a smaller range.
- Going too fast: Slow down so your core can stabilize before you move.
- Breath-holding/straining: Exhale on effort and keep breathing steady.
- Twisting hips: Keep your pelvis level (especially on bird dog and side plank).
- Skipping glute work: Bridges help pelvic control and core stability.
- Progressing too soon: Add reps first, then time, then range, then load.
Nutrition and daily activity tips that support fat loss
If your goal includes changing body fat over time, focus on consistency:
- Aim for a realistic weekly movement goal and include strength training
- Build meals around protein and fiber to support fullness
- Prioritize sleep and stress management (both can affect appetite and recovery)
For a baseline activity target many people use, see the adult recommendations from the CDC.
Who should avoid or modify these exercises
Talk to a qualified clinician or pelvic floor physical therapist first if you have:
- Ongoing pelvic pain, prolapse symptoms, or urinary leakage that worsens with exercise
- Significant abdominal separation you’re unsure how to manage
- Recent surgery or a medical condition where exercise needs clearance
- Sharp back pain that increases during core work
Modifying (shorter range, shorter holds, slower tempo) is often enough, but don’t push through warning signs.
FAQs
Can FUPA exercises flatten my lower belly?
They can strengthen the muscles that support your lower core and improve posture and control, which may change how your midsection looks. Fat loss, when it happens, is usually driven by overall lifestyle habits, not one specific move.
How often should I do FUPA exercises for women?
Most people do well with 3–4 sessions per week, keeping the routine short and focusing on perfect form.
Are these FUPA exercises safe after pregnancy?
Often yes, especially the breathing, heel slides, bridges, and modified planks—but postpartum timelines vary. If you feel pressure, heaviness, or leaking, get guidance first.
What’s better for FUPA: cardio or strength training?
Both help. Strength training builds muscle and support, while cardio helps increase total weekly activity. The combination is usually the most practical approach.
Should I do crunches to target the lower belly?
Not necessarily. Many people get better results from anti-arching stability moves (dead bug, bird dog) because they train the deep core without as much strain.
How long until I notice results?
Many people feel better core control within a few weeks if they train consistently. Visible changes depend on many factors, including overall activity, nutrition, and genetics.
Conclusion
FUPA exercises for women work best when you train your deep core, glutes, and pelvic stability with clean form and steady breathing. Start with the six moves above, repeat them consistently, and progress slowly.
References
- American Council on Exercise. “ACE Lists Most Common Fitness Myths” (includes spot reduction myth). (February 19, 2004). American Council on Exercise
- Selman R, et al. “Maximizing Recovery in the Postpartum Period: A Timeline for Rehabilitation from Pregnancy through Return to Sport.” (2022). PubMed Central
- Tsartsapakis I, et al. “A Comparison between Core Stability Exercises and Muscle Thickness.” (2024). PubMed Central