
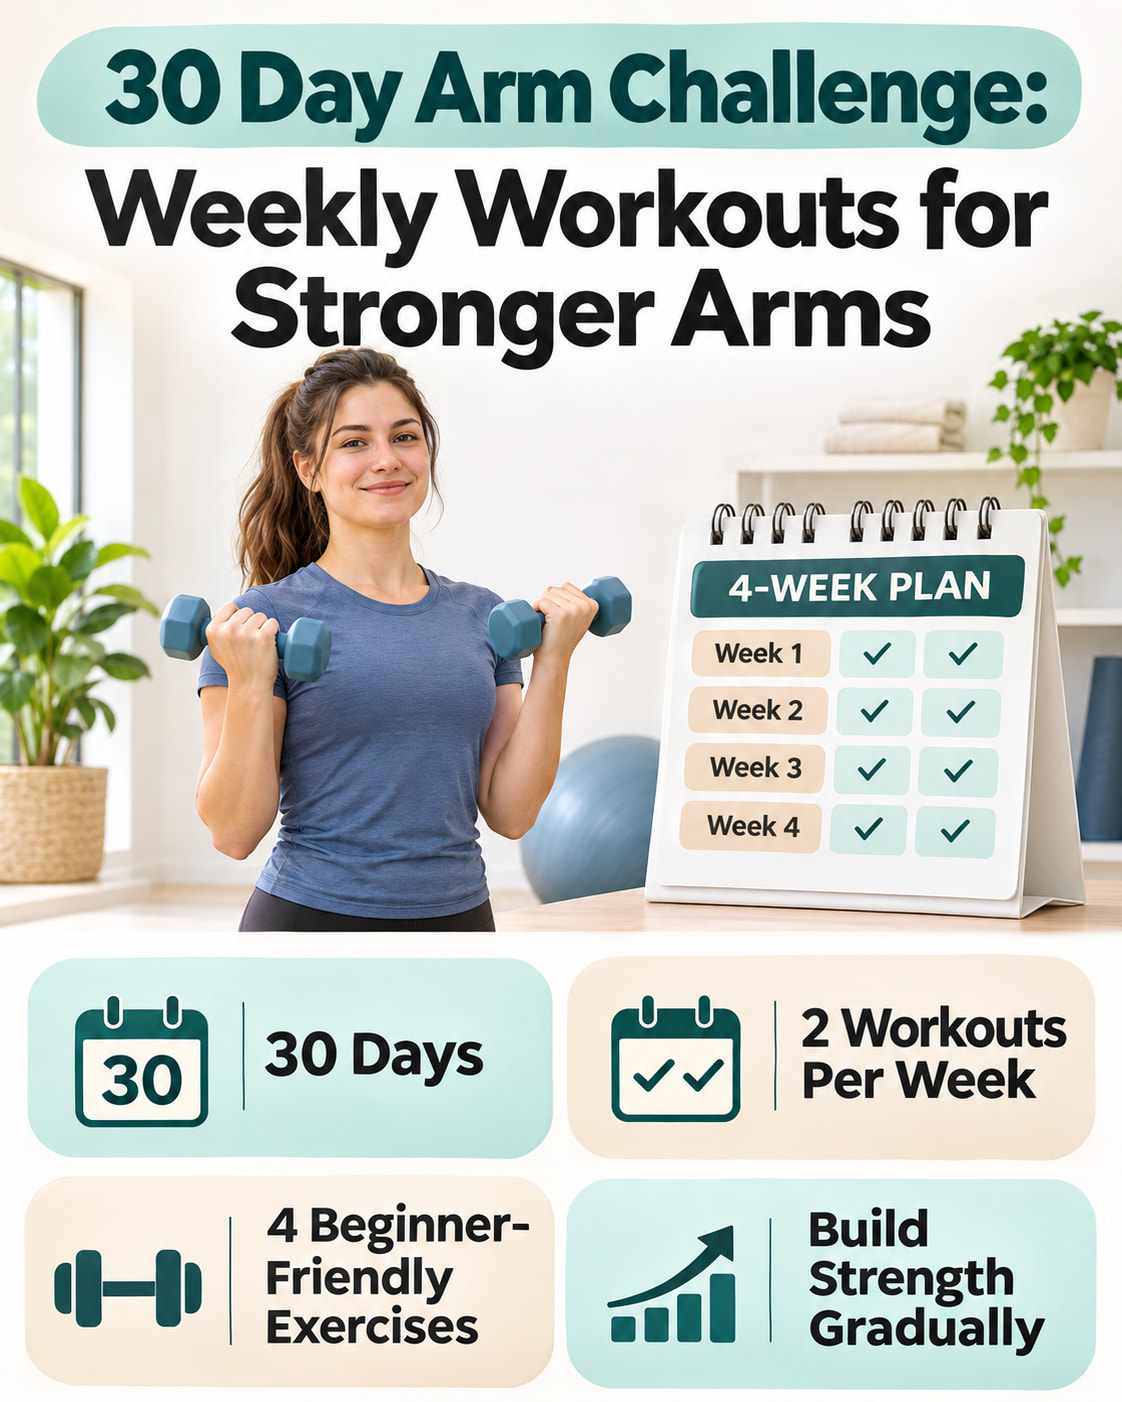
A 30 Day Arm Challenge can help you start building arm strength with two workouts per week, manageable resistance, and recovery days between sessions. This plan uses four basic exercises and gradual progression to make getting started straightforward.
You will complete eight scheduled workouts across four weeks, followed by an optional progress check on Day 30. The aim is to practice good technique, establish consistency, and make the exercises more manageable. Visible changes vary, so use your training performance to track progress.
How This 30 Day Arm Challenge Works
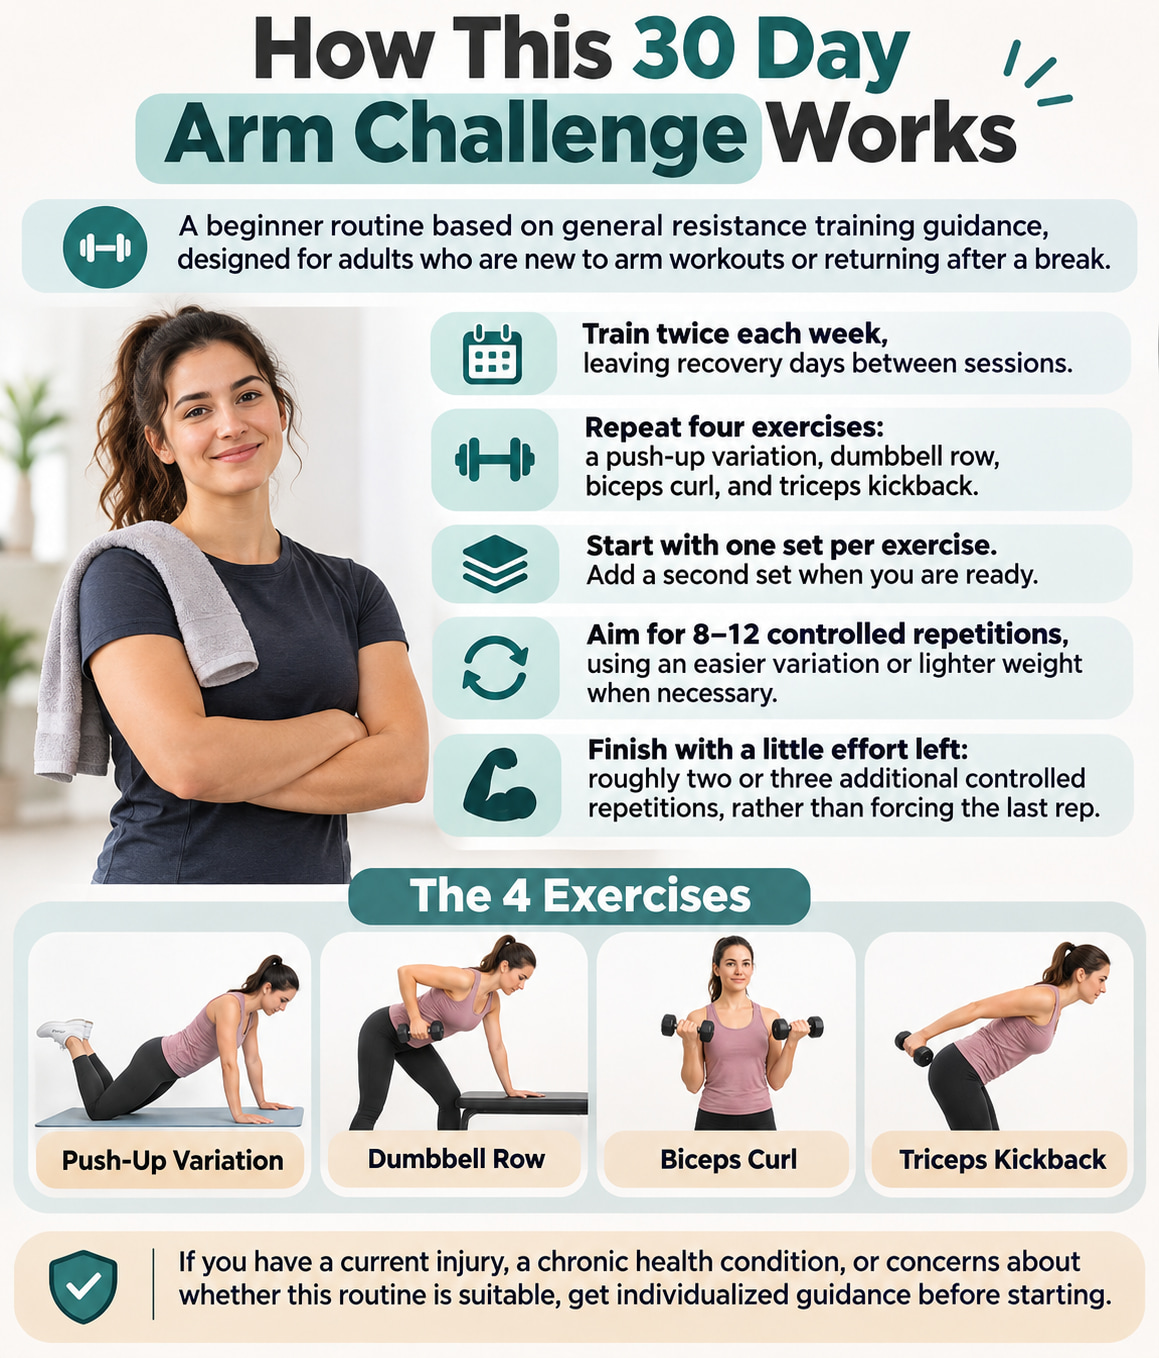
This is a sample beginner routine based on general resistance training guidance. It is designed for adults who are new to structured arm workouts or returning after a break.
The ACSM’s 2026 resistance training guidance supports regular, individualized strength training. You can make progress with simple exercises, and training to complete muscular failure is not required.
For this challenge:
- Train twice each week, leaving recovery days between sessions.
- Repeat four exercises: a push-up variation, dumbbell row, biceps curl, and triceps kickback.
- Start with one set per exercise. Add a second set when you are ready.
- Aim for 8–12 controlled repetitions, using an easier variation or lighter weight when necessary.
- Finish with a little effort left: roughly two or three additional controlled repetitions, rather than forcing the last rep.
If you already follow an upper-body or full-body strength program, fit these movements into your existing sessions and account for overlapping work. Presses, rows, and other arm exercises all contribute to your workload.
If you have a current injury, a chronic health condition, or concerns about whether this routine is suitable, get individualized guidance before starting.
What You Need Before Starting
Gather a few simple items:
- Dumbbells: Choose weights you can control. You may need different weights for rows, curls, and kickbacks.
- A stable surface: A wall or fixed countertop works for elevated push-ups. Use a stable support for rows and kickbacks.
- A workout log: A notebook or phone note is enough.
Avoid using furniture that can slide, tip, or roll.
Before each workout, warm up with 5–10 minutes of brisk walking or another comfortable aerobic activity, as suggested in Mayo Clinic’s weight training guidance. Then rehearse a few easy repetitions of the movements before starting your working sets.
30 Day Arm Challenge: Weekly Workout Schedule
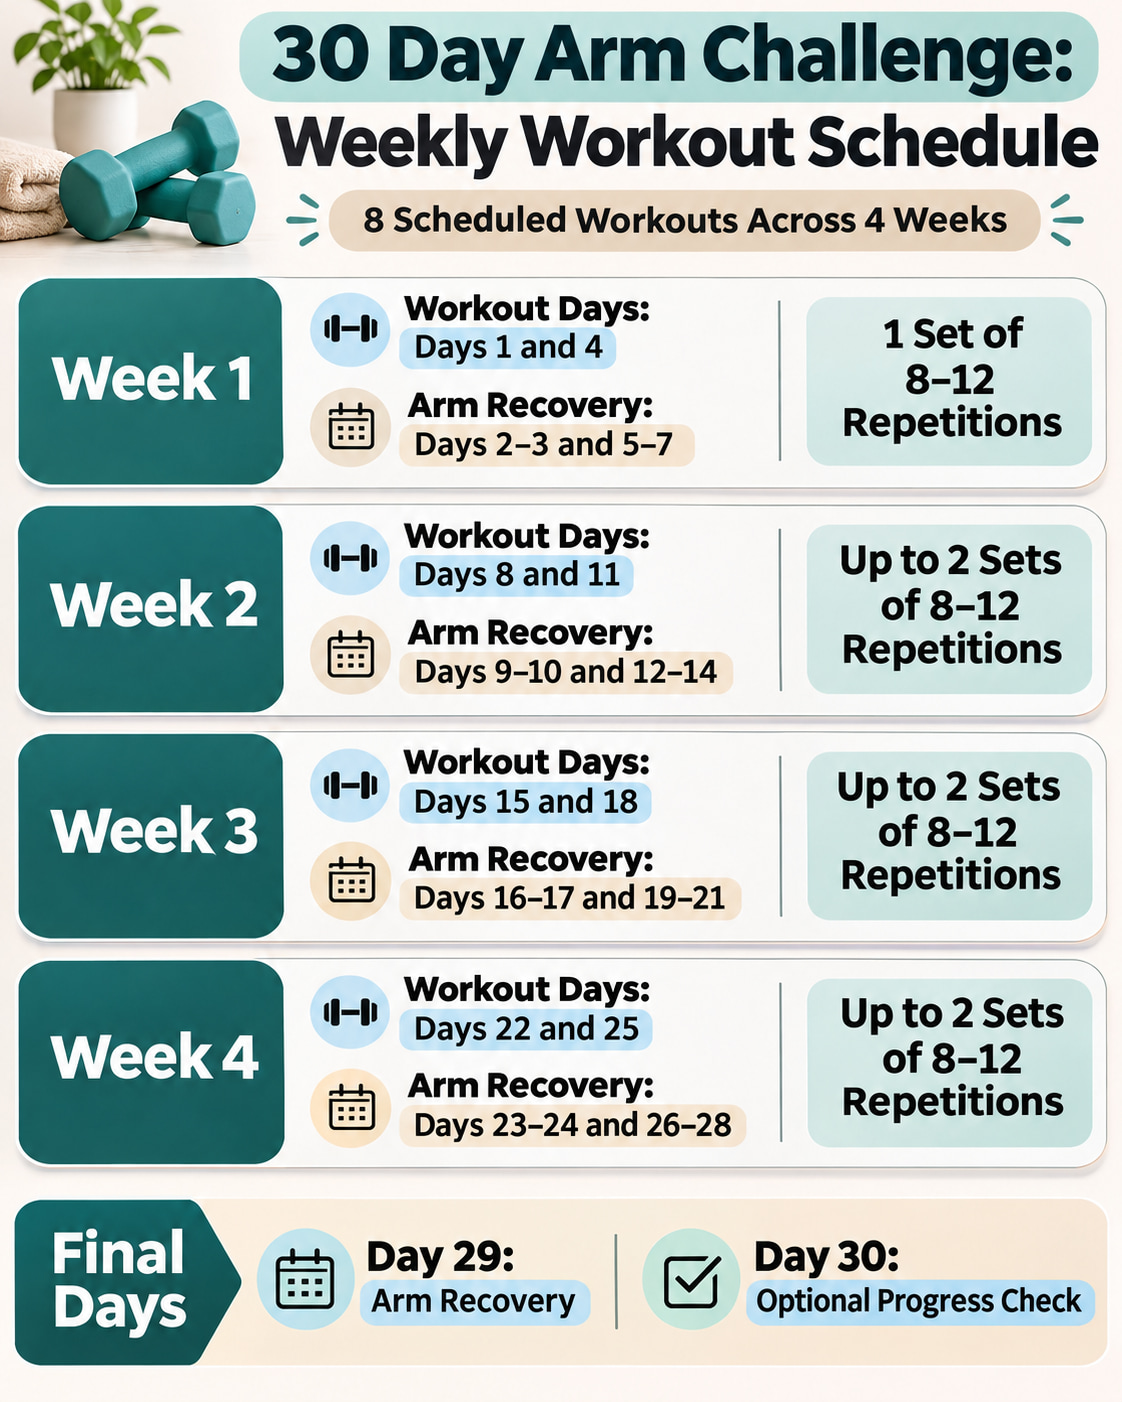
Start on any day of the week and call it Day 1. The table covers the full month.
“Arm recovery” means taking a break from challenging arm exercises. You can rest completely or choose comfortable activity that does not heavily load the same muscles.
| Week | Workout days | Arm recovery days | Sets and repetitions per exercise |
|---|---|---|---|
| Week 1 | Days 1 and 4 | Days 2–3 and 5–7 | 1 set of 8–12 |
| Week 2 | Days 8 and 11 | Days 9–10 and 12–14 | Up to 2 sets of 8–12 |
| Week 3 | Days 15 and 18 | Days 16–17 and 19–21 | Up to 2 sets of 8–12 |
| Week 4 | Days 22 and 25 | Days 23–24 and 26–28 | Up to 2 sets of 8–12 |
| Final days | Day 30: optional progress check | Day 29: arm recovery | Follow the progress-check instructions below |
For rows and kickbacks, the repetition target applies to each arm. For curls, perform the target number with each arm, whether you lift both dumbbells together or alternate sides.
Complete the exercises in this order:
- Wall or incline push-up.
- Supported dumbbell row.
- Dumbbell biceps curl.
- Supported triceps kickback.
Finish the scheduled sets of one exercise before moving to the next. As a starting rest interval for this plan, take 60–120 seconds between sets and exercises, and longer when needed to repeat the movement with control. You can also rest between sides.
Week 1: Learn the Movements
Use the first two workouts to find suitable weights and exercise variations. Start with one set of each movement.
If eight repetitions are too difficult, reduce the weight or make the push-up easier. You can also begin with fewer controlled repetitions while learning.
On Day 1, record each exercise’s weight or variation, repetitions, approximate rest periods, and how challenging the set feels. Note your push-up surface or wall position. These details will help you compare your performance at the end.
Week 2: Add a Set When Ready
Add a second set only if you have recovered from the previous workout and can maintain good technique.
You do not have to increase every exercise together. For example, you might perform two sets of curls while keeping push-ups at one set.
Repeat Week 1’s workload if you need more practice.
Week 3: Make a Small Progression
Keep the same exercises. If a movement is becoming manageable, add one or two repetitions within the 8–12 range.
When you can reach the top of the range comfortably with controlled form, consider a small resistance increase. The next section explains how.
Week 4: Keep the Work Consistent
Continue with the resistance and set count that suit you. There is no requirement to increase anything during the final week.
Use these sessions to confirm that your technique stays steady from the first repetition to the last.
How to Do the Arm Exercises
1. Wall or Incline Push-Up
Works: Chest, triceps, and the front of the shoulders.
A wall push-up provides an accessible starting option. An incline push-up uses a stable elevated surface, such as a fixed countertop.
- Place your hands slightly wider than shoulder-width on the wall or countertop.
- Step your feet back and keep your body aligned from head to heels.
- Bend your elbows and bring your chest toward the surface. Keep your elbows angled somewhat toward your sides.
- Push through your hands to return to the starting position.
Keep your trunk steady throughout the movement. Avoid letting your hips sag or reaching forward with your head.
Make it easier: Use the wall and stand closer to it.
Progress gradually: Move from the wall to a suitable lower, stable surface once the current version is manageable.
2. Supported Dumbbell Row
Works: Upper back and rear shoulders, with assistance from the arm muscles.
- Hold a dumbbell in your right hand. Place your left hand on a stable support.
- Hinge forward at your hips with a slight knee bend and a comfortably neutral back.
- Let the weight hang below your shoulder, then draw your elbow back toward your hip.
- Lower the dumbbell slowly. Complete your repetitions, then switch sides.
Keep your shoulders and hips facing the floor rather than rotating your torso to lift the weight. Let your arm move while your trunk stays steady.
Make it easier: Reduce the weight and adjust your support so you can hold the position comfortably.
3. Dumbbell Biceps Curl
Works: The muscles at the front of your upper arms.
- Stand comfortably or sit upright, holding the dumbbells beside you with palms facing forward.
- Keep your elbows close to your sides.
- Bend your elbows to lift the weights toward your shoulders.
- Lower the weights with control until your arms return to the starting position.
Keep your wrists aligned with your forearms. Avoid leaning backward, swinging the dumbbells, or moving your elbows forward to finish a repetition.
Make it easier: Use lighter dumbbells or work one arm at a time.
Counting tip: Ten alternating curls on each side means 20 individual arm movements.
4. Supported Triceps Kickback
Works: The muscles at the back of your upper arms.
- Hold a light dumbbell in one hand and support your other hand on a stable surface.
- Hinge forward, keeping your back comfortably neutral.
- Bring your working upper arm alongside your torso and bend the elbow.
- Keep that upper arm still while straightening the elbow.
- Bend the elbow slowly to return. Complete the repetitions, then switch sides.
The movement comes from your elbow. Avoid swinging your shoulder or twisting your body to move the weight.
Make it easier: Use a lighter weight. Kickbacks may require less resistance than your rows or curls.
How to Choose Your Weights and Progress
Choose resistance separately for each exercise. A weight that works for a row may be too heavy for a kickback.
Your starting weight should allow controlled repetitions without swinging, straining your posture, or holding your breath. The later repetitions should feel challenging while leaving a little effort in reserve.
Use this practical progression rule for the challenge:
- Stay with the same weight while building toward 12 repetitions.
- When you complete all planned sets at 12 repetitions with good control and a little effort left in two workouts, try the smallest manageable increase.
- Return toward eight repetitions with the heavier weight.
- Keep the new resistance only if you can maintain your technique.
The two-workout rule is a simple way to make decisions in this plan, not a universal requirement.
For example, if you complete two sets of 12 curls with a particular weight and both sessions feel controlled, try a slightly heavier dumbbell next time. If you begin leaning backward or cannot complete the lower end of the range, use the previous weight.
Change one main variable at a time. When adding a second set, keep the resistance steady. When increasing resistance, allow the repetitions to drop within the planned range.
Rest and Recovery During the Challenge
Leave at least one full day between challenging strength sessions for the same muscles. The calendar provides more space than that between its scheduled workouts.
Count other upper-body activity when planning recovery. A demanding push-up session or chest-and-back workout still involves your arms, even if you do not call it “arm day.”
Some muscle soreness can occur after unfamiliar exercise. If soreness makes you change how you move, take more recovery time or reduce the next session. Stop an exercise that causes pain, especially pain around a shoulder, elbow, or wrist. Seek professional advice for persistent symptoms.
This arm challenge is one part of a broader fitness routine. CDC activity guidance recommends strengthening all major muscle groups at least twice weekly, along with at least 150 minutes of moderate aerobic activity or an equivalent amount of vigorous activity.
Include suitable work for your legs, hips, and trunk as you build your overall routine.
What Results Can You Expect in 30 Days?
A useful first-month goal is to become more consistent and capable with the exercises.
A four-week training study published in 2018 found that progressive push-up training and bench press training improved strength in 23 moderately trained men. It supports the possibility of early strength improvements, but it does not predict exactly how you will respond to this plan.
Small muscle changes can also occur within several weeks. However, measurable changes in a study do not necessarily translate into an obvious difference in the mirror.
Useful signs of progress include:
- Completing more controlled repetitions with the same weight.
- Finding the same push-up variation more manageable.
- Using slightly more resistance without changing your technique.
- Completing your planned sessions consistently.
Will the Challenge Reduce Arm Fat?
Training your arms should not be presented as a reliable way to select where body fat is lost.
A systematic review of localized fat reduction, published in the 2022 volume of Human Movement, analyzed 13 studies involving 1,158 participants. It found no overall advantage for fat loss in the trained limb compared with the untrained limb.
Use the challenge to work on strength and consistency. A specific change in arm size or appearance is not guaranteed.
How to Check Your Progress on Day 30
After warming up, repeat one set of each exercise from your Day 1 workout. Use your original weights, push-up setup, exercise order, and similar rest periods.
Start by matching your original repetition count. If appropriate, continue up to 12 while leaving roughly two or three controlled repetitions in reserve.
Compare your movement quality and how challenging the sets feel. If you already completed 12 repetitions on Day 1, the same set feeling more manageable can still be useful feedback.
This is an informal check, not a maximum-strength test. Skip it if you have not recovered, and review your workout log instead.
Frequently Asked Questions
Can a 30 Day Arm Challenge Make Your Arms Stronger?
It may help you begin improving strength, particularly if resistance training is new to you. Results depend on your starting point, consistency, exercise difficulty, and recovery. Completing the calendar does not guarantee a specific strength or appearance change.
Should You Train Your Arms Every Day?
This beginner plan schedules two weekly workouts with recovery between them. Keep the remaining days free from additional challenging arm sessions. Daily walking or other suitable activity can still fit into your routine.
What Dumbbell Weight Should a Beginner Use?
Choose a weight that allows controlled repetitions and becomes challenging near the end of the set. There is no single correct starting weight for everyone. Select resistance separately for each exercise and reduce it whenever your technique changes.
Can You Do the Challenge Without Dumbbells?
You can use securely closed water bottles that are easy to grip for light resistance. Wall push-ups require no handheld weights. Resistance bands are another option, but rows, curls, and kickbacks need instructions appropriate to the band and its setup.
What If You Miss a Workout?
Move the session to a suitable day while preserving recovery before the next arm workout. Continue the sequence even if finishing takes longer than 30 days. Avoid combining missed sessions into one unusually large workout.
Do You Need to Feel Sore for the Workout to Count?
No. Soreness is not a requirement for progress. Track your repetitions, resistance, technique, and consistency. Increasing soreness should not become a training goal.
What Should You Do After Day 30?
Continue with two suitable weekly sessions or incorporate these movements into a balanced strength program. Keep your current workload if it remains challenging. Make small changes as the exercises become easier, using the same progression principles.
Conclusion
Start with Day 1, choose manageable resistance, and record what you do. Follow the recovery days and build the workload only when your technique and recovery allow it.
By the end of this 30 Day Arm Challenge, your workout log should give you a clear starting point for the next month. Keep the routine practical enough to continue beyond the calendar.
References
- American College of Sports Medicine. Resistance training position stand.
- Centers for Disease Control and Prevention. Adult physical activity recommendations and strengthening activities, sets, and repetitions.
- Mayo Clinic. Weight training technique.
- Mayo Clinic. Getting started with strength training.
- Mayo Clinic. Modified push-ups, dumbbell biceps curls, and dumbbell rows.
- American Council on Exercise. Triceps kickback technique.