
The open book stretch is a simple side-lying drill that helps improve thoracic (upper back) rotation and chest/shoulder mobility when done slowly and without forcing range. Understanding how to do it correctly matters because upper-back stiffness can affect how comfortably you rotate, reach overhead, and maintain posture during daily activities and training.

If you want a safe, beginner-friendly mobility option, the open book stretch is popular because it lets you practice rotation while keeping your hips stacked and supported on the floor.
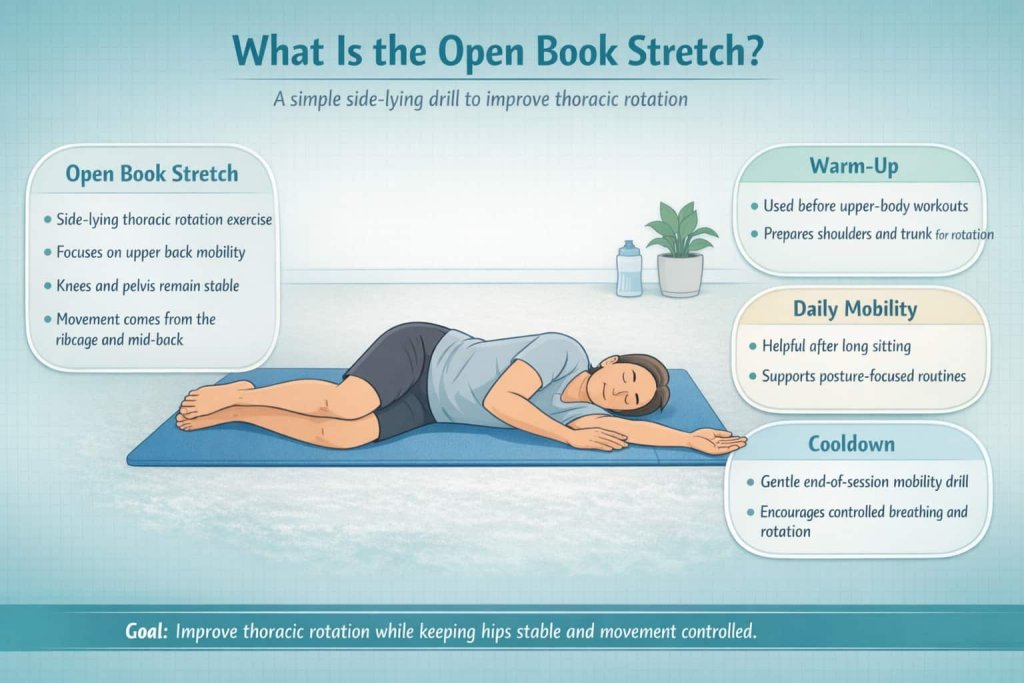
What Is the Open Book Stretch
The open book stretch (sometimes called the “open the book” thoracic rotation) is a side-lying movement where you rotate your upper back by opening your top arm across your body like a book page. The goal is to create rotation in the thoracic spine while keeping your knees and pelvis as still as possible.
It’s commonly used as:
- A warm-up before upper-body sessions
- A short daily mobility routine for desk stiffness
- A gentle cooldown drill after training
How to Do the Open Book Stretch Correctly
Use these form cues to keep it effective and controlled.
Step-by-step setup
- Lie on your side with hips and knees bent (often around 90 degrees)
- Stack your knees and hips so your pelvis stays stable
- Reach both arms straight out in front of your chest, palms together
Perform the movement
- Keep your knees together as you slowly lift the top arm and “open” it toward the other side
- Let your chest rotate while your bottom arm stays near the floor
- Follow your top hand with your eyes and head to encourage smooth rotation
- Move only as far as you can control without forcing the stretch
- Return slowly and repeat
Open Book Stretch Variations and Modifications
1) Use a Pillow Under Your Head
Why it works:
Supporting your head keeps your cervical spine (neck) in a more neutral position. When the head drops too low or tilts, it can create unnecessary neck tension and limit how freely your upper back rotates. A pillow helps the thoracic spine move without the neck compensating.
Muscles worked:
This variation still emphasizes the thoracic rotators (including spinal stabilizers), chest muscles (pectorals), and muscles around the shoulder blade such as the rhomboids and mid/lower trapezius.
How to do it:
- Lie on your side with hips and knees bent.
- Place a pillow under your head so your neck stays aligned with your spine.
- Stack your knees and extend both arms forward.
- Slowly open your top arm across your body while keeping knees together.
- Return with control and repeat.
Trainer Tip:
If you feel neck strain, adjust pillow height. Your head should not tilt up or drop down—aim for straight alignment from tailbone to crown.
2) Put a Foam Roller or Yoga Block Between Your Knees
Why it works:
Placing an object between your knees encourages pelvic stability. When the knees separate, rotation often shifts into the lower back and hips instead of the thoracic spine. Light pressure into the roller or block helps keep the movement where you want it.
Muscles worked:
In addition to upper-back rotators and chest muscles, this setup lightly activates inner thigh muscles (adductors) to help maintain alignment.
How to do it:
- Lie on your side with hips and knees bent.
- Place a foam roller or yoga block between your knees.
- Gently squeeze to keep knees stacked.
- Open your top arm slowly while keeping pressure on the block.
- Return to start and repeat smoothly.
Trainer Tip:
Use only gentle pressure. Over-squeezing can create unnecessary tension and reduce relaxed, smooth rotation.
3) Reduce the Range and Pause in the Middle
Why it works:
Stopping at mid-range builds control and awareness. Instead of chasing maximum rotation, you train stability and coordination through the movement. This can improve how well you “own” each degree of rotation.
Muscles worked:
Thoracic stabilizers, obliques, and muscles around the shoulder blade work more actively during controlled pauses.
How to do it:
- Set up in the standard open book position.
- Begin opening your top arm slowly.
- Pause halfway for 1–2 seconds.
- Continue slightly further only if comfortable.
- Return slowly and repeat.
Trainer Tip:
If you feel your lower back taking over, shorten the range slightly and focus on controlled breathing during the pause.
Open Book Stretch Benefits
The open book stretch may help by:
- Supporting thoracic rotation practice (turning your ribcage smoothly)
- Encouraging chest opening and shoulder movement in a controlled position
- Reinforcing breathing with movement, which can make rotation feel less rigid
- Improving movement options for exercises that involve reaching and rotation
Thoracic mobility is often discussed as an important link in upper-limb and trunk mechanics in clinical and sports movement frameworks, including discussions published on the National Institutes of Health (NIH).
Best Reps, Sets, and How Often to Do It
There isn’t one perfect prescription for everyone, but typical programming looks like:
- Reps: 5–10 slow reps per side
- Sets: 1–3 sets
- Frequency: 3–6 days per week, or as part of your warm-up
If you prefer time-based mobility:
- 30–60 seconds per side for 1–3 rounds can work well as a short daily routine.
Keep the effort light. This should feel like a controlled mobility drill, not a max stretch.
Common Mistakes That Make the Open Book Stretch Less Effective
Letting the knees lift or separate
If the top knee lifts, the movement often shifts away from thoracic rotation and becomes more of a hip/pelvis roll. Keep knees gently stacked.
Forcing the shoulder to the floor
Trying to “win” range by pressing the arm down can irritate the shoulder or create compensation. Let range improve gradually.
Moving too fast
Speed usually reduces control and turns the drill into a momentum swing. Slow movement is the point.
Twisting through the low back
If you feel strain in the low back, reduce the range and refocus on ribcage rotation with hips stable.
Who Should Be Careful With the Open Book Stretch
Be extra cautious and consider professional guidance if you have:
- Known spinal conditions where rotation is limited
- Osteoporosis or a history of vertebral fracture
- Recent surgery, significant pain, numbness, or unexplained symptoms
For people with osteoporosis, major bone health organizations emphasize safer movement choices and spine protection strategies, as outlined by the Bone Health and Osteoporosis Foundation.
If you’re doing rehab or managing a spine issue, structured spine conditioning programs are best chosen with medical or physical therapy guidance, according to the American Academy of Orthopaedic Surgeons (AAOS).
Safety Tips Before You Start
Use these quick rules to keep it beginner-friendly:
- Stay in a pain-free, controlled range
- Avoid holding your breath; use calm breathing
- Stop if symptoms worsen, become sharp, or feel unusual
- Progress range gradually over weeks, not in one session
General back-care guidance from the Mayo Clinic also emphasizes that stretching and exercise should be adjusted to the individual.
People Also Ask About the Open Book Stretch
Does the open book stretch help posture?
It can support posture habits by improving thoracic movement options and chest opening. But posture is influenced by strength, daily positions, and total activity, so think of this as one helpful tool, not a complete solution.
Where should you feel the open book stretch?
Most people feel it across the chest, upper back/ribs, and sometimes around the back of the shoulder. You should not feel sharp pain or nerve-like symptoms.
Can beginners do the open book stretch?
Yes. It’s commonly used as a beginner-friendly thoracic rotation drill because the floor provides support and helps limit excessive movement.
Is it okay to do the open book stretch every day?
Many people tolerate it well as a daily mobility drill if it’s gentle and controlled. If you feel sore or irritated, reduce frequency or range.
FAQs
1) How long should I hold the open book stretch?
You can do it as slow reps or hold briefly at your comfortable end range for 1–3 seconds. Some routines use 30–60 seconds per side in a slow, continuous flow.
2) Should my knees stay on the floor?
Yes, keeping knees stacked helps focus the rotation in your upper back. If your knees lift, place a pillow or block between them.
3) Can I do the open book stretch if I have shoulder pain?
Use a smaller range, move slowly, and avoid forcing your arm toward the floor. If shoulder pain persists, get guidance from a clinician.
4) What’s the best time to do the open book stretch?
It works well in a warm-up, after long sitting, or as part of a short evening mobility routine.
5) How many reps should I do per side?
A common starting point is 5 reps per side, then build toward 8–10 slow reps as tolerated.
6) Can the open book stretch replace strength training?
No. Mobility drills can support movement quality, but strength training is still important for long-term joint and posture support.
Conclusion
The open book stretch is a simple, low-equipment way to practice thoracic rotation and unlock upper-back mobility with control. Focus on stacked knees, slow breathing, and gradual range improvements for best results.