
This 30-day push up challenge combines an exercise variation you can control, three scheduled practice days per week, and gradual increases in repetitions. You can begin with wall, incline, knee, or standard push-ups and adjust the workload as you go.

The goal is to build a consistent routine and improve your performance. Your starting point determines which variation you use, and your recovery determines when you progress.
Below, you will find a complete calendar, technique instructions, and clear options for making the plan easier or harder.
How This 30-Day Push Up Challenge Works
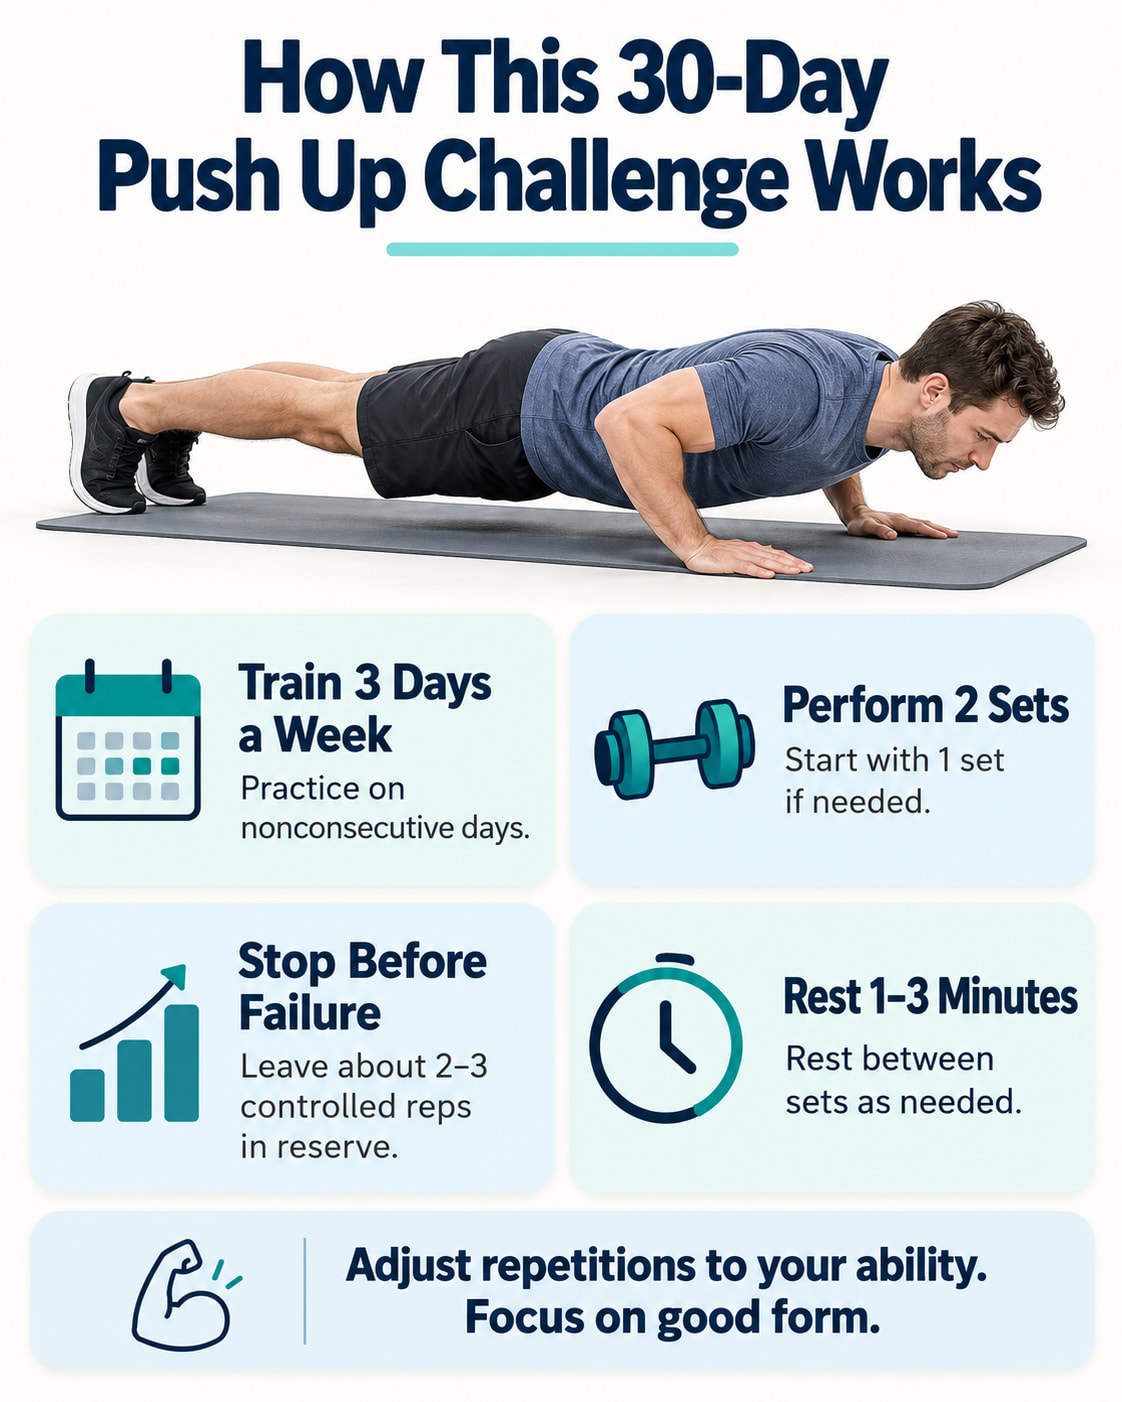
This example plan is intended for generally healthy adults. It applies general strength-training principles; the exact calendar has not been tested as a specific research program.
The American College of Sports Medicine’s 2026 resistance-training position stand supports progressive resistance training and explains that reaching muscle failure is not necessary for progress.
For this challenge:
- Practice on nonconsecutive days. The first four weeks include three scheduled sessions, with starting and finishing checks on Days 1 and 30.
- Use two sets for regular workouts. Start with one set if two feel too demanding.
- Finish with a few repetitions left. Aim to stop when you estimate you could perform about two or three more controlled repetitions.
- Rest about one to three minutes between sets. Take longer if you need it to repeat the movement with good control.
- Treat the calendar as adjustable. Repeat or reduce a target whenever needed.
A repetition, or rep, is one complete lowering and pressing movement. A set is a group of repetitions performed before resting.
The “two or three more” cue is an estimate. Your ability to keep steady form matters more than judging it perfectly.
Choose Your Starting Push-Up Level
Choose a variation that allows roughly five controlled repetitions while leaving a few more possible. If five repetitions require straining or losing your body position, make the exercise easier.
| Starting option | How to set up | How to adjust it |
|---|---|---|
| Wall push-up | Place your hands around shoulder height on a wall and step back into a comfortable leaning position. | Adjust your foot position while keeping your body aligned. |
| High incline push-up | Place your hands on a fixed counter or another secure, weight-bearing surface. | A higher support generally makes the exercise easier. |
| Lower incline push-up | Use a stable bench or lower support. | Lower the support gradually as your ability improves. |
| Knee push-up | Support yourself on your hands and knees, keeping your head, hips, and knees aligned. | Choose this if it allows comfortable, controlled movement. |
| Standard push-up | Support yourself on your hands and toes, keeping your body aligned from head to heels. | Use a higher hand support if your form deteriorates. |
Knee push-ups and incline push-ups are alternatives. Their relative difficulty depends on the incline height and your ability.
If standard push-ups are already easy, a modest feet-elevated variation can increase the load. Use a low, secure step and keep the same form standards. Avoid adding difficulty simply because the calendar has reached a new week.
How to Do a Push-Up With Good Form
Push-ups primarily work the chest, triceps, and shoulders while the trunk muscles help maintain body position.
Before each session, warm up with five to ten minutes of walking or another comfortable aerobic activity. Then try a few easy repetitions of your chosen movement.
- Set your hands. Place them around shoulder width or slightly wider. Keep the support secure and your hands comfortable.
- Brace your middle. Gently tighten your abdomen and glutes. Keep your head aligned with your spine.
- Lower slowly. Bend your elbows and move your chest toward the floor or support. Let your elbows angle back comfortably.
- Keep your body together. Avoid letting your hips sag, lifting your hips, or reaching forward with your chin.
- Press upward. Push through your hands and return to the starting position with control.
- Keep breathing. Breathe in as you lower and out as you press upward.
Use a comfortable range of movement that you can repeat. If you cannot lower and press back up while maintaining alignment, choose an easier variation.
End the set when your form changes, even if you have repetitions left on the calendar.
Your 30-Day Push Up Challenge Calendar
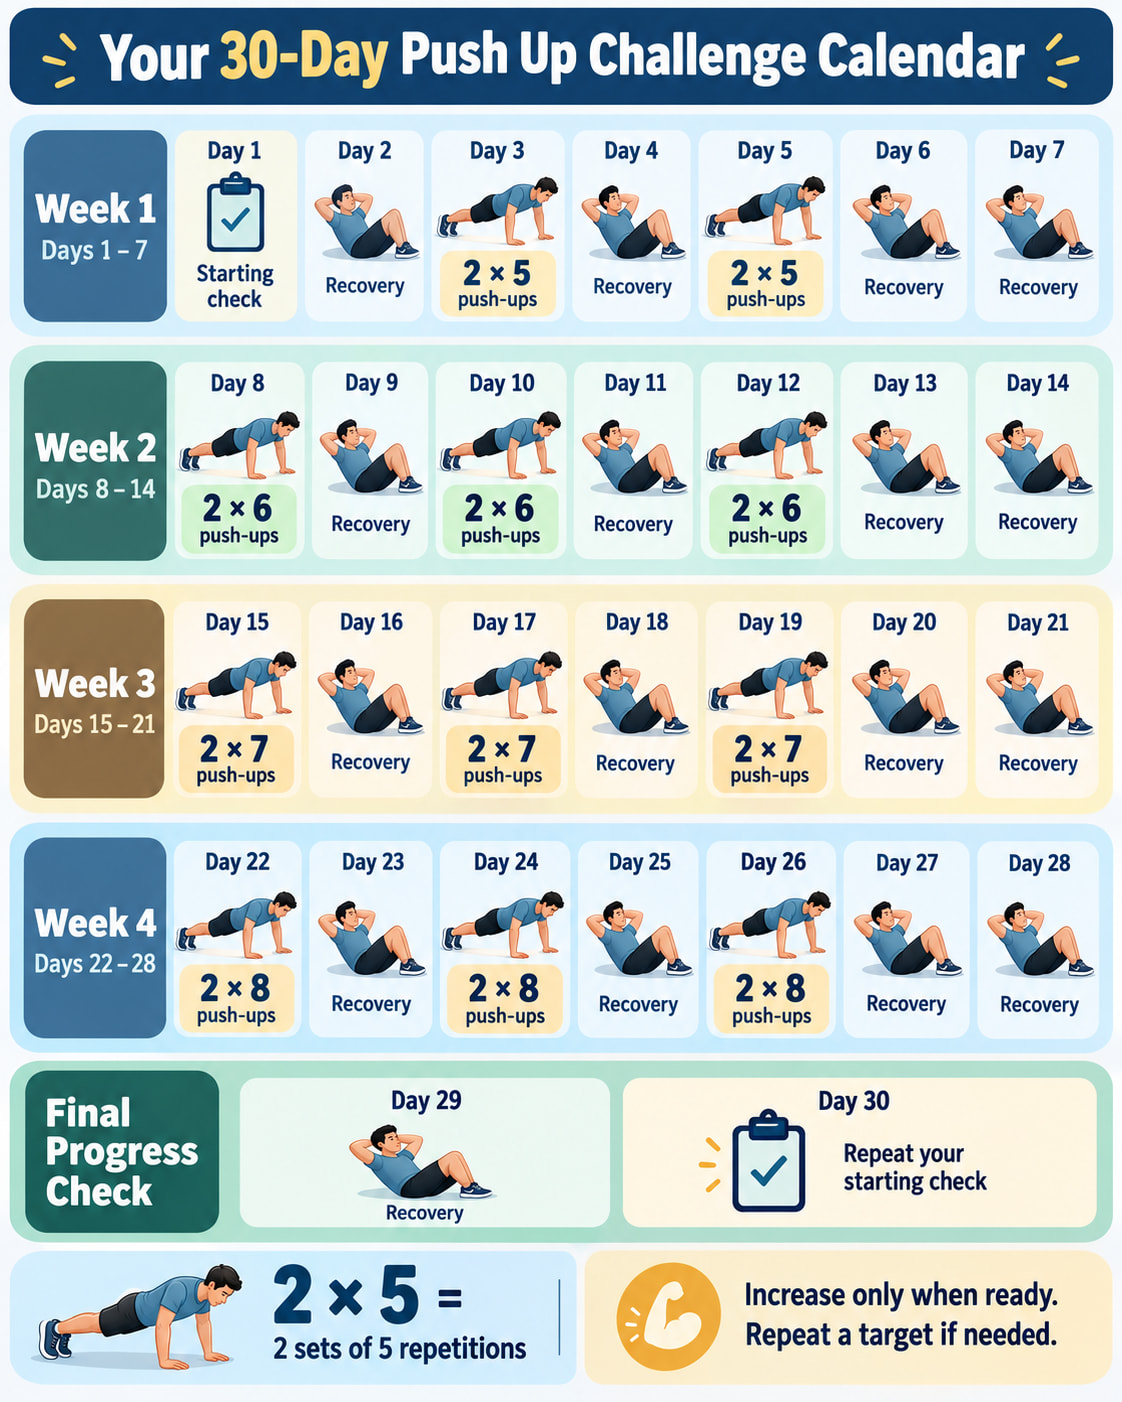
The schedule below uses the same repetition targets across starting levels. The variation determines the resistance.
For example, one person might complete two sets of five wall push-ups while another completes two sets of five standard push-ups. Both are following the plan.
Day 1: Record Your Starting Point
After warming up, perform one controlled set using your chosen variation.
Stop when you estimate that you could complete only two or three more good repetitions, or sooner if your form changes. Cap this check at 12 repetitions.
Record:
- Your push-up variation.
- Support height and foot position, if applicable.
- Number of controlled repetitions.
- How hard the set felt.
This check is your complete Day 1 session. You do not need additional working sets.
If you cannot reach five controlled repetitions, use an easier version at your next session. If you reach 12 with plenty left, consider a slightly harder version for subsequent workouts.
The Complete 30-Day Schedule
“2 × 5” means two sets of five repetitions, with rest between sets. The numbers are targets, and increases depend on readiness.
| Day | Planned activity |
|---|---|
| 1 | Starting check: one controlled set |
| 2 | Recovery from push-ups |
| 3 | 2 × 5 |
| 4 | Recovery from push-ups |
| 5 | 2 × 5 |
| 6 | Recovery from push-ups |
| 7 | Recovery from push-ups |
| 8 | 2 × 6 |
| 9 | Recovery from push-ups |
| 10 | 2 × 6 |
| 11 | Recovery from push-ups |
| 12 | 2 × 6 |
| 13 | Recovery from push-ups |
| 14 | Recovery from push-ups |
| 15 | 2 × 7 |
| 16 | Recovery from push-ups |
| 17 | 2 × 7 |
| 18 | Recovery from push-ups |
| 19 | 2 × 7 |
| 20 | Recovery from push-ups |
| 21 | Recovery from push-ups |
| 22 | 2 × 8 |
| 23 | Recovery from push-ups |
| 24 | 2 × 8 |
| 25 | Recovery from push-ups |
| 26 | 2 × 8 |
| 27 | Recovery from push-ups |
| 28 | Recovery from push-ups |
| 29 | Recovery from push-ups |
| 30 | Repeat your starting check |
One-set option: If you are new to strength exercise, perform one set at each workout until a second set feels manageable. When adding the second set, keep your current repetition target.
If three weekly sessions feel like too much, use the first and third scheduled sessions of each week. Continue following the same recovery and progression rules.
Complete two regular workouts at your current repetition target before increasing it, even if that means repeating the target into the next week. The Day 1 check does not count toward those two workouts.
Day 30: Compare Your Progress
Repeat the Day 1 check after the same warm-up. Use your original variation, support height, foot position, movement depth, and controlled pace.
Apply the same stopping rule and 12-repetition cap.
Look for changes such as:
- More controlled repetitions before reaching the same effort level.
- The same number of repetitions feeling easier.
- Better body alignment throughout the movement.
If you reach 12 repetitions at both checks, compare effort and control. Also note whether your regular workouts progressed to a more demanding variation.
How to Adjust the Challenge to Your Progress
Move to the next target only after completing your current workload comfortably for two regular workouts, with steady form and a few repetitions remaining. You should also feel recovered before the next workout.
If the Target Feels Too Hard
Repeat the previous target, reduce the repetitions, or choose an easier variation.
For example, if two sets of six are manageable but two sets of seven cause your hips to sag, stay at six. There is no need to catch up with the calendar.
If your second set repeatedly falls short, allow more rest or reduce the workload.
If the Target Feels Too Easy
Choose one change:
- Add the next planned repetition.
- Lower your hand support slightly.
- Use a more demanding variation that you can control.
When changing to a harder variation, return to a manageable target, such as five repetitions per set, and rebuild gradually. Keep the easier variation available if your form breaks down.
Change one main part of the workout at a time. Increasing repetitions, adding sets, and changing variations together makes the workload harder to judge.
Make Recovery Part of the Plan
Mayo Clinic recommends allowing one full day between exercising the same muscle group. This calendar includes that spacing between push-up sessions.
Recovery from push-ups can still include walking or other suitable activity. Account for demanding chest presses, dips, and other pushing exercises when planning your week because they also work the chest, shoulders, and triceps.
If you already follow a strength routine, fit these sessions into your existing pushing workouts and adjust the total workload.
Missed a session? Resume when you are ready, keep a recovery day between sessions, and continue from the last manageable target. Avoid doubling the next workout. Finishing the schedule may take longer than 30 calendar days.
What Results Can You Expect After 30 Days?
A useful goal is to complete the month with more consistent practice, better control, or a greater manageable workload.
In a small randomized study published in 2018, 23 healthy, moderately trained men followed progressive push-up or bench-press training three times weekly for four weeks. Both groups improved strength, but neither showed a statistically significant increase in measured muscle thickness.
That supports cautious expectations: strength can improve over a month, while visible muscle changes are uncertain. The study was small, included men, and did not test this exact calendar.
Progress also does not have to mean reaching floor push-ups. Performing your original incline push-ups with greater control or using a slightly lower support can be worthwhile progress.
When to Stop or Seek Guidance
Stop a set if you develop sharp pain, worsening joint discomfort, or symptoms that change how you move. Persistent wrist, elbow, or shoulder pain deserves individualized assessment.
Some muscle soreness may follow unfamiliar exercise. Cleveland Clinic explains that delayed-onset muscle soreness commonly develops one to three days afterward. Soreness is not required for progress.
If soreness interferes with your usual movement, allow more recovery and reduce the next session’s difficulty. Seek medical assessment for severe or persistent pain, suspected injury, substantial swelling, or difficulty moving or using an arm.
If you have an existing injury, recent surgery, a chronic condition, or exercise restrictions, ask your healthcare professional how to adapt the plan before beginning.
What to Do After the Challenge
Continue with the last workload you can perform comfortably, or repeat the month using an appropriate variation. Progress when your current sessions become manageable.
Also make room for exercises that cover the rest of your body, such as rows, squats or sit-to-stands, and suitable hip-strengthening movements.
The CDC’s adult activity guidelines recommend muscle-strengthening activities for all major muscle groups on at least two days weekly, along with at least 150 minutes of moderate-intensity aerobic activity or an equivalent amount of vigorous activity.
Your push-up practice can become one part of that broader routine.
Frequently Asked Questions
Can I Start a Push Up Challenge if I Cannot Do One Floor Push-Up?
Yes. Start with wall push-ups or a high incline that allows controlled movement. Choose your exercise by what you can currently perform comfortably. Floor push-ups can remain a longer-term option.
How Many Push-Ups Should I Do Each Day?
Follow the scheduled sessions and recovery days. This example starts regular workouts at two sets of five repetitions, with a one-set option, and gradually works toward two sets of eight when you are ready.
Should I Do Push-Ups Every Day During the Challenge?
This plan uses nonconsecutive practice days. Follow its recovery schedule, including when you feel enthusiastic about adding more. Other demanding pushing exercises also count toward your workload.
Do Wall, Incline, and Knee Push-Ups Count?
Yes. They are valid variations within this plan. Record the version you use so your comparisons are meaningful. If you change the support height or variation, note that change in your workout log.
What if I Miss Several Days?
Resume with the last comfortable workload, or reduce it if needed. Keep recovery days between sessions and repeat a week when that feels appropriate. You do not need to make up missed repetitions.
Can This Challenge Get Me to 100 Push-Ups?
It does not promise that outcome. Reaching 100 repetitions in one set is a different goal from accumulating 100 across a day. Use this month to establish your starting point and a manageable progression before choosing a more specific target.
Conclusion
Start with a push-up variation you can control, record your first session, and use the calendar as a guide. Keep recovery days, increase the workload only when you are ready, and compare your progress using the same setup.
Choose your starting variation and schedule Day 1. A useful result is a routine you can continue beyond the challenge.
References
- American College of Sports Medicine — Resistance Training Prescription Position Stand
- American Council on Exercise — Push-Up Exercise Instructions
- Cleveland Clinic — How to Do a Push-Up
- Mayo Clinic — Weight Training: Do’s and Don’ts of Proper Technique
- Mayo Clinic — Strength Training: Get Stronger, Leaner, Healthier
- Effect of Progressive Calisthenic Push-Up Training on Muscle Strength and Thickness
- Kinetic Analysis of Several Variations of Push-Ups
- CDC — Adult Physical Activity Overview