
The best hip bursitis exercises are gentle strengthening and mobility movements that may help reduce irritation around the outer hip and support healthier alignment. These exercises focus on improving glute strength, easing stiffness, and enhancing hip control—three key elements that can influence discomfort associated with hip bursitis or Greater Trochanteric Pain Syndrome (GTPS).
Understanding how to exercise safely is essential because the bursa and surrounding tissues can become irritated by certain positions or repetitive stress. This guide walks you through what to know before starting, what to avoid, the 12 best PT-approved exercises, and how often to do them.
Why Hip Bursitis Exercises Matter
Hip bursitis exercises matter because they help improve the strength, stability, and mobility of the muscles surrounding your hip. When these muscles are weak or tight, the outer hip structures—including the bursa—can experience more friction and pressure during daily activities. Gentle, targeted exercises may help reduce irritation, support healthier movement patterns, and improve comfort over time.
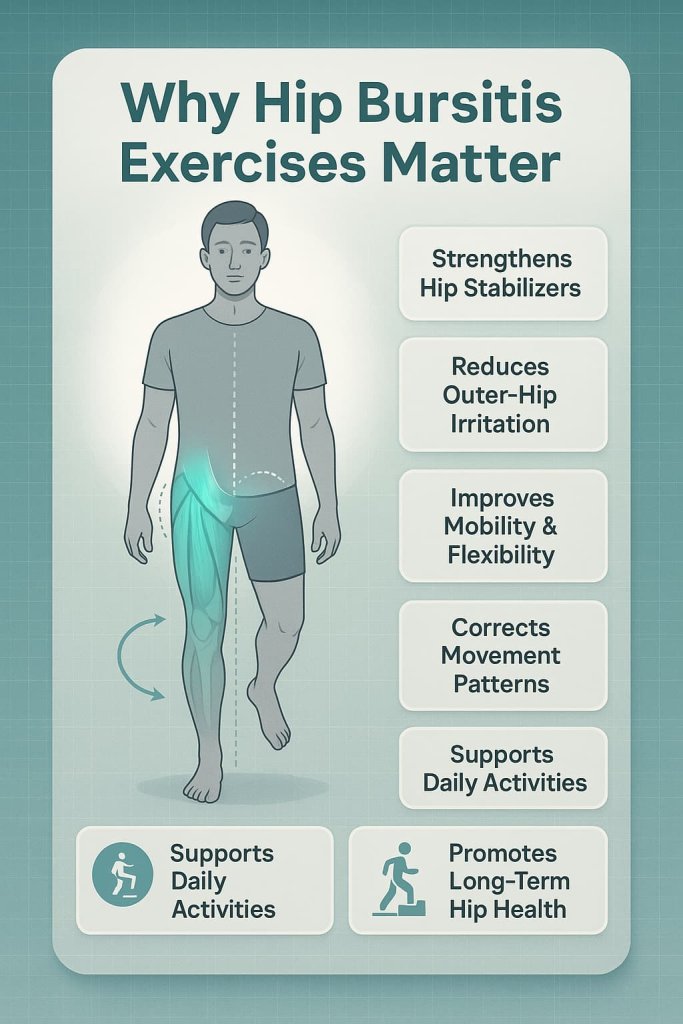
Key reasons these exercises are important:
- Strengthens hip stabilizers that help keep the pelvis level during walking and standing.
- Reduces strain on irritated tissues by improving muscle support around the hip joint.
- Improves mobility and flexibility, which may ease stiffness and allow smoother movement.
- Helps correct movement patterns that contribute to outer hip irritation.
- Supports daily activities such as climbing stairs, standing up, and walking longer distances.
- Promotes long-term joint health by building balanced strength around the hip.
These exercises are a conservative, first-line approach often recommended by physical therapists and reputable medical sources. Always start gently and follow guidance from a healthcare professional if you have ongoing pain or functional limitations.
12 Best Hip Bursitis Exercises
Strengthening and mobility exercises play an important role in supporting hip stability, reducing irritation, and improving daily movement. The 12 PT-approved exercises below focus on gentle, controlled motions that may help ease discomfort and enhance overall hip function.
1. Glute Bridge
Strengthens the glutes and reduces stress on the hip bursa.
Why it works:
This exercise activates the gluteus maximus and deep hip stabilizers that help keep the pelvis level. Stronger glutes reduce friction around the outer hip and may ease irritation in the bursa during walking, standing, and climbing stairs.
Muscles worked:
Glutes, hamstrings, core stabilizers.
How to do it:
- Lie on your back with knees bent and feet flat.
- Press evenly through your heels to lift your hips upward.
- Squeeze your glutes gently at the top.
- Pause briefly, then lower with slow control.
Trainer Tip:
Keep ribs down and avoid pushing through your toes—drive through your heels for better glute activation.
2. Clamshells
Targets the gluteus medius, a key stabilizer for hip bursitis.
Why it works:
Clamshells strengthen the small hip muscles responsible for preventing the knee from collapsing inward. This stability lowers tension on the outer hip tendons and bursa during daily movements like walking.
Muscles worked:
Gluteus medius, deep external rotators.
How to do it:
- Lie on your side with knees bent and hips stacked.
- Keep feet together and lift the top knee upward.
- Pause at the top, then lower slowly.
- Maintain a steady, controlled pace.
Trainer Tip:
Do not rotate your pelvis—keep hips stacked to isolate the glutes correctly.
3. Side-Lying Leg Raise
A classic PT exercise for strengthening lateral hip muscles.
Why it works:
This exercise trains the gluteus medius and minimus, which help offload the irritated bursa by improving hip stability during walking and standing.
Muscles worked:
Gluteus medius, gluteus minimus.
How to do it:
- Lie on your side with legs extended.
- Lift your top leg slightly above hip height.
- Hold briefly, then lower with control.
- Keep hips steady throughout the movement.
Trainer Tip:
Keep toes pointing forward—not upward—to properly target the lateral hip.
4. Hip Hikes
Improves pelvic stability during walking and climbing stairs.
Why it works:
Hip hikes activate the stance-side glute medius, which is responsible for keeping the pelvis level. This lowers tension on the outer hip tissues that can aggravate bursitis.
Muscles worked:
Gluteus medius, lateral core muscles.
How to do it:
- Stand on a step with one foot.
- Let the other leg hang freely.
- Lower the unsupported hip, then lift it back to level.
- Keep torso upright and movement controlled.
Trainer Tip:
Move slowly—rushing causes momentum and reduces the effectiveness of the stabilizer muscles.
5. Standing Hip Abduction (Band Optional)
A gentle standing movement that strengthens abductors.
Why it works:
Strengthening the outer hip muscles improves alignment and reduces compressive forces on the bursa during standing and walking.
Muscles worked:
Gluteus medius, tensor fasciae latae (TFL).
How to do it:
- Stand tall and hold a wall or chair for balance.
- Move your leg out to the side in a controlled motion.
- Return to center without letting hips sway.
- Add a light resistance band if tolerated.
Trainer Tip:
Don’t lean sideways—keep your torso tall and stable for proper muscle engagement.
6. Mini Squats
A safe, low-load functional movement for hip strength.
Why it works:
Mini squats engage the glutes and quads without deep hip flexion, making them easier on the irritated bursa. They improve strength used for daily movements like sitting and standing.
Muscles worked:
Glutes, quads, core stabilizers.
How to do it:
- Stand with feet hip-width apart.
- Lower into a shallow squat (about a quarter depth).
- Pause gently, then rise slowly.
- Keep weight evenly distributed across your feet.
Trainer Tip:
Track knees over toes and avoid letting them collapse inward.
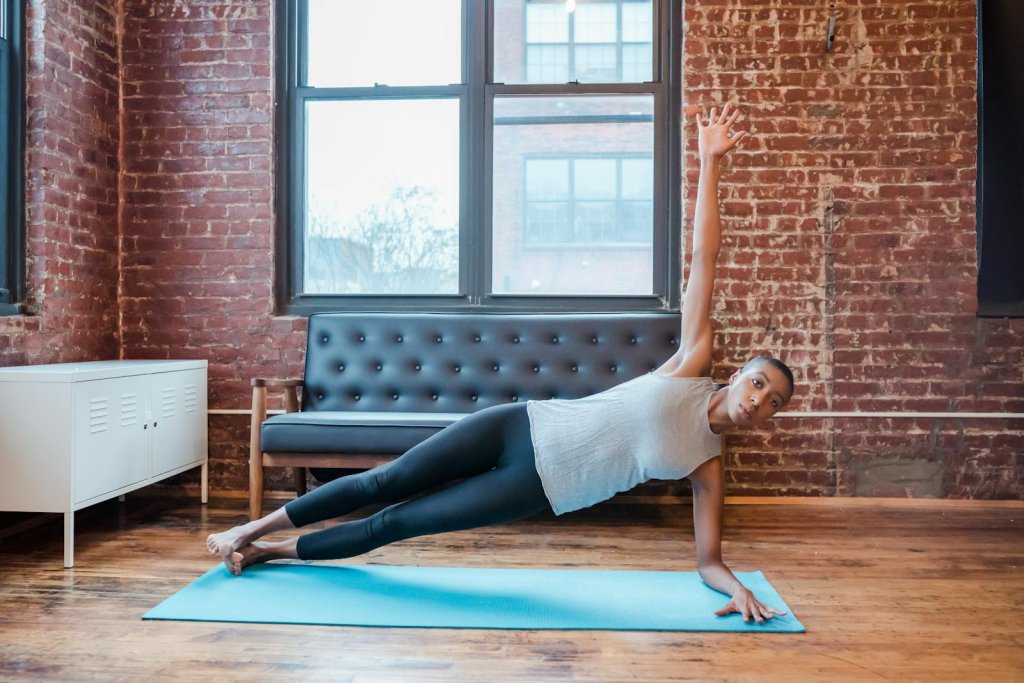
7. Side Plank (Knees or Full)
Strengthens hip stabilizers and core.
Why it works:
A strong lateral core and pelvic stabilizers help prevent excessive hip movement that can irritate the outer hip tissues.
Muscles worked:
Gluteus medius, obliques, deep core muscles.
How to do it:
- Lie on your side with elbow under shoulder.
- Lift hips into a straight line from head to knees or feet.
- Hold 10–20 seconds while maintaining good form.
- Lower with control.
Trainer Tip:
Start with the knees-bent version if full side plank is too challenging.
8. Figure-4 Glute Stretch
A gentle stretch for glutes and deep hip muscles.
Why it works:
This stretch may ease tightness around the glutes and piriformis, which can contribute to outer-hip tension and discomfort.
Muscles worked:
Glutes, piriformis.
How to do it:
- Lie on your back and cross one ankle over the opposite knee.
- Pull your legs gently toward your chest.
- Hold for 20–30 seconds.
- Switch sides.
Trainer Tip:
Do not pull aggressively—keep the stretch gentle and pain-free.
9. Hip Flexor Stretch (Half Kneeling)
Reduces tension at the front of the hip.
Why it works:
Tight hip flexors can cause compensations that increase pressure on the outer hip. Stretching them may help promote better alignment and movement patterns.
Muscles worked:
Hip flexors, quadriceps.
How to do it:
- Kneel with one leg in front and one behind.
- Shift hips forward slightly until you feel a light stretch.
- Hold for 20–30 seconds.
- Switch sides.
Trainer Tip:
Keep your torso tall—avoid arching your lower back.
10. IT Band Stretch (Standing Side Lean)
Addresses soft-tissue tightness that may contribute to irritation.
Why it works:
This stretch may help reduce tension along the outer thigh and hip, supporting more comfortable movement.
Muscles worked:
IT band region, glutes, obliques.
How to do it:
- Stand tall and cross one leg behind the other.
- Lean your torso gently away from the back leg.
- Hold 20–30 seconds.
- Switch sides.
Trainer Tip:
A small lean is enough—avoid overstretching.
11. Adductor Rock-Back Stretch
Supports hip mobility without excessive load.
Why it works:
Improves inner-thigh mobility and reduces compensations that may strain the hips during walking or squatting.
Muscles worked:
Adductors, hip stabilizers.
How to do it:
- Begin on all fours.
- Extend one leg out to the side with foot flat.
- Gently rock hips backward until a comfortable stretch is felt.
- Return to start and repeat.
Trainer Tip:
Move slowly—stay in a pain-free range at all times.
12. “Sit-to-Stand” Strength Exercise
A functional strengthening move that builds hip and leg strength.
Why it works:
Improves lower-body endurance and stability needed for daily activities. Strengthening the glutes and quads may reduce load on the outer hip when getting up from chairs or walking.
Muscles worked:
Glutes, quadriceps, hamstrings.
How to do it:
- Sit on a chair with feet planted.
- Lean slightly forward and stand up with control.
- Sit back slowly without dropping into the chair.
- Repeat for a small, controlled set.
Trainer Tip:
Avoid letting knees collapse inward as you stand.
How Often Should You Do Hip Bursitis Exercises?
General guidance supported by physical-therapy principles:
- Strengthening:
2–3 days per week, 1–3 sets of 8–12 controlled reps. - Stretching & Mobility:
Daily or 3–5 days per week.
Hold each stretch for 15–30 seconds. - Progression:
Increase intensity only if symptoms remain stable for 24 hours.
Stop if pain becomes sharp, spreads, or worsens over time.
What You Need to Know Before Doing Hip Bursitis Exercises
Before you begin, keep these important points in mind:
- Most outer hip bursitis cases fall under Greater Trochanteric Pain Syndrome (GTPS), which involves irritation of the bursa and surrounding tendons.
- Gentle strengthening is often recommended because weak hip stabilizers can increase pressure on the outer hip during walking or standing.
- Start with low-intensity movements and increase difficulty gradually.
- Mild discomfort is normal, but sharp or worsening pain is a sign to stop.
- Avoid comparing your recovery timeline to others—progress varies by individual.
- Always seek medical guidance if symptoms persist or worsen.
What to Avoid With Hip Bursitis
Certain movements and daily habits can increase irritation around the hip. Avoid the following when symptoms are active:
- Lying directly on the painful hip, as this adds compression to the inflamed area.
- Deep or aggressive stretching, especially if it causes sharp discomfort.
- High-impact activities like running, jumping, or fast stair climbing during flare-ups.
- Sudden increases in walking distance or pace, which may overload the outer hip.
- Side-lying leg lifts if they trigger sharp pain (try bent-knee versions first).
- Crossing your legs for long periods, which can stress the lateral hip structures.
These precautions help minimize irritation and create a safer environment for healing.
When to See a Doctor
Seek medical evaluation if you experience:
- Severe or sudden hip pain
- Pain that does not improve after weeks of gentle exercise
- Fever, redness, or warmth around the hip
- Difficulty bearing weight
- Night pain or unexplained swelling
- A recent fall or injury
These signs may indicate something more serious than bursitis and require medical assessment.
FAQ
1. Can exercises help hip bursitis?
Strengthening and gentle mobility work may help reduce irritation and improve stability.
2. Should I stretch or strengthen first?
Begin with light strengthening, then add stretching as symptoms allow.
3. Can walking worsen hip bursitis?
Long distances or hills may aggravate symptoms; reduce volume temporarily if needed.
4. Are resistance bands safe?
Yes—use light bands and increase tension gradually.
5. How long before I feel improvement?
Many people notice changes within a few weeks, but timelines vary by individual.
6. Is heat or ice better?
Both may help temporarily; follow your clinician’s guidance.
7. Should I avoid sleeping on the painful side?
Yes—use pillows or switch sides to reduce pressure.
Conclusion
Hip bursitis exercises can be a safe and effective way to improve strength, support stability, and reduce irritation around the hip. By combining gentle strengthening with mobility work and avoiding aggravating movements, you can support healthier hip function over time. Start slowly, progress gradually, and speak with a healthcare professional if symptoms persist or worsen.
This content is for informational purposes only and not medical advice.
References
- Cleveland Clinic – Trochanteric Bursitis: Symptoms, Causes & Treatments
- Mayo Clinic – Bursitis: Symptoms and Causes
- NHS – Bursitis
- NCBI Bookshelf – Greater Trochanteric Pain Syndrome
- Kjeldsen T et al. (2024) – Exercise Compared to a Control Condition or Other Conservative Treatment for Greater Trochanteric Pain Syndrome (GTPS)
- Marcioli MAR et al. (2025) – Effect of Muscle Strengthening on Pain, Functionality, Muscle Endurance and Postural Control in Women With Greater Trochanteric Pain Syndrome: A Randomized Clinical Trial